SECTION 3 - PARTS, ASSEMBLIES & HARDWARE
1-3-8
3-8
© 2018 Konami Gaming Inc. P/N 810352
CONCERTO CRESCENT
(Original Instructions)
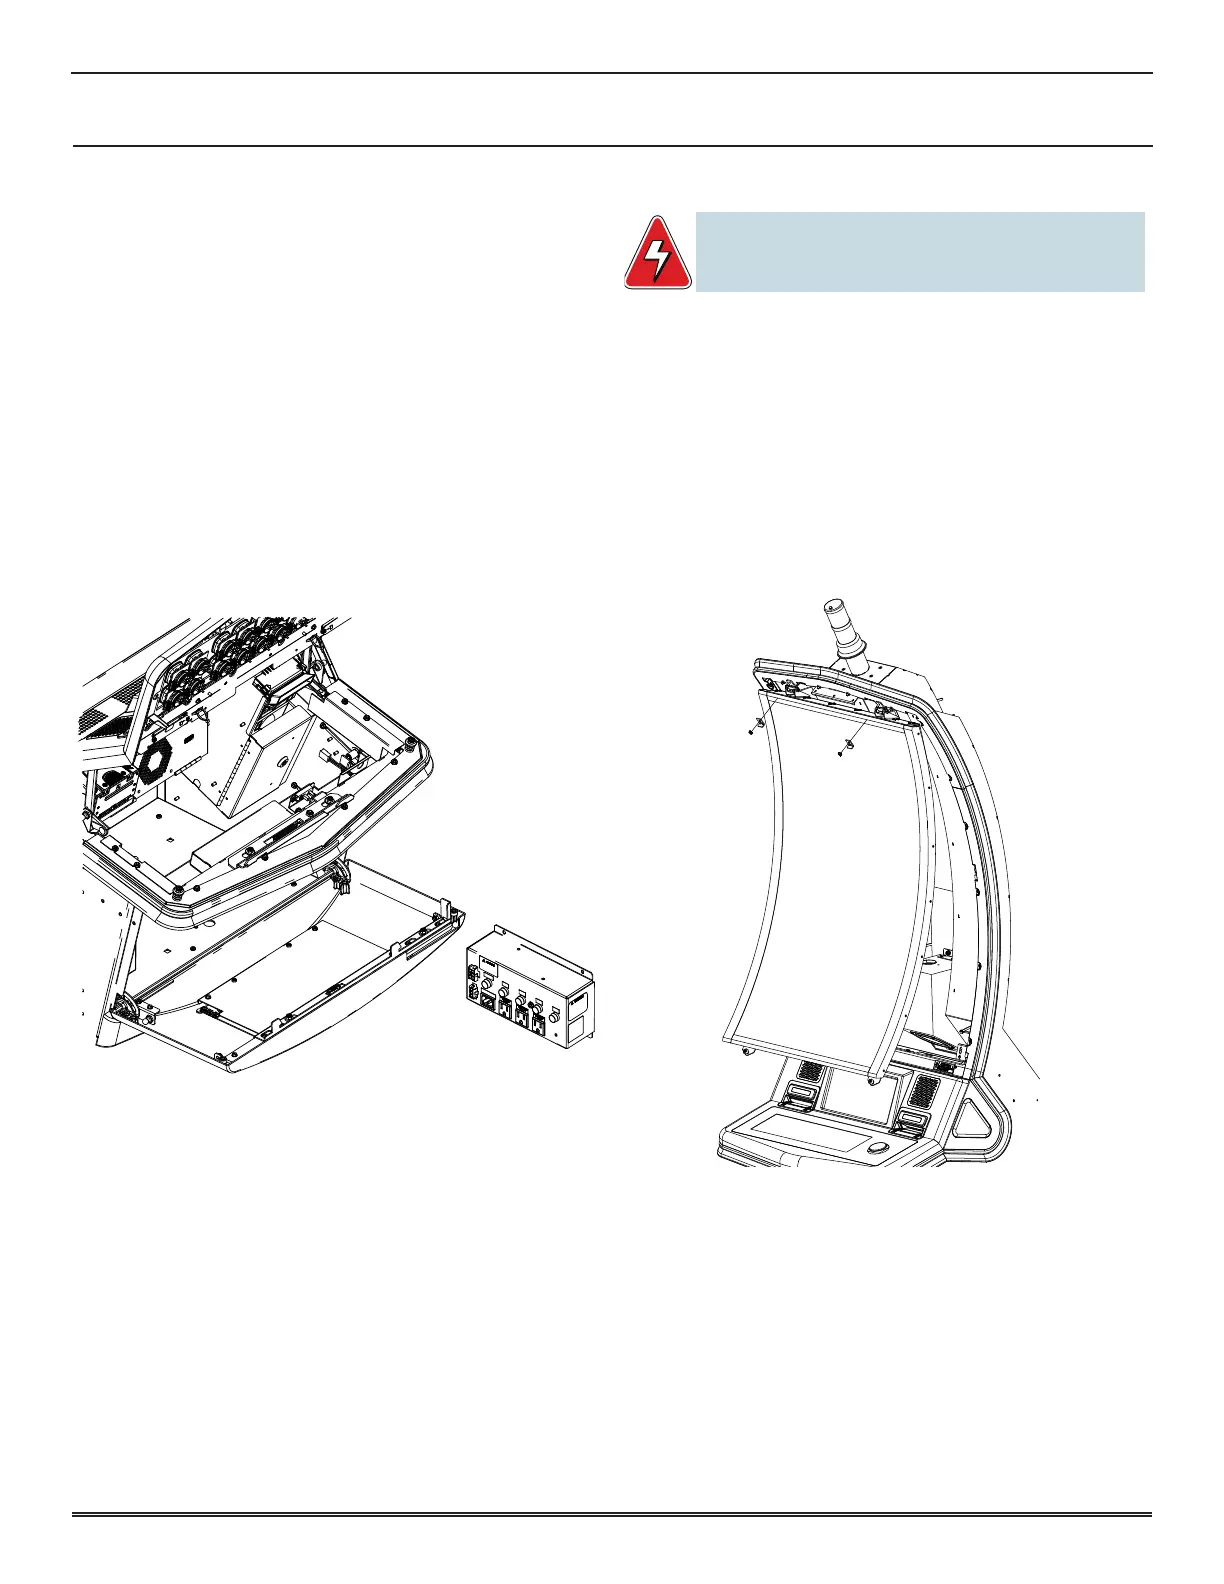
POWER DISTRIBUTION ASSEMBLY
reMoval
1� Unlock and open both Deck Door and Sub Door�
2� Turn off machine power�
3� Remove front cover by loosening the two 8-32 captive
screws�
4� Remove the two 8-32 nuts and two 8-32 screws securing
the side cover�
5� Remove side cover�
6� Disconnect harnesses from power distribution assembly�
7� Remove the four 8-32 nuts securing the Power Distribution
Assembly�
8� Remove Power Distribution Assembly�
installation
1� Install Power Distribution Assembly to mounting studs�
2� Secure with the four 8-32 nuts�
3� Connect harnesses to Power Distribution Assembly�
4� Install side cover and secure with the two 8-32 nuts and
two 8-32 screws�
5� Install front cover and tighten the two 8-32 captive screws�
6� Turn on machine power�
7� Close and lock both Deck Door and Sub Door�
LCD UNIT
WARNING: When servicing or replacing the Crescent LCD unit,
two people are required to lift the unit to prevent injury
or damage.
reMoval
1� Unlock and open Main Deck Door�
2� Unlatch and remove Display Door�
3� While holding the bottom of the monitor in place, loosen
the two bottom fasteners�
4� Slowly release the bottom of the monitor, allowing it to
swing open�
5� Disconnect the harnesses on the back of the monitor�
6� Remove the two retaining clips at the top of the monitor�
7� Lift the monitor off the two top brackets�
installation
1� Lift the monitor and place the two pins in the Brackets at
the top of the monitor�
2� Allow the monitor to swing open and connect the
harnesses to the back of the monitor�
3� Swing monitor closed and tighten the two bottom
fasteners�
4� At the top of the monitor, attach the two retaining clips
with a hex nut�
5� Install and latch Display Door�
6� Close and lock Main Deck Door�