bizhub 501/421/361
6. OTHERS
143
Field Service Ver.2.0 Mar. 2009
6.3.10 Removing/reinstalling the upper covers /Fr and /Lt
A. Procedure
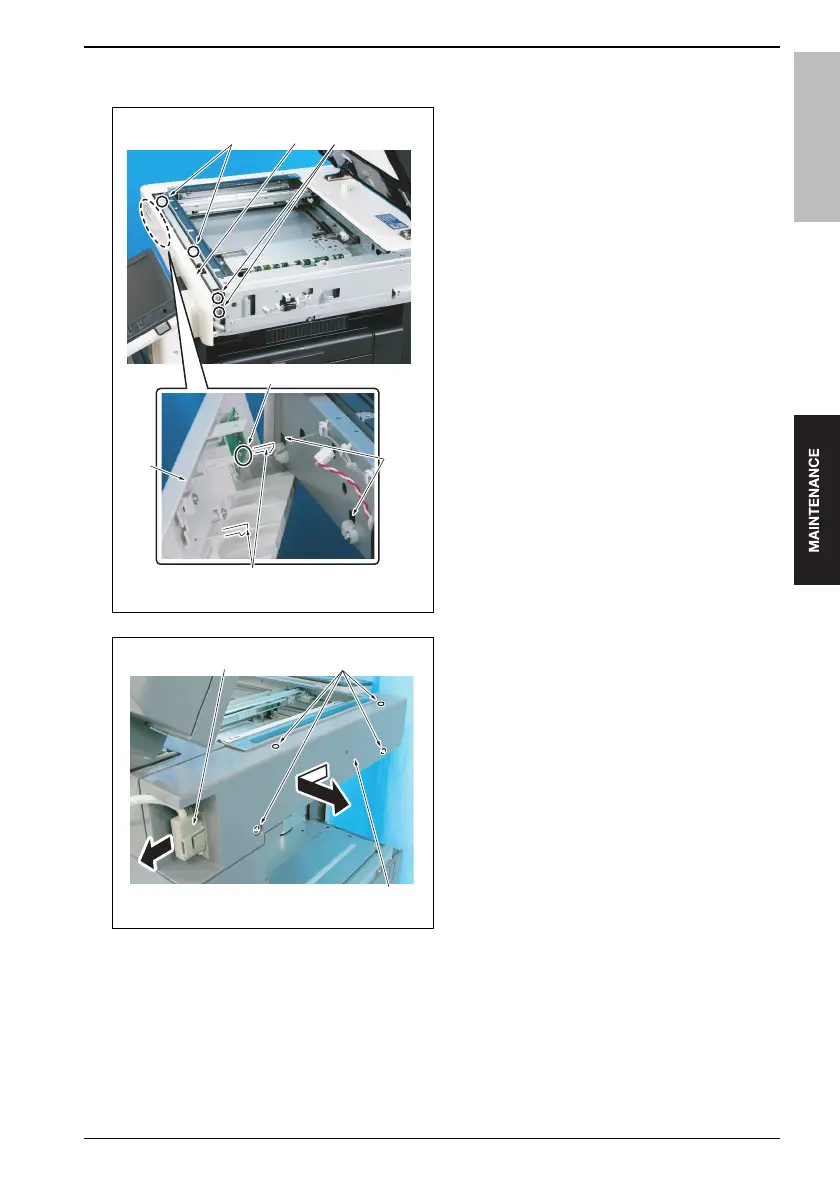
1.
Remove the original glass.
(See P.141)
2.
Loosen the 2 screws [1].
3.
Remove the 2 screws [2]
4.
Push up the lock levers [3] at 2 places from its
lower position and release it from the holes [4],
and then remove the upper cover /Fr [5].
5.
Remove the connector [6] and then remove the
upper cover /Fr [5].
Note
• When reinstalling the upper cover /Fr [5], be
sure to insert the lock levers [3] at 2 places
into the holes [4] securely.
6.
Remove the connector [1].
7.
Remove the 4 screws [2] and then remove the
upper cover /Lt [3].
8.
Reinstall the above parts following the removal
steps in reverse.
a0r5f2c009ca
[2] [1][5]
[6]
[3]
[4]
[5]
a0r5f2c010ca
[1] [2]
[3]
 Loading...