LACO ORIGINAL OPERATING INSTRUCTIONS TITANTEST™
50
© 2018 LACO TECHNOLOGIES, INC. - [TitanTest itna01en1-07 BA.fm] - 1807
Internal automatic:
For calibration with the internal calibration leak without volume on the
test port. The test port must be blank-flanged.
Internal manual:
For calibration with the internal calibration leak with volume on the test
port.
It must be confirmed that there is a stable measuring signal by pressing
"Signal stable".
External calibration leak If "Calibration mode external" is used for the calibration, a request to con-
nect the external calibration leak appears on the display.
1. Check whether the value in the display corresponds to the value on the
rating plate of the calibration leak.
If this is not the case, change the calibration leak value in " Setup >
Calibration settings > Calibration Leak & CAL mode" (see Chapter 6.4.8:
"Define calibration settings", page 48).
2. Connect the calibration leak to the test port.
3. Open the calibration leak while rotating the calibrated leak valve.
4. Press "OK".
The preparations for the calibration with an external calibration leak are
complete.
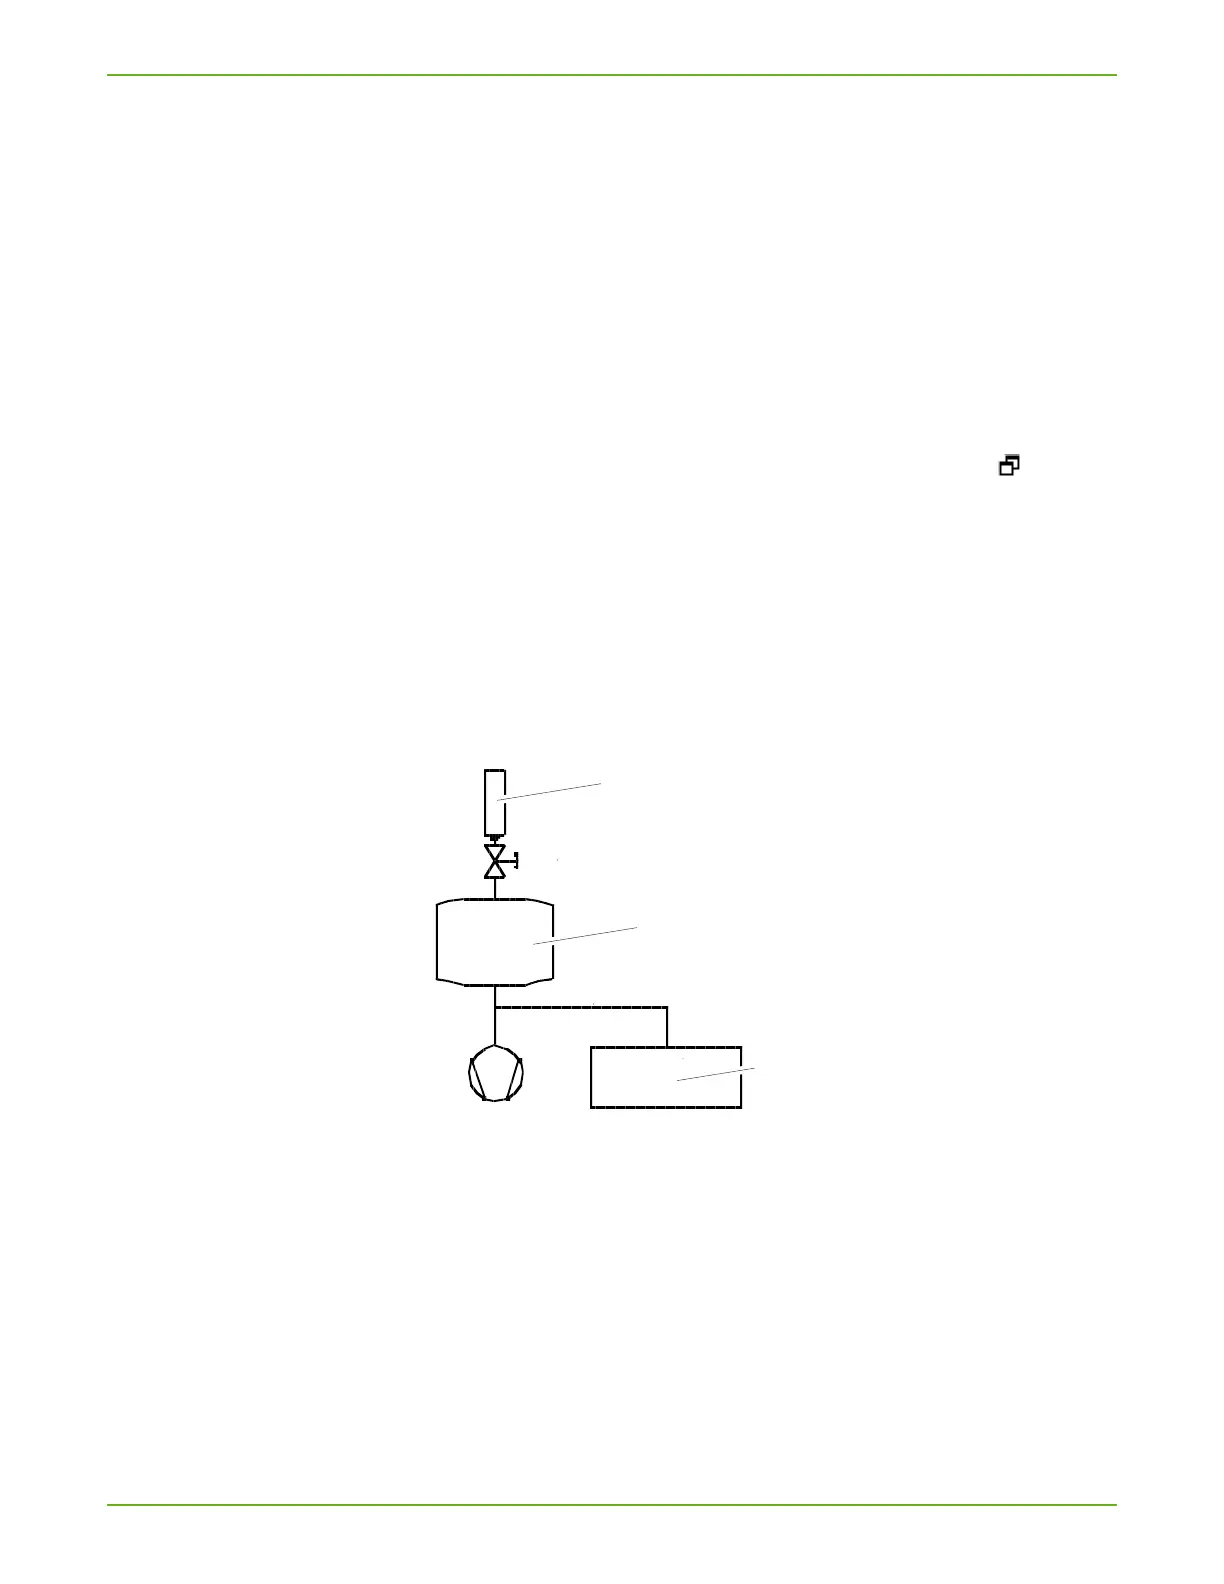
Connection of an external calibration leak for partial flow.
Fig. 14: Connection external calibration leak for partial flow.
a Calibration leak
b Test chamber
c TITANTEST™
► If TITANTEST™ is connected to a vacuum system with an integrated vacuum
pump, connect the calibration leak to its test container.
Calibration sequence
1. In order to start the calibration, select "Calibration" in the "Standby" win-
dow.
The calibration progresses over multiple steps which are shown in the
display. The first step is evacuation.