X75HD Installation and Operation Manual 185
Appendix C: Servicing Instructions
Preliminary—Contents are proprietary and confidential. Do not photocopy or distribute.
Preparing the X75HD for Servicing
Before installing any hardware options, do the following:
1. Read and heed the safety precautions outlined in the “Preface” on
page iii and in the section “Safety Precautions” on page 180.
2. Confirm that the X75HD is turned off and that the power cord is
disconnected from the rear panel.
Note that with the power cord disconnected, the unit is no longer
grounded, so be cautious about static electricity.
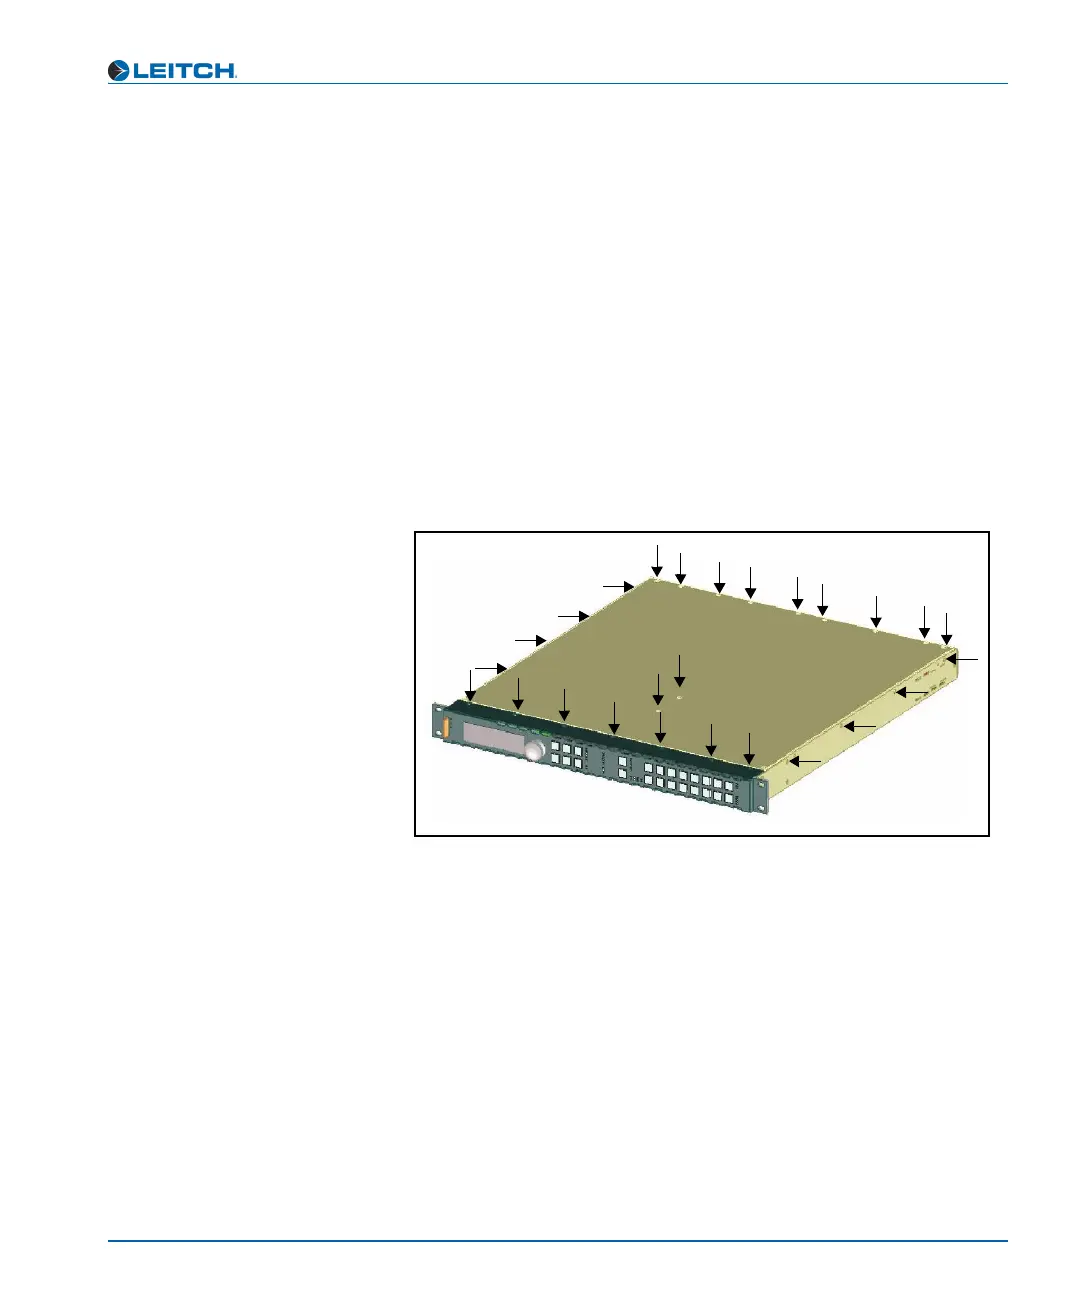
3. Use a Phillips screwdriver to remove the 26 retaining screws on the
chassis cover. Figure C-2 shows the location of the screws along the
back edge, front edge, top, and each side of the frame.
Keep the screws, as they will be needed to replace the top cover.
Figure C-2. Location of Chassis Cover Screws
4. Lift off the chassis cover from the X75HD.
To complete the installation of all hardware options:
1. Replace the top cover, and use the original 25 screws to secure the
top cover.
2. Plug the power cord back in.


 To Next Page