186 X75HD Installation and Operation Manual
Preliminary—Contents are proprietary and confidential. Do not photocopy or distribute.
Appendix C: Servicing Instructions
Installing and Removing an Audio
Synchronizer Module (AS-X75HD/AS-X75HD-L)
Installing a New Module
If you have ordered an AS-X75HD or AS-X75HD-L module separately
and wish to upgrade your X75HD system, you will need to install the
module yourself. Follow these steps to install an audio synchronizer
module in an X75HD frame:
1. Remove the chassis cover (see “Preparing the X75HD for
Servicing” on page 185).
2. Remove the screws from the blank cover plate on the rear panel
where the new audio synchronizer module is to be installed, and
then remove the cover plate.
Retain the screws for later use.
3. Remove the packaging from the audio synchronizer module.
The AS-X75HD/AS-X75HD-L package includes one board, four
stackers, and the required number of standoff screws.
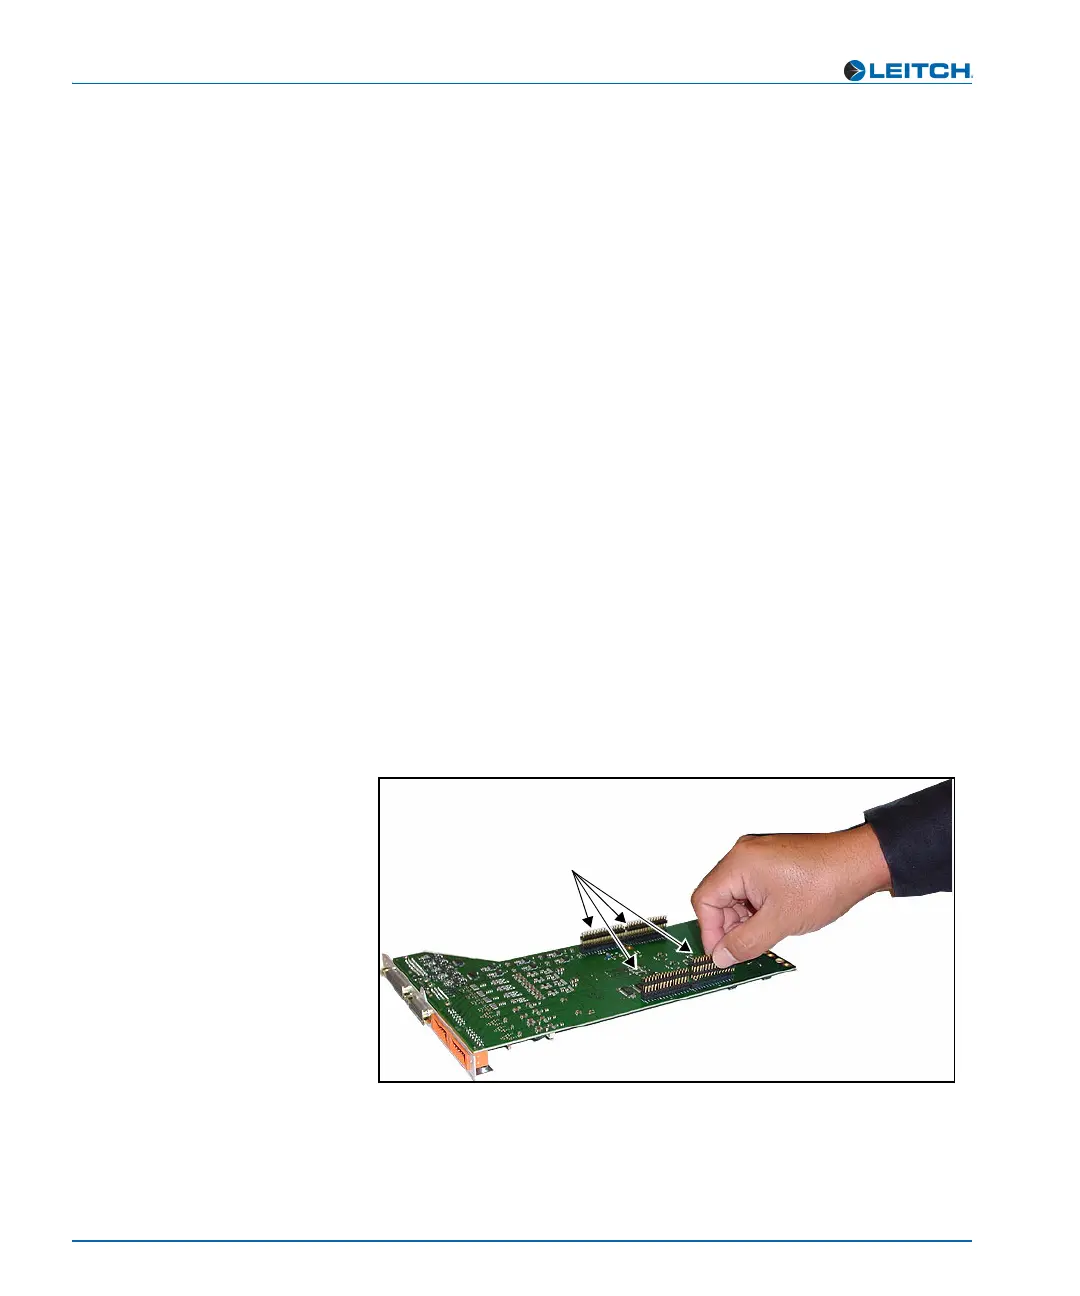
4. Turn the board upside down and insert the four stackers into the
corresponding connectors on the underside of the board.
See Figure C-3.
Figure C-3. Connecting Four Stackers to Module
Connecting the stackers
Locate the stacker connection points
on the module, and then push the
stackers into place