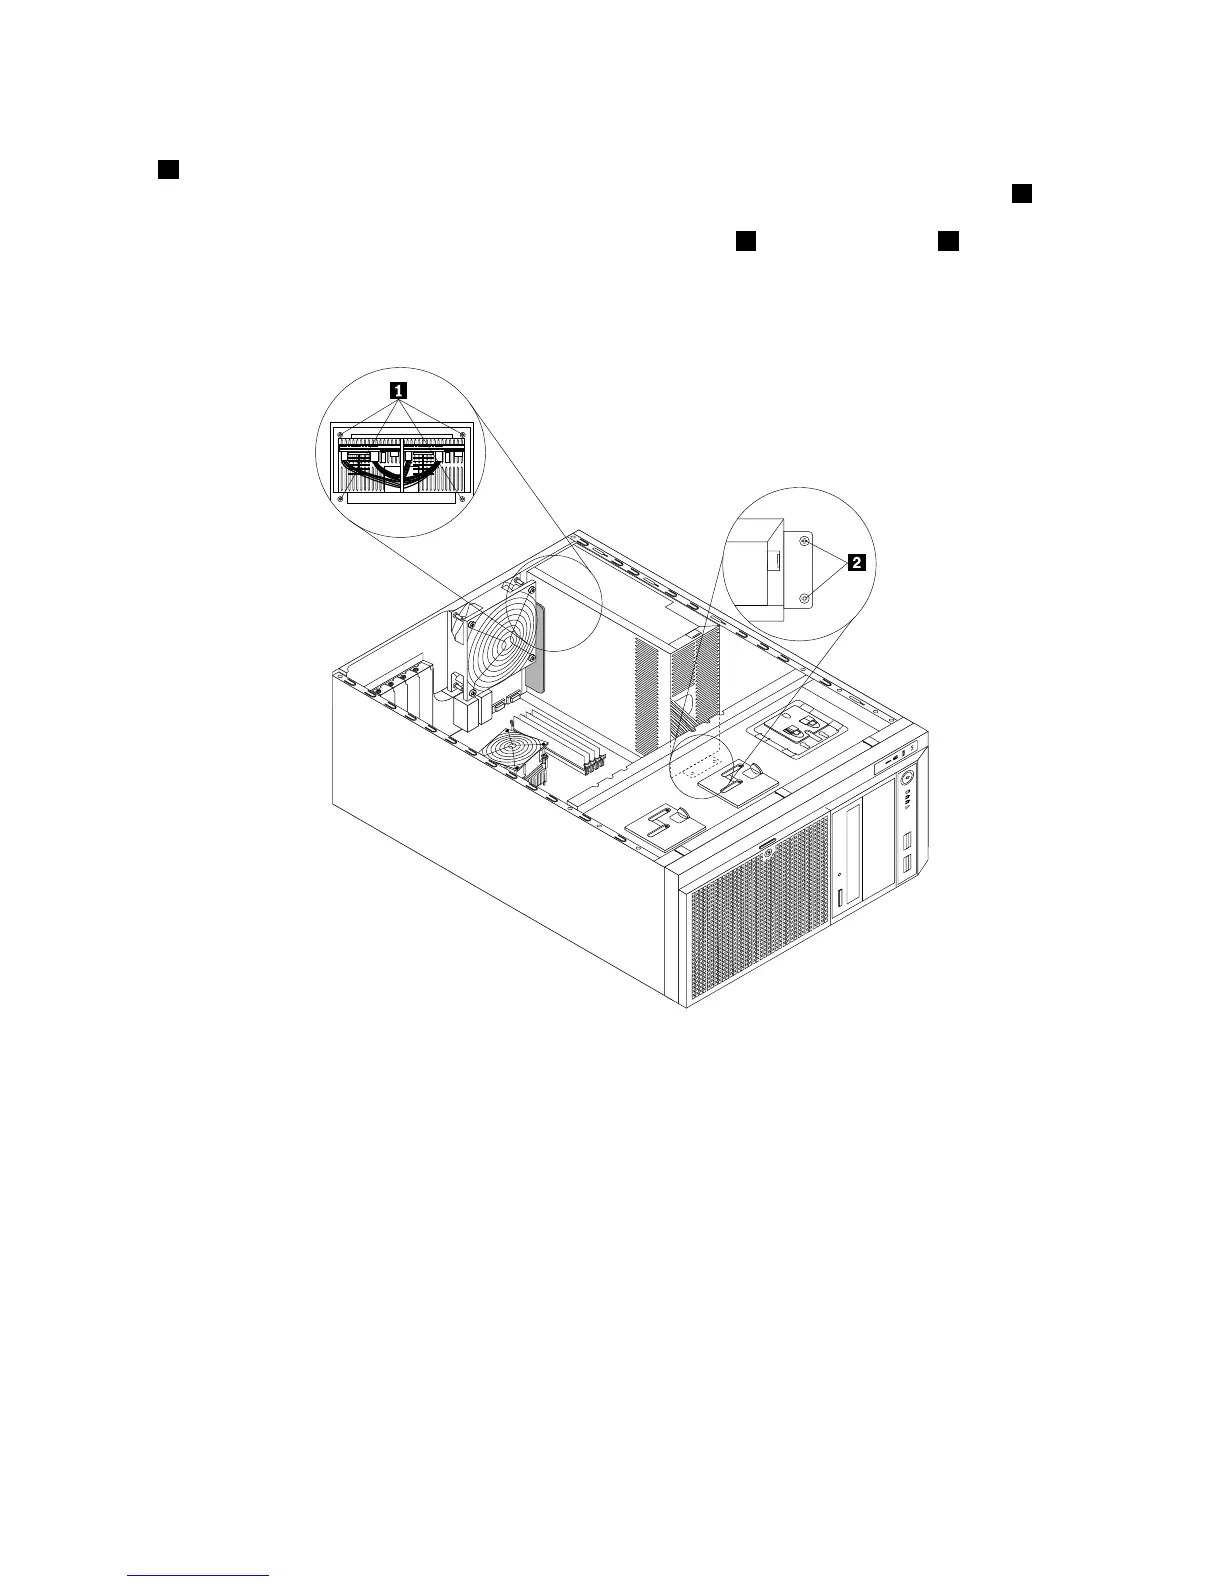
10.Installthenewpowerdistributionboardandcageassemblyintothechassissothatthefourscrewholes
1intherearofthenewpowerdistributionboardandcageassemblyarealignedwiththecorresponding
holesmarkedwithRintherearofthechassis.Meanwhile,makesurethatthetwoscrewholes2in
themetalclipatthefrontofthenewpowerdistributionboardandcageassemblyarealignedwiththe
correspondingholesinthechassis.Then,installthefourscrews
1andthetwoscrews2tosecurethe
newpowerdistributionboardandcageassemblyinplace.
Note:UseonlyscrewsprovidedbyLenovo.
Figure83.Installingthepowerdistributionboardandcageassembly
11.Refertoyournoteandconnectthepowercablesofthenewpowerdistributionboardandcageassembly
tothesystemboard,alldrives,andorhot-swapharddiskdrivebackplane(s),dependingonthemodel.
Then,properlyroutethecablesandsecurethecableswiththecableclipsandtiesinthechassis.
12.Reinstallthefrontsystemfan(s).See“Replacingthefrontsystemfan”onpage149.
13.Reinstallthehot-swapredundantpowersupplymodule(s)andortheprotectiveshieldfortheredundant
powersupplymodulebay2.See“Replacingahot-swapredundantpowersupplymodule”onpage140.
14.Ifyouareinstructedtoreturntheoldpowerdistributionboardandcageassembly,followallpackaging
instructionsanduseanypackagingmaterialsthataresuppliedtoyouforshipping.
Whattodonext:
•Toworkwithanotherpieceofhardware,gototheappropriatesection.
•Tocompletethereplacement,goto“Completingthepartsreplacement”onpage162
.
146ThinkServerUserGuide