Diagnostic aids 3-1
7013-XXX
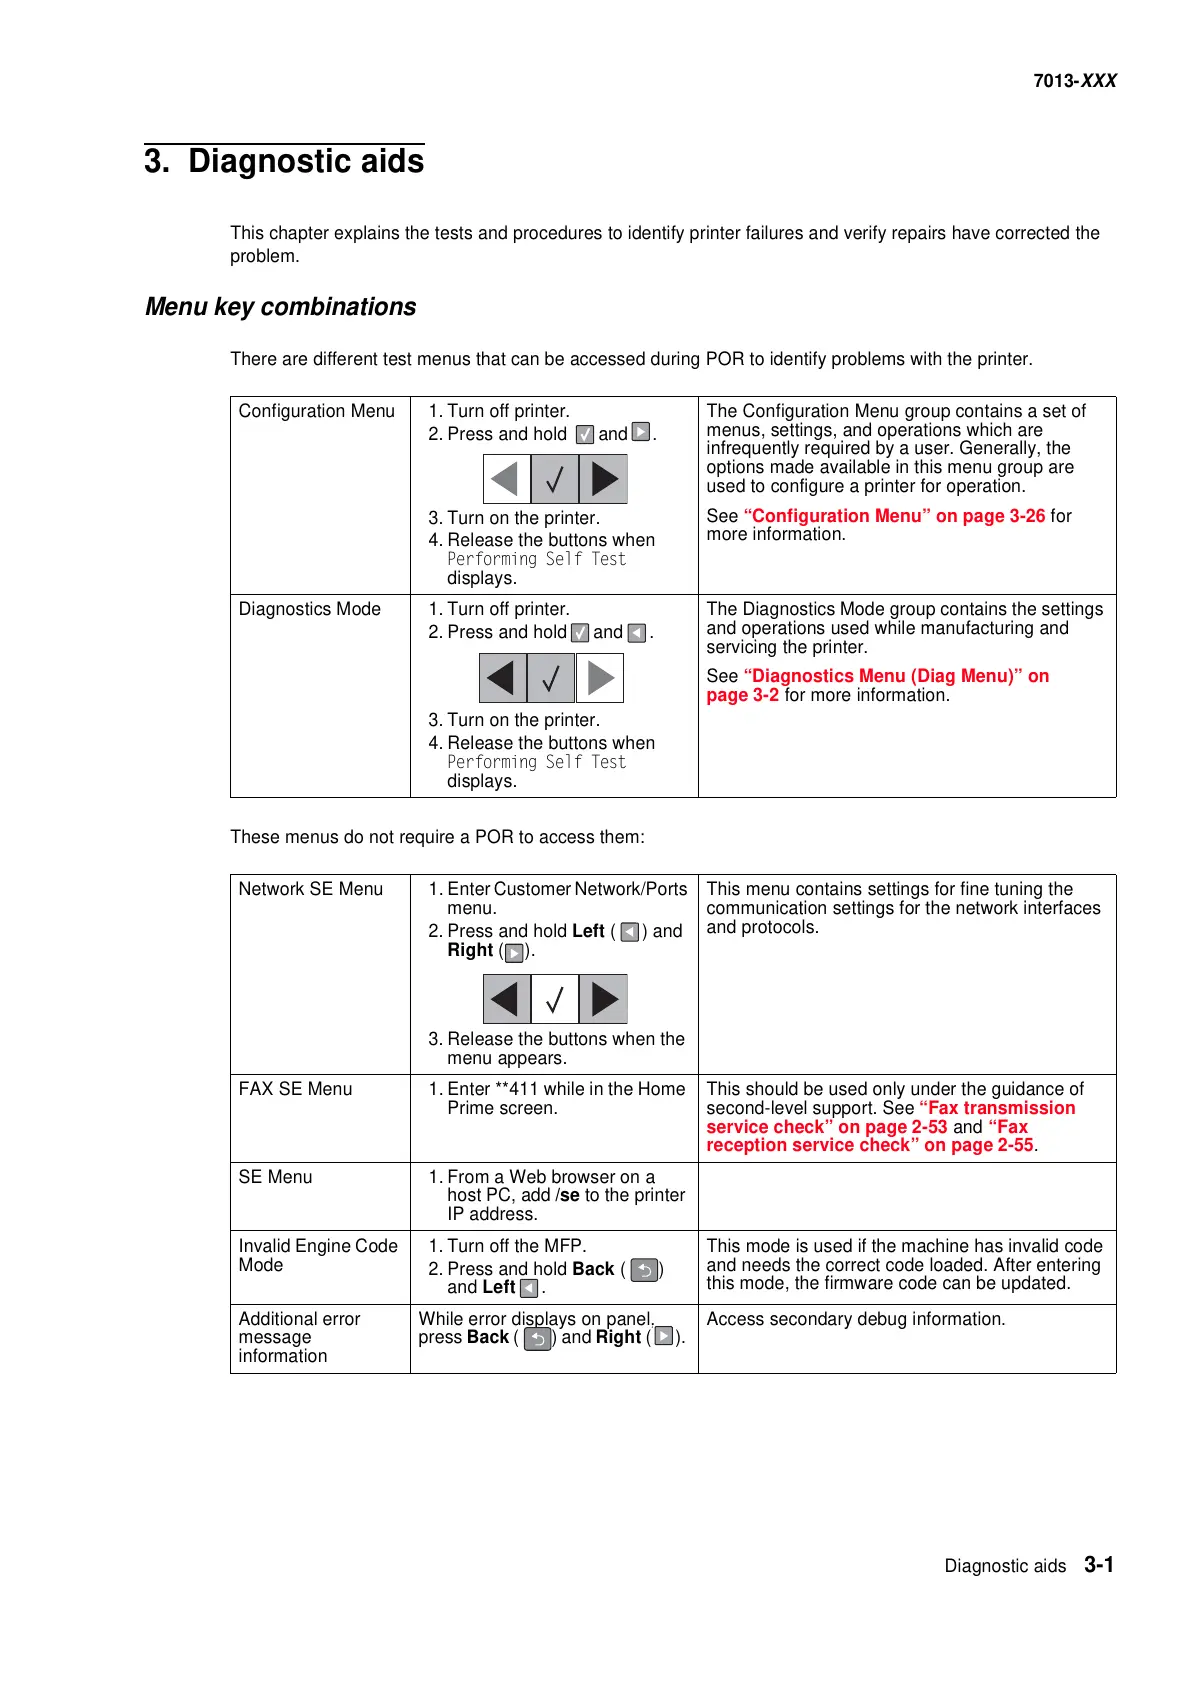
3. Diagnostic aids
This chapter explains the tests and procedures to identify printer failures and verify repairs have corrected the
problem.
Menu key combinations
There are different test menus that can be accessed during POR to identify problems with the printer.
These menus do not require a POR to access them:
Configuration Menu 1. Turn off printer.
2. Press and hold and .
3. Turn on the printer.
4. Release the buttons when
Performing Self Test
displays.
The Configuration Menu group contains a set of
menus, settings, and operations which are
infrequently required by a user. Generally, the
options made available in this menu group are
used to configure a printer for operation.
See “Configuration Menu” on page 3-26 for
more information.
Diagnostics Mode 1. Turn off printer.
2. Press and hold and .
3. Turn on the printer.
4. Release the buttons when
Performing Self Test
displays.
The Diagnostics Mode group contains the settings
and operations used while manufacturing and
servicing the printer.
See “Diagnostics Menu (Diag Menu)” on
page 3-2 for more information.
Network SE Menu 1. Enter Customer Network/Ports
menu.
2. Press and hold Left ( ) and
Right ().
3. Release the buttons when the
menu appears.
This menu contains settings for fine tuning the
communication settings for the network interfaces
and protocols.
FAX SE Menu 1. Enter **411 while in the Home
Prime screen.
This should be used only under the guidance of
second-level support. See “Fax transmission
service check” on page 2-53 and “Fax
reception service check” on page 2-55.
SE Menu 1. From a Web browser on a
host PC, add /se to the printer
IP address.
Invalid Engine Code
Mode
1. Turn off the MFP.
2. Press and hold Back ()
and Left .
This mode is used if the machine has invalid code
and needs the correct code loaded. After entering
this mode, the firmware code can be updated.
Additional error
message
information
While error displays on panel,
press Back ( ) and Right ().
Access secondary debug information.