Diagnostic aids 3-35
7013-XXX
Understanding paper jam codes and locations
200-202 paper jams
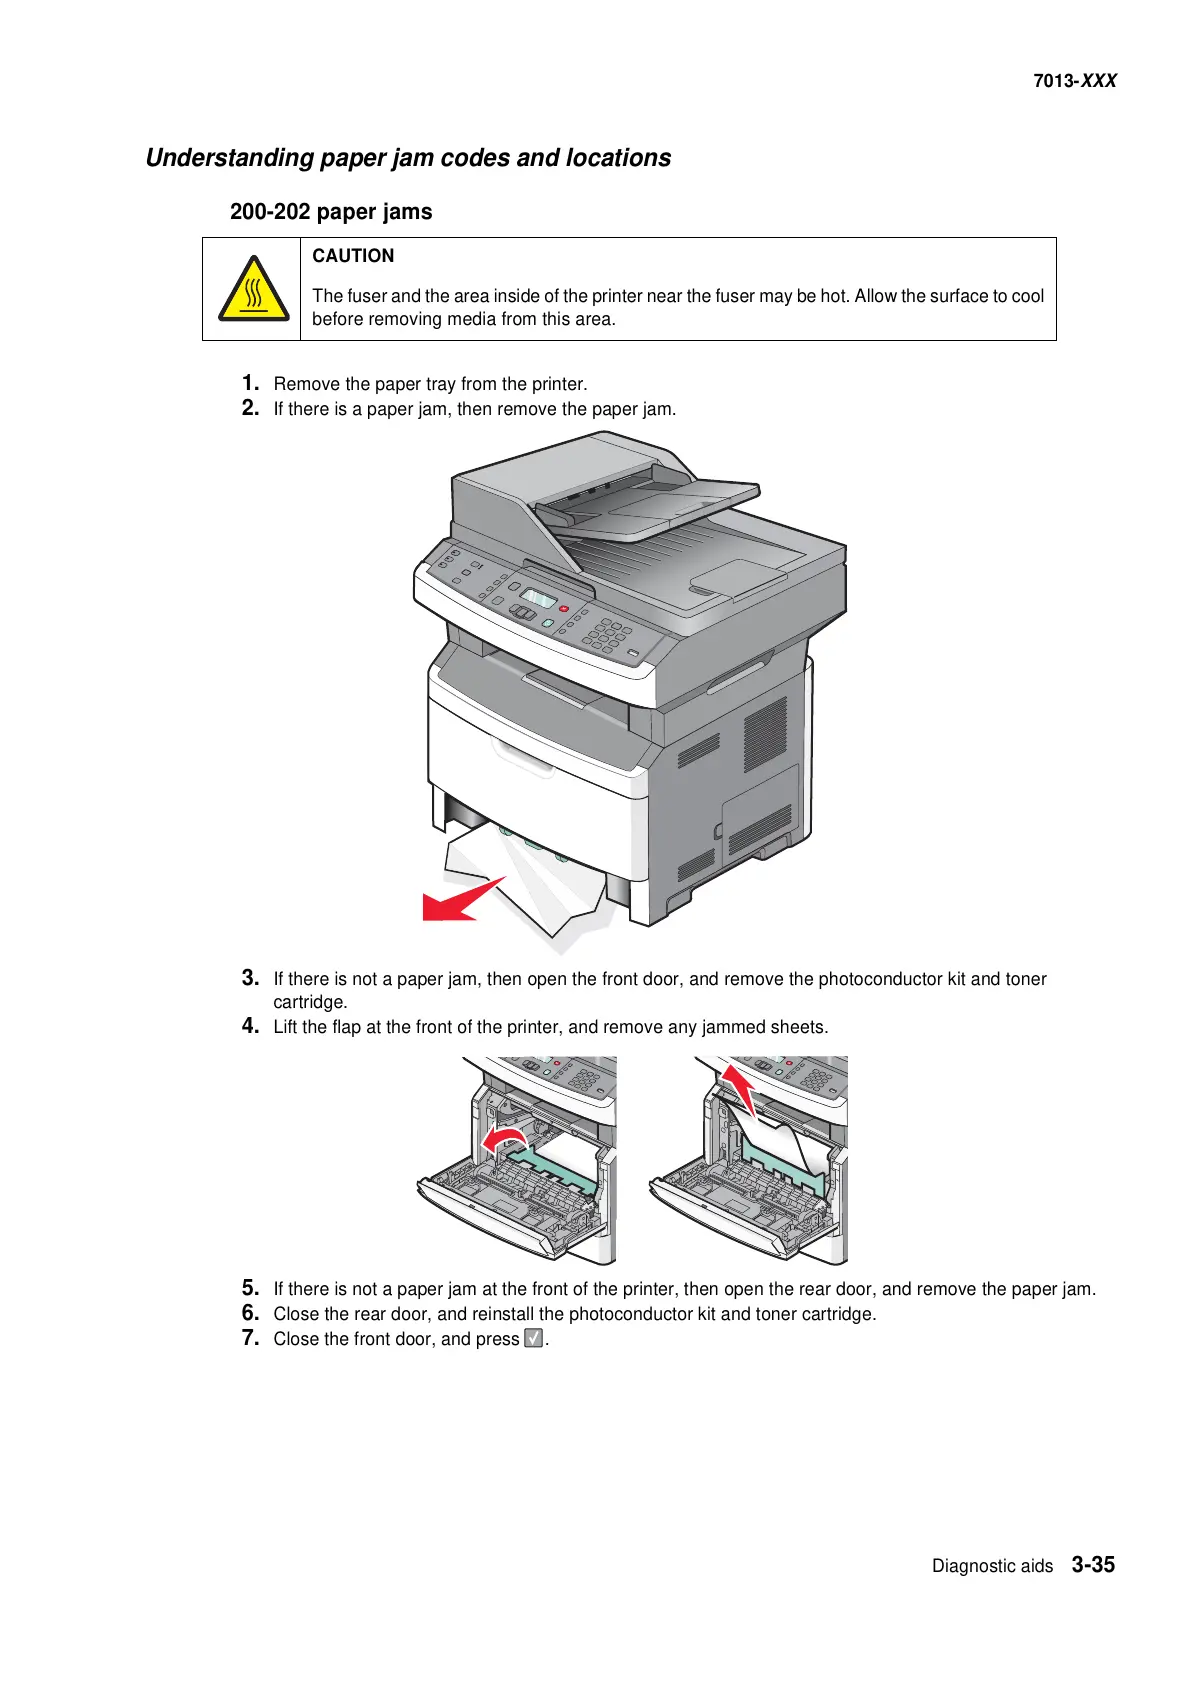
1. Remove the paper tray from the printer.
2. If there is a paper jam, then remove the paper jam.
3. If there is not a paper jam, then open the front door, and remove the photoconductor kit and toner
cartridge.
4. Lift the flap at the front of the printer, and remove any jammed sheets.
5. If there is not a paper jam at the front of the printer, then open the rear door, and remove the paper jam.
6. Close the rear door, and reinstall the photoconductor kit and toner cartridge.
7. Close the front door, and press .
CAUTION
The fuser and the area inside of the printer near the fuser may be hot. Allow the surface to cool
before removing media from this area.