Do you have a question about the Lexmark 363dn and is the answer not in the manual?
Details printer memory, print quality, compatibility, media capacity, and other technical specifications.
Covers ADF, flatbed, resolution, color depth, and operating environments for scanning functions.
Information on error codes, symptoms, and service checks for printer troubleshooting and repair.
Procedures for checking printer components like controller board, fans, and motors for proper function.
Troubleshooting for paper jams and feeding issues, including POST errors and sensor checks.
Steps to diagnose and resolve print quality issues like blank pages, streaks, or toner problems.
Procedures to access various test menus like Configuration, Diagnostics, and FAX SE for maintenance.
Settings for defaults, page counts, serial number, model name, and configuration ID.
Adjustments for EP defaults, fuser temperature, print contrast, charge roll, and gap settings.
Tests for ASIC memory, feed functionality, and sensor status in ADF and flatbed units.
Guidance on avoiding paper jams and understanding jam codes and locations for troubleshooting.
Procedures for updating printer firmware via USB flash drive or network connection.
Precautions and procedures for safely handling electronic components sensitive to static discharge.
General notes and specific procedures for removing various printer parts and assemblies.
Step-by-step instructions for removing the Automatic Document Feeder (ADF) unit from the printer.
Instructions for disconnecting and removing the ADF cable from the controller board.
Procedure for removing the ADF scanner assembly, including disconnecting cables.
Detailed steps for removing the printer's fuser assembly, including cable disconnections.
Instructions for removing the left side printer cover to access internal components.
Steps to remove the left side scanner cover for access to scanner components.
Procedure for removing the Low Voltage/High Voltage Power Supply unit.
Instructions for removing the main motor gear drive assembly.
Steps to remove the manual feed clutch assembly.
Procedure for removing the manual feed solenoid.
Instructions for removing the media ACM ASM feeder.
Steps to remove the media feed clutch.
Procedure for removing the multipurpose feeder.
Instructions for removing the MPF tray.
Steps to remove the MPF feed clutch.
Instructions for removing the nameplate blank cover.
Procedure for removing the operator panel.
Steps to remove the operator panel cable.
Procedure for removing the paper input and duplex sensor assembly.
Instructions for removing the printhead assembly.
Steps to remove the rear door and cover.
Procedure for removing the rear exit guide assembly with its sensor and solenoid.
Instructions for removing the right side printer cover.
Steps to remove the right side scanner cover.
Procedure for removing the toner level sensor.
Instructions for removing the top printer cover.
Steps to remove the transfer roll.
Instructions for removing the upper front guide assembly.
Procedure for removing wear strips from Tray 1 and the 250-sheet tray.
Instructions for removing wear strips from the 550-sheet tray.
Procedure for removing the wireless antenna.
Steps to remove the wireless card.
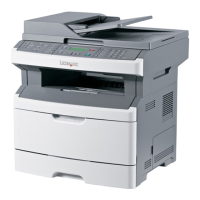
Identifies physical locations of printer components via front and rear views.
Details pin assignments for various connectors on the controller board.
Checklist for identifying unsafe conditions and potential hazards within the printer.
Guidelines and specifications for lubricating printer parts.
Lists available maintenance kits and their part numbers for printer servicing.
Explains the legend and conventions used in the parts catalog for identifying FRUs.
Exploded view and part list for printer covers and exterior components.
Exploded view and part list for the printer's scanner unit and related bezels.
Exploded view and part list for electronic components, including controller board and power supply.
Exploded view and part list for the printer's internal frame and mechanical assemblies.
Part list for optional components like flash memory and wireless cards.
List of available power cords for different regions and specifications.
| Print Technology | Laser |
|---|---|
| Print Resolution | 1200 x 1200 dpi |
| Paper Capacity | 250 sheets |
| Duplex Printing | Yes |
| Display | 2-line LCD |
| Functions | Print, Copy, Scan, Fax |
| Scanner Type | Flatbed |
| Scan Resolution | 600 x 600 dpi |
| Fax Speed | 33.6 Kbps |
| Operating System Compatibility | Windows, Mac, Linux |
| Connectivity | USB, Ethernet |