EasyManuals Logo

Lexmark M52 Series User Manual

Lexmark M52 Series
970 pages
To Next Page IconTo Next Page
To Previous Page IconTo Previous Page
Page #479 background imageLoading...
Page #479 background image
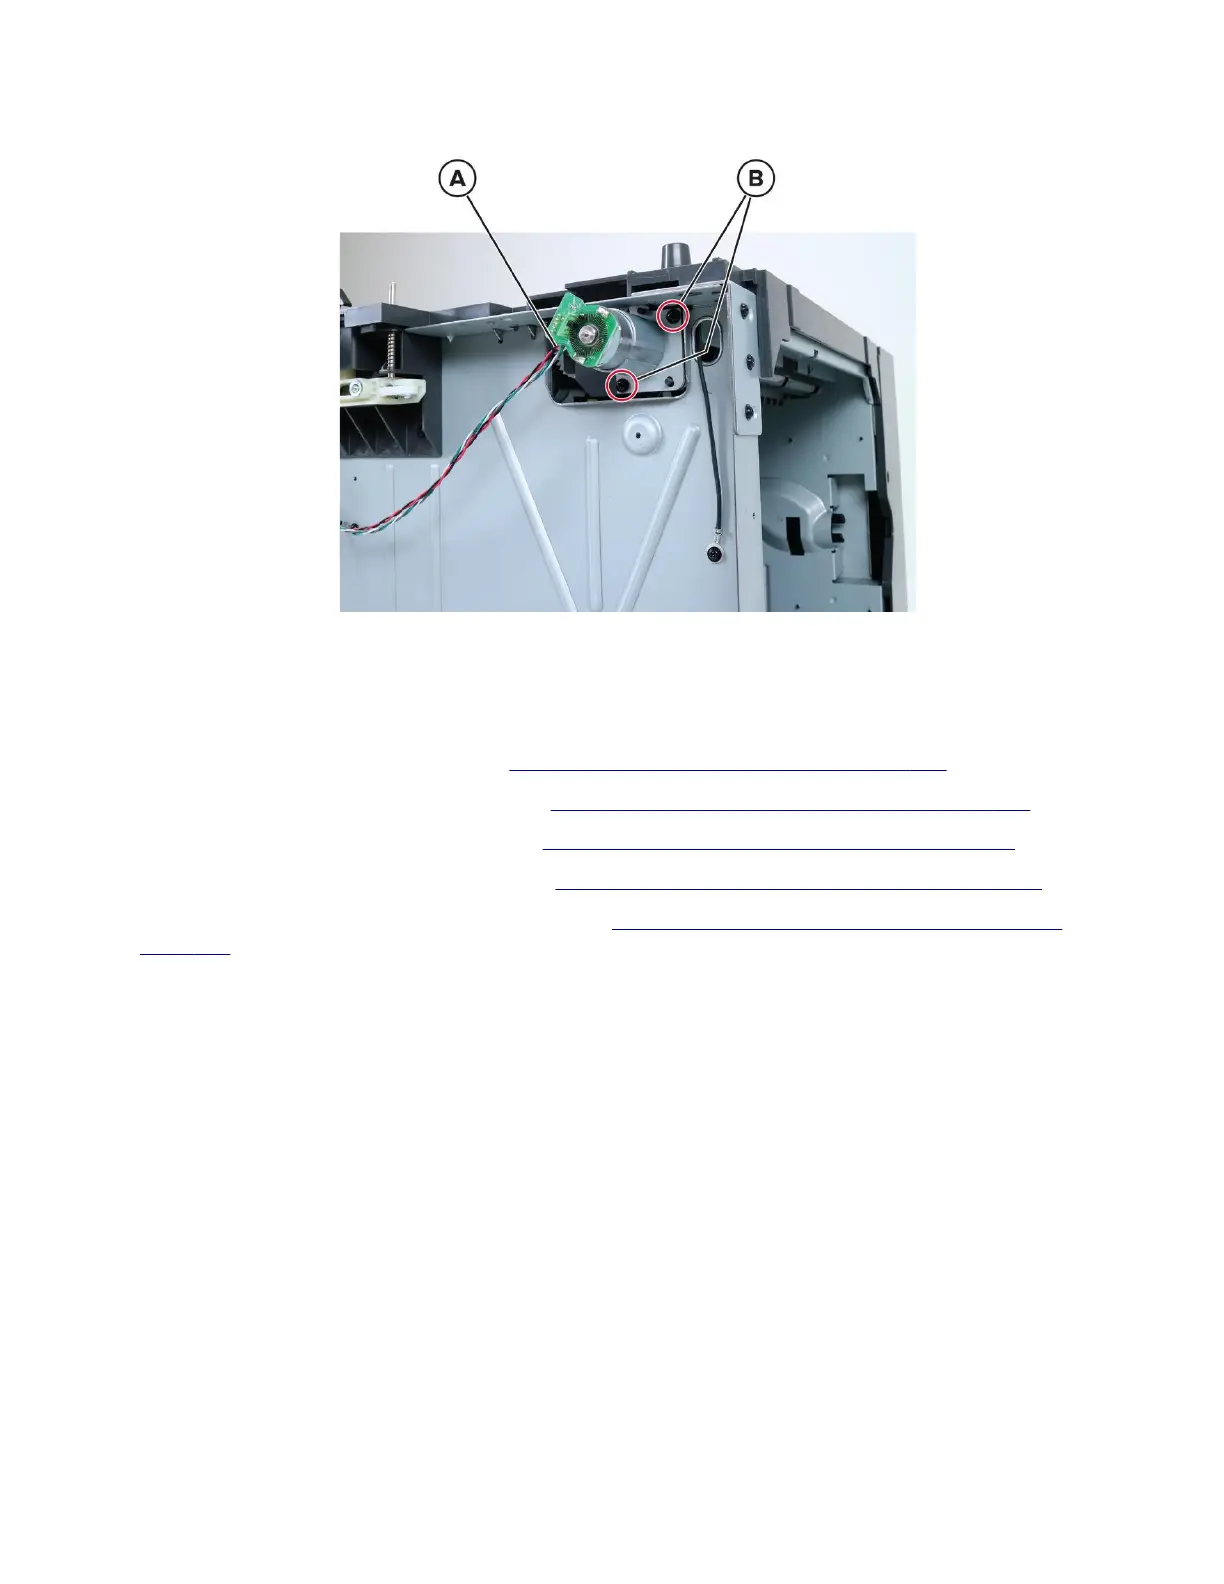
4 Disconnect the cable (A), and then remove the two screws (B).
5 Remove the motor.
2100-sheet tray top cover removal
1 Remove the 2100-sheet tray insert. See “2100-sheet tray insert removal” on page 472.
2 Remove the 2100-sheet tray rear cover. See “2100-sheet tray rear cover removal” on page 473.
3 Remove the 2100-sheet tray left cover. See “2100-sheet tray left cover removal” on page 473.
4 Remove the 2100-sheet tray right cover. See “2100-sheet tray right cover removal” on page 476.
5 Remove the motor (2100-sheet tray transport). See “Motor (2100-sheet tray transport) removal” on
page 478.
4064
Parts removal
479

Table of Contents

Questions and Answers:

Question and Answer IconNeed help?

Do you have a question about the Lexmark M52 Series and is the answer not in the manual?

Lexmark M52 Series Specifications

General IconGeneral
Print TechnologyLaser
Print Resolution, BlackUp to 1200 x 1200 dpi
Connectivity, StandardUSB 2.0, Ethernet
Network ConnectivityEthernet
Media Types SupportedCard Stock, Envelopes, Plain Paper, Transparencies
Operating Systems SupportedWindows, macOS, Linux

Related product manuals