CP5 • Replacing components
52 CP_SEM_60-00-60.001
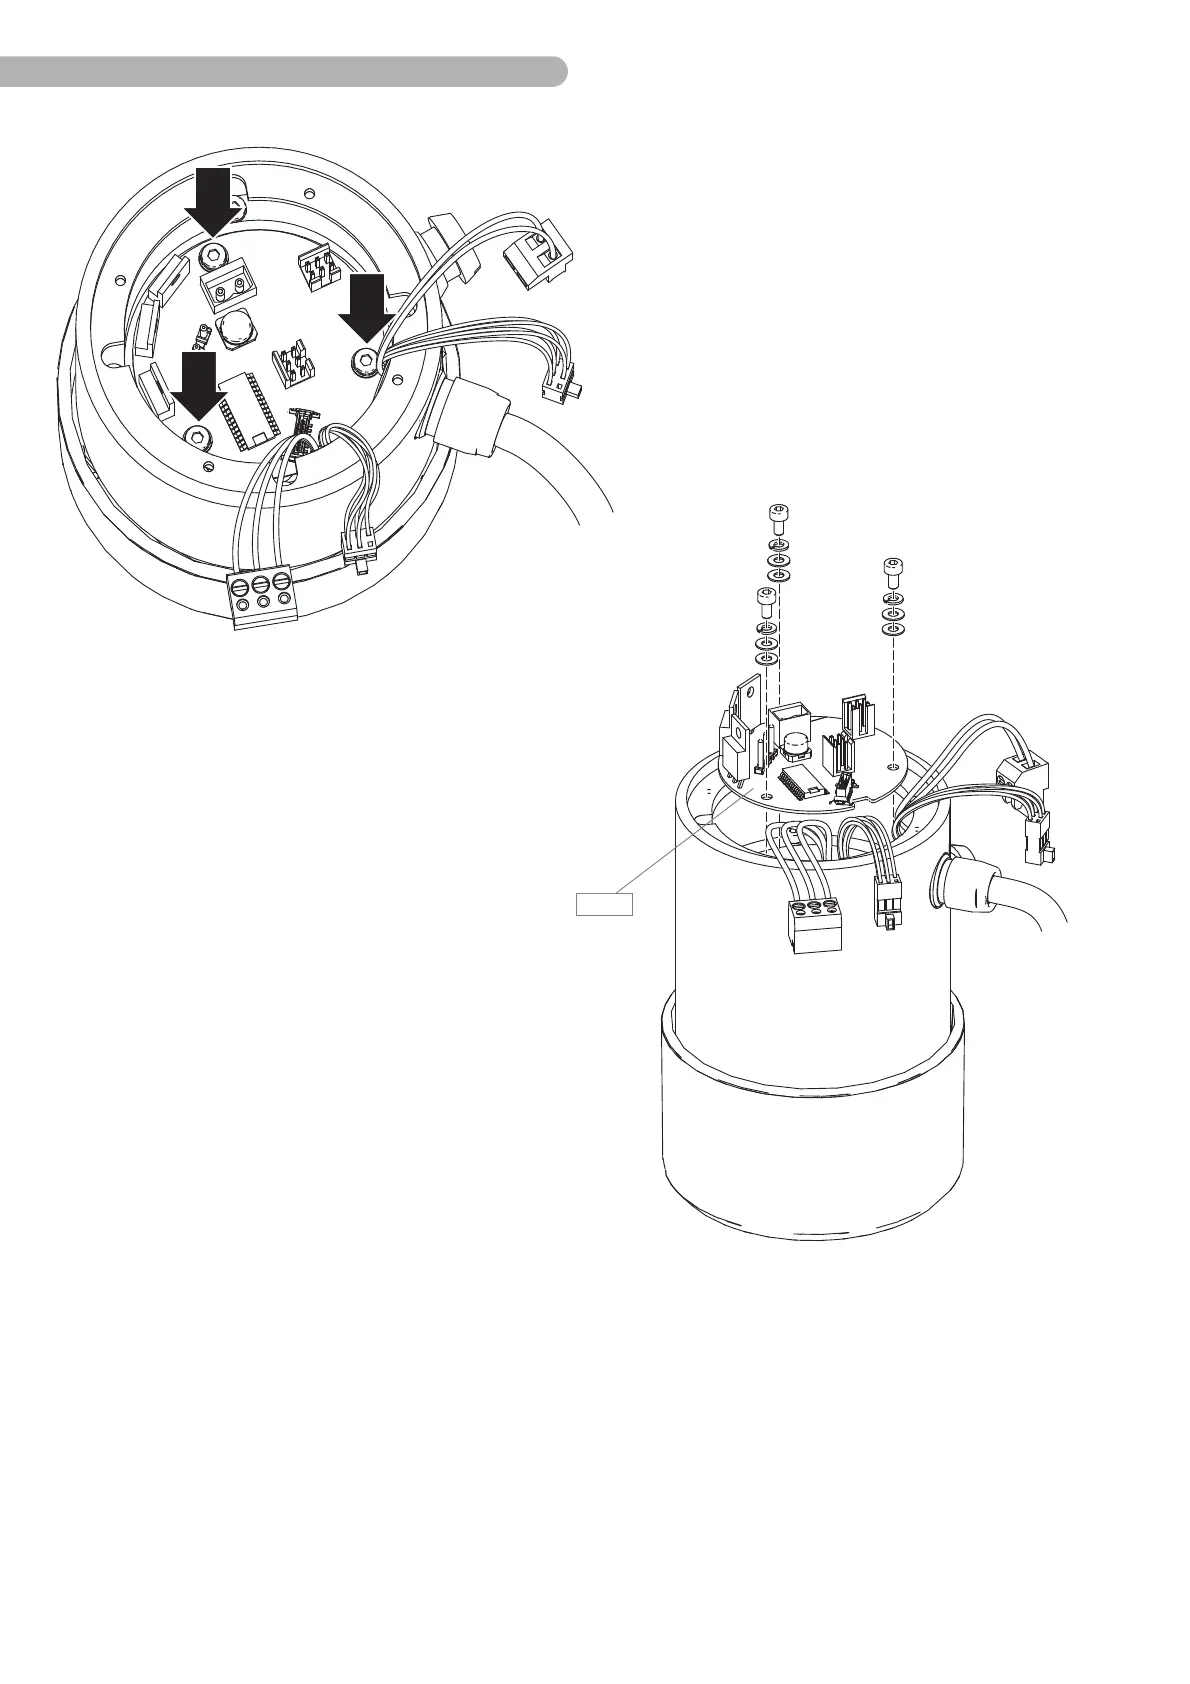
Fig. 26: Dismantling the board (2)
◗ Unscrew the three marked screws (Allan key size 2.5) including the washers.
◗ Carefully pull the board B 9 out upwards.
◗ Replace the circuit board.
◗ Install the new circuit board in the reverse order.
◗ Reconnect the connectors.
Warning during assembly: Sharp edges of the housing can be damage cables or their insulation. Make
certain that the cables not being pinched.