CP5 • Replacing components
CP_SEM_60-00-60.001 41
6 Replacing components
6.1 Pump control panel
In the interest of clarity, cables and connectors have been omitted in some of the figures. Always mark
the plugs and cables to avoid mistakes in subsequent assembly.
!
Please note that it is essential that ESD protective safety measures are taken when working with
components susceptible to ESD. When removing or fitting circuit boards or components susceptible to
ESD, ensure that you use ESD mats, wrist straps, or similar.
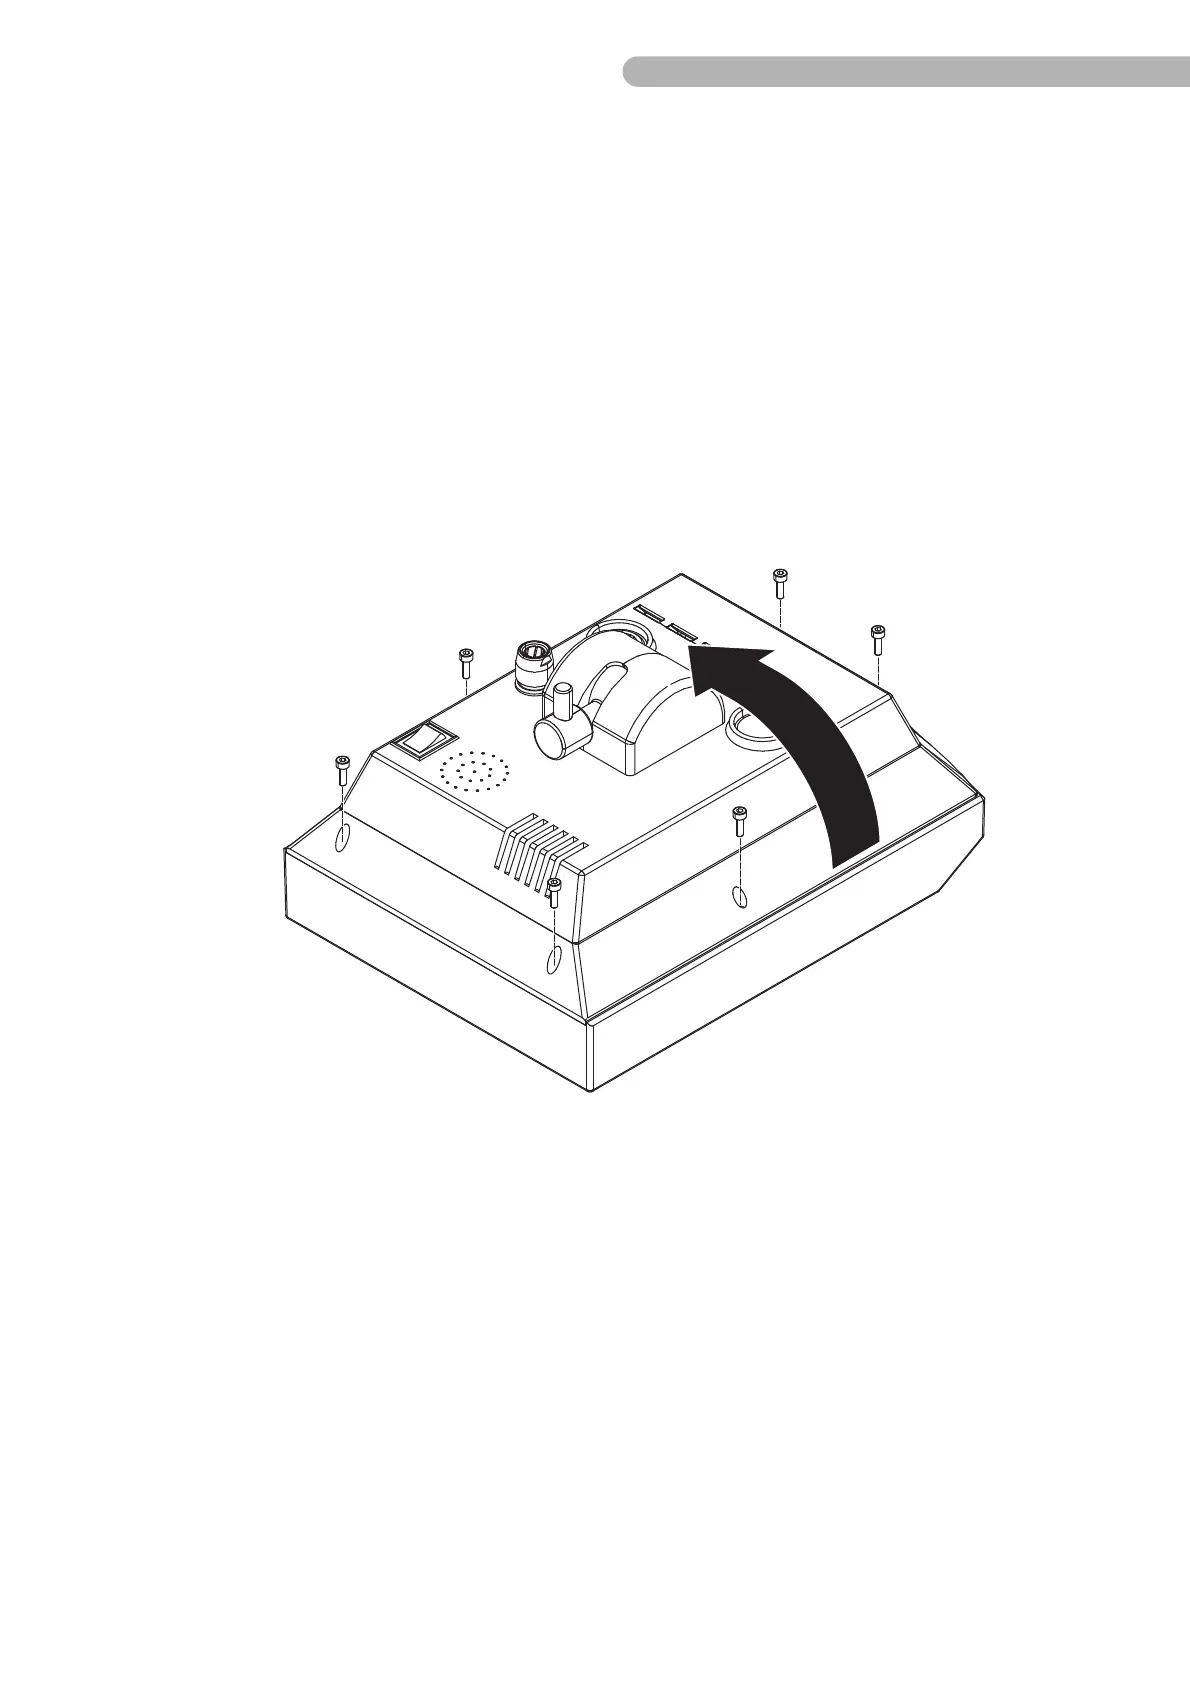
6.1.1 Open pump control panel
Fig. 16: Opening the control panel (1)
◗ Remove the six socket head screws (DIN 912 M3x10 / allen key size 2.5 mm).
◗ Carefully open the back of the housing.
Warning: The back of the housing cannot be opened up fully without first detaching the plug
connectors between the connections on the back of the housing and the circuit board!