L19WD Series
43
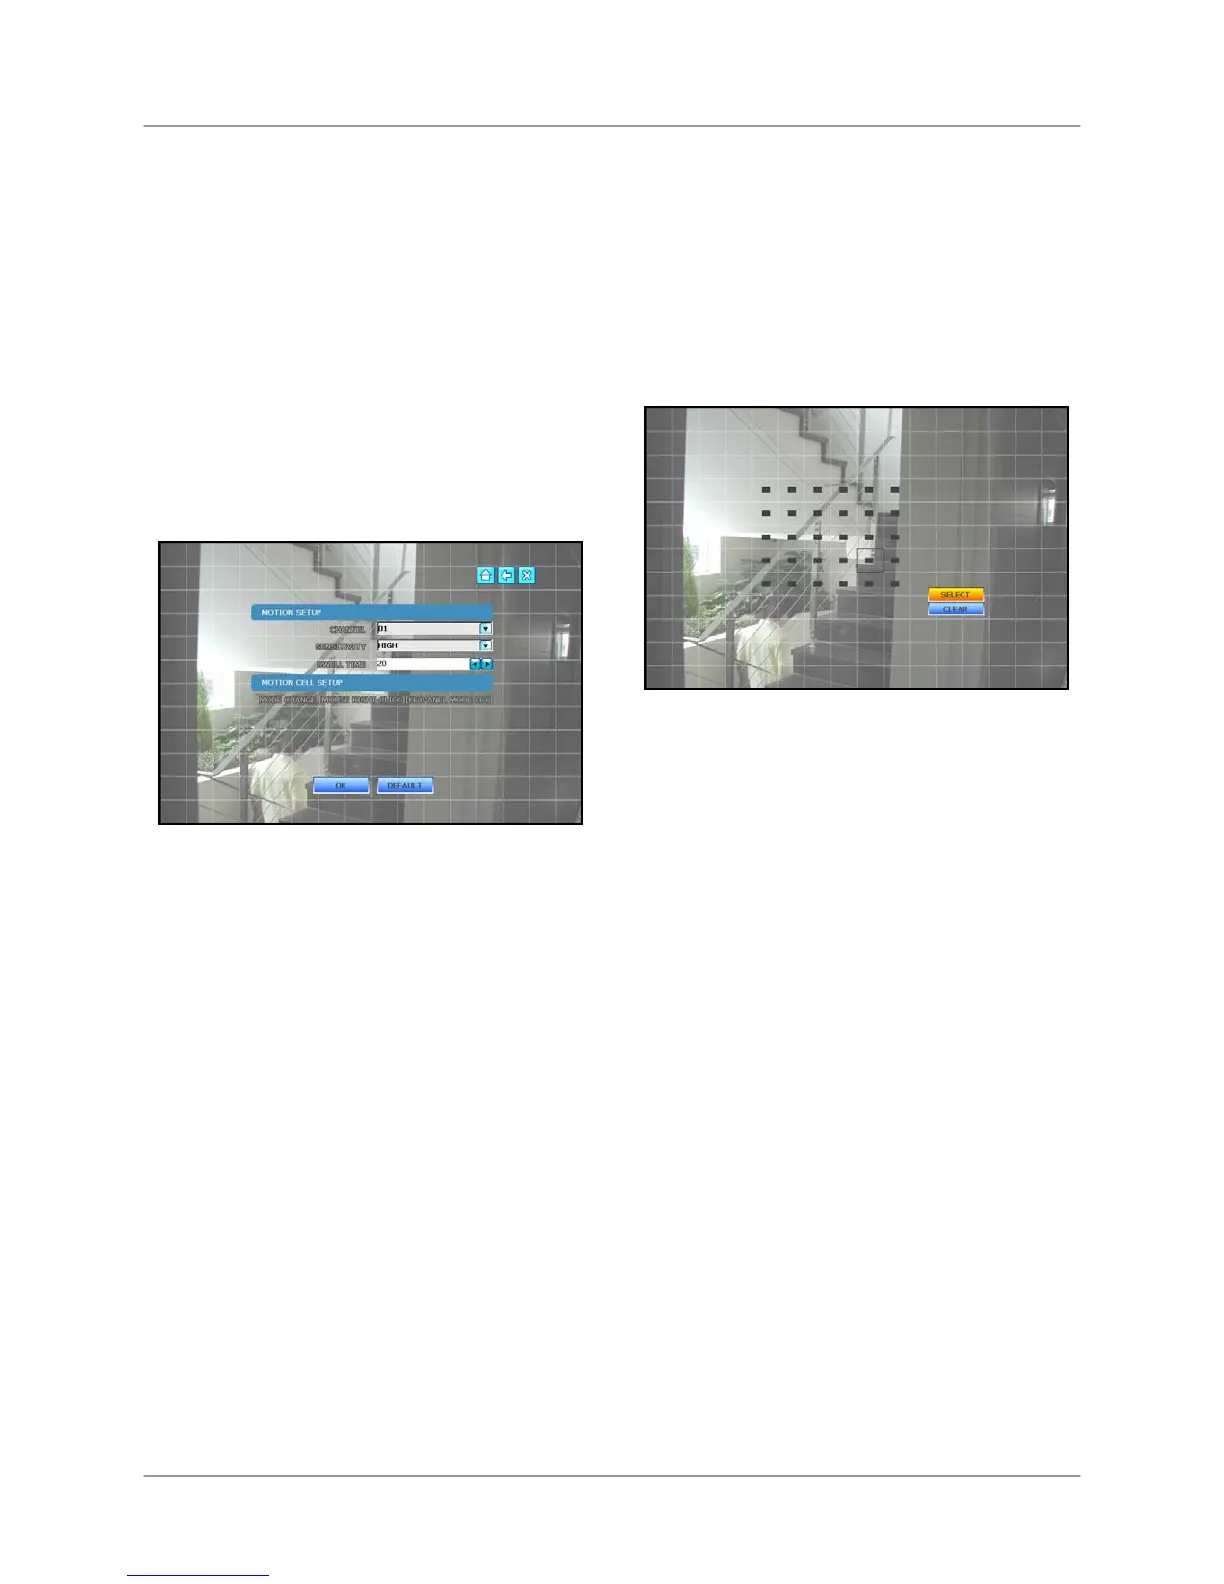
MOTION
Set the Motion Sensitivity for each camera
channel.
Use Motion Cell Setup to apply motion
detection to only a certain area of the
image. For example, if you want to closely
monitor a door, you can apply motion
sensing to only the area of the door, not
the whole image.
Note: In the Motion Menu, all images from
connected cameras will turn green as they
detect movement. Use this feature to help
you with Motion Cell Setup.
To configure Motion Setup:
Mouse:
1. Click the CHANNEL drop-down menu
to select the channel you want to
configure.
2. Click the Sensitivity drop-down menu to
select either Low, Medium, High, or
Very High.
3. Click the DWELL TIME arrows to
increase or decrease the DWELL
TIME. The higher the Dwell Time, the
longer the channel with motion
detection remains in Full-Screen view.
Remote Control:
1. Press ◄► to select the Channel drop-
down menu and press ▲▼ to select an
individual channel.
2. Press ◄► to select the Sensitivity
drop-down menu and press ▲▼ to
select Low, Medium, High, or Very
High.
3. Press ◄► to select the DWELL TIME
text field and press ▲▼ to increase or
decrease the Dwell Time.
Click OK to save your settings, or click
DEFAULT to restore factory defaults.
To configure Motion Cell Setup:
Mouse:
1. Right-click on the screen to open
Motion Cell grid.
2. Click and drag across the screen to set
a specific motion sensitive area.
3. Click SELECT to enable the motion
sensitivity to the selected cells. Cells
are clear.
4. Click CLEAR to disable the area of
motion sensitivity. Cells turn solid grey.
Click OK to save your settings, or click
DEFAULT to restore factory defaults.
Note: By default, motion detection is
enabled on the entire image of each
connected camera
. To verify that motion
is active, move your hand in front of the
camera – the active cells turn green.
See Appendix 5 for more details.
 Loading...