Installation Instructions
Installation
of
the
Magellan Maestro is simple and
easy.
The hardest part will
be
picking the best
location.
Selecting
the
Location
A few
tips
on
selecting the proper location.
• Mount the Magellan Maestro in a place where
it
can
be
easily seen and will not interfere
with
your view of
the
road.
• The Magellan Maestro should
be
mounted
in
such a way
that
the antenna, (located in the
top
of
the receiver), has
an
unobstructed view of
the
sky through the windshield.
• Select whether
it
will
be
mounted using
the
adjustable
mount
to
the
windshield or the
supplied adhesive disk.
Be
sure to check your local and regional laws before mounting
to
the windshield. Some states, like California and Minnesota, have laws restricting
the
mounting
of
any device
on
the
windshield.
•
If
planning
to
use the adhesive disk, a smooth surface
on
the dash board will need
to
be
selected.
Do
not attach the adhesive disk to the windshield.
• Make sure
that
the Magellan Maestro or any cabling will not
be
disturbed in
the
event
that
the
airbags are deployed.
Cleaning
the
Area
Use
the
alcohol pad
that
came with the Magellan Maestro
to
clean the area
on
the windshield or dash
that
has been selected for mounting the Magellan Maestro.
Applying
the
Adhesive
Disk
(Skip
if
mounting
directly
to the windshield.) Remove the protective tape from the back
of
the
adhesive disk. Apply
the
disk with the adhesive side towards
the
dash. Maintain pressure
on
the disk
for 5 minutes to allow
it
to
set in place. Allow the disk
24
hours
to
cure before continuing.
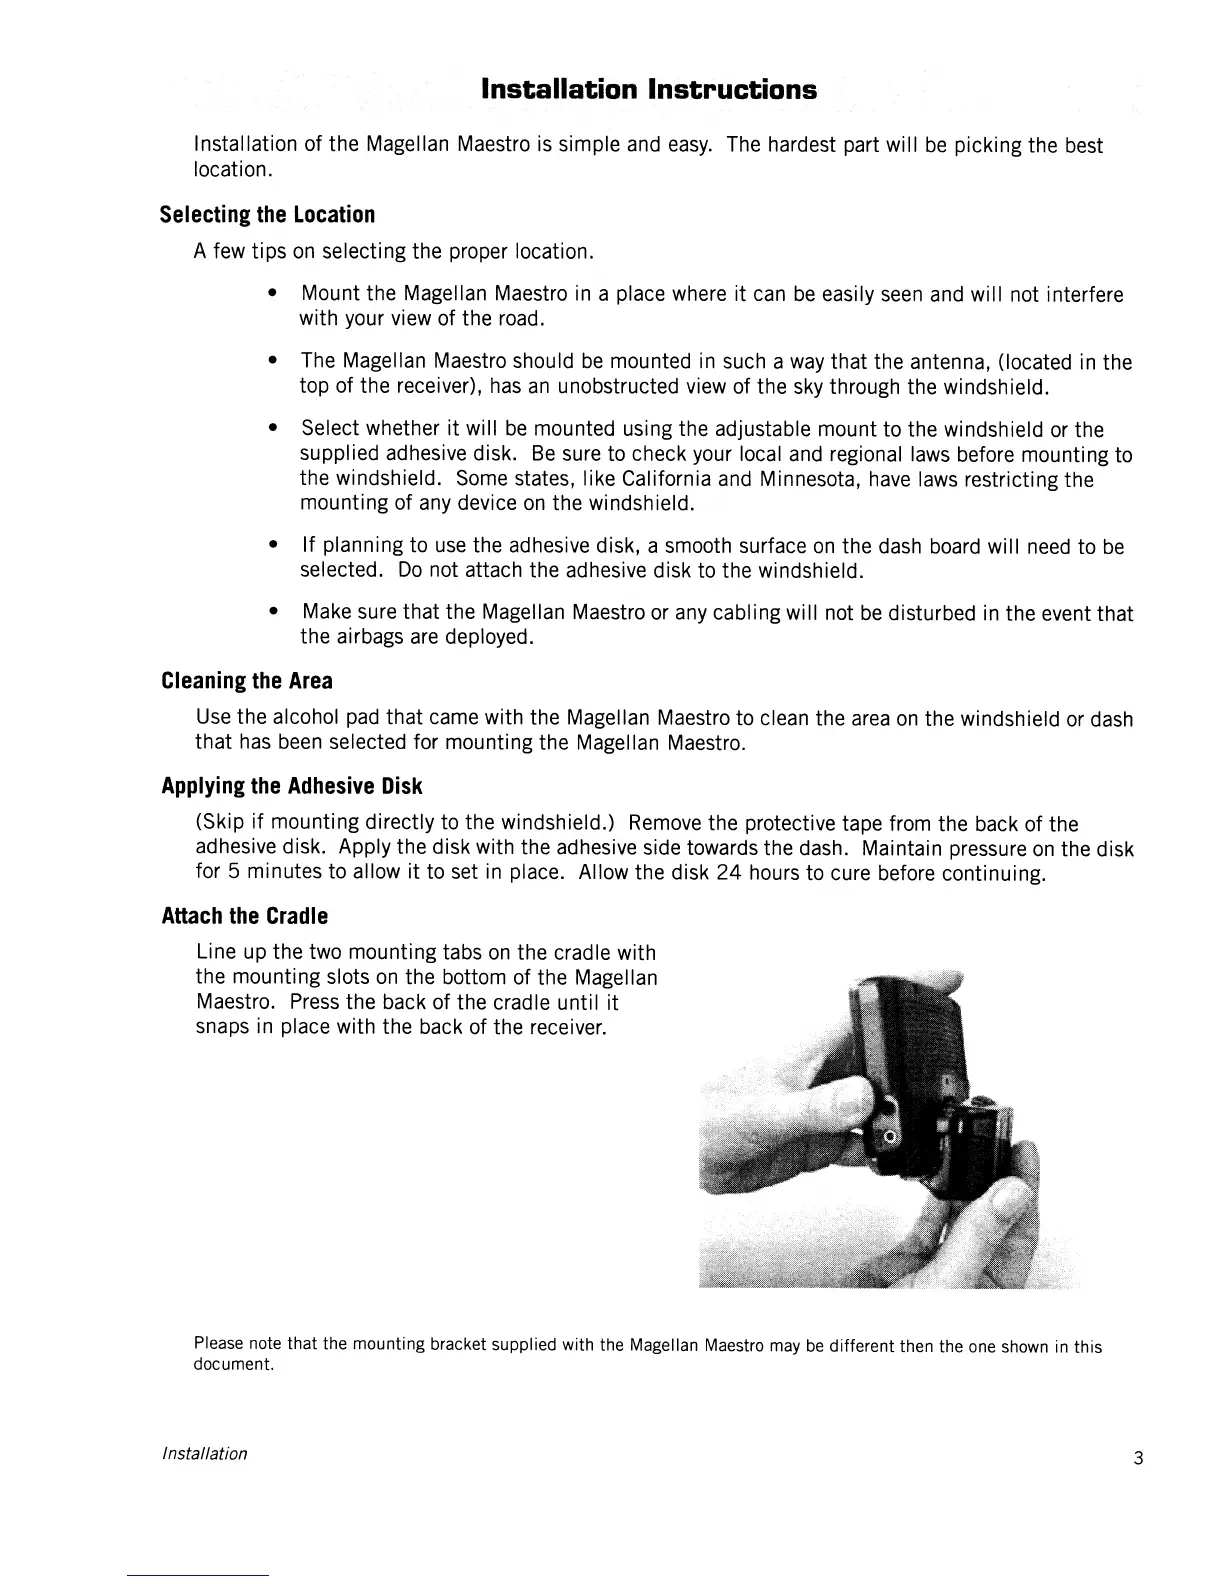
Attach
the
Cradle
Line up
the
two
mounting
tabs
on
the
cradle with
the
mounting
slots
on
the bottom of the Magellan
Maestro. Press
the
back
of
the cradle
until
it
snaps in place
with
the back of the receiver.
Please note that the mounting bracket supplied with the Magellan Maestro may
be
different then the one shown in this
document.
Installation
3