10 Maintenance
48
10 Maintenance
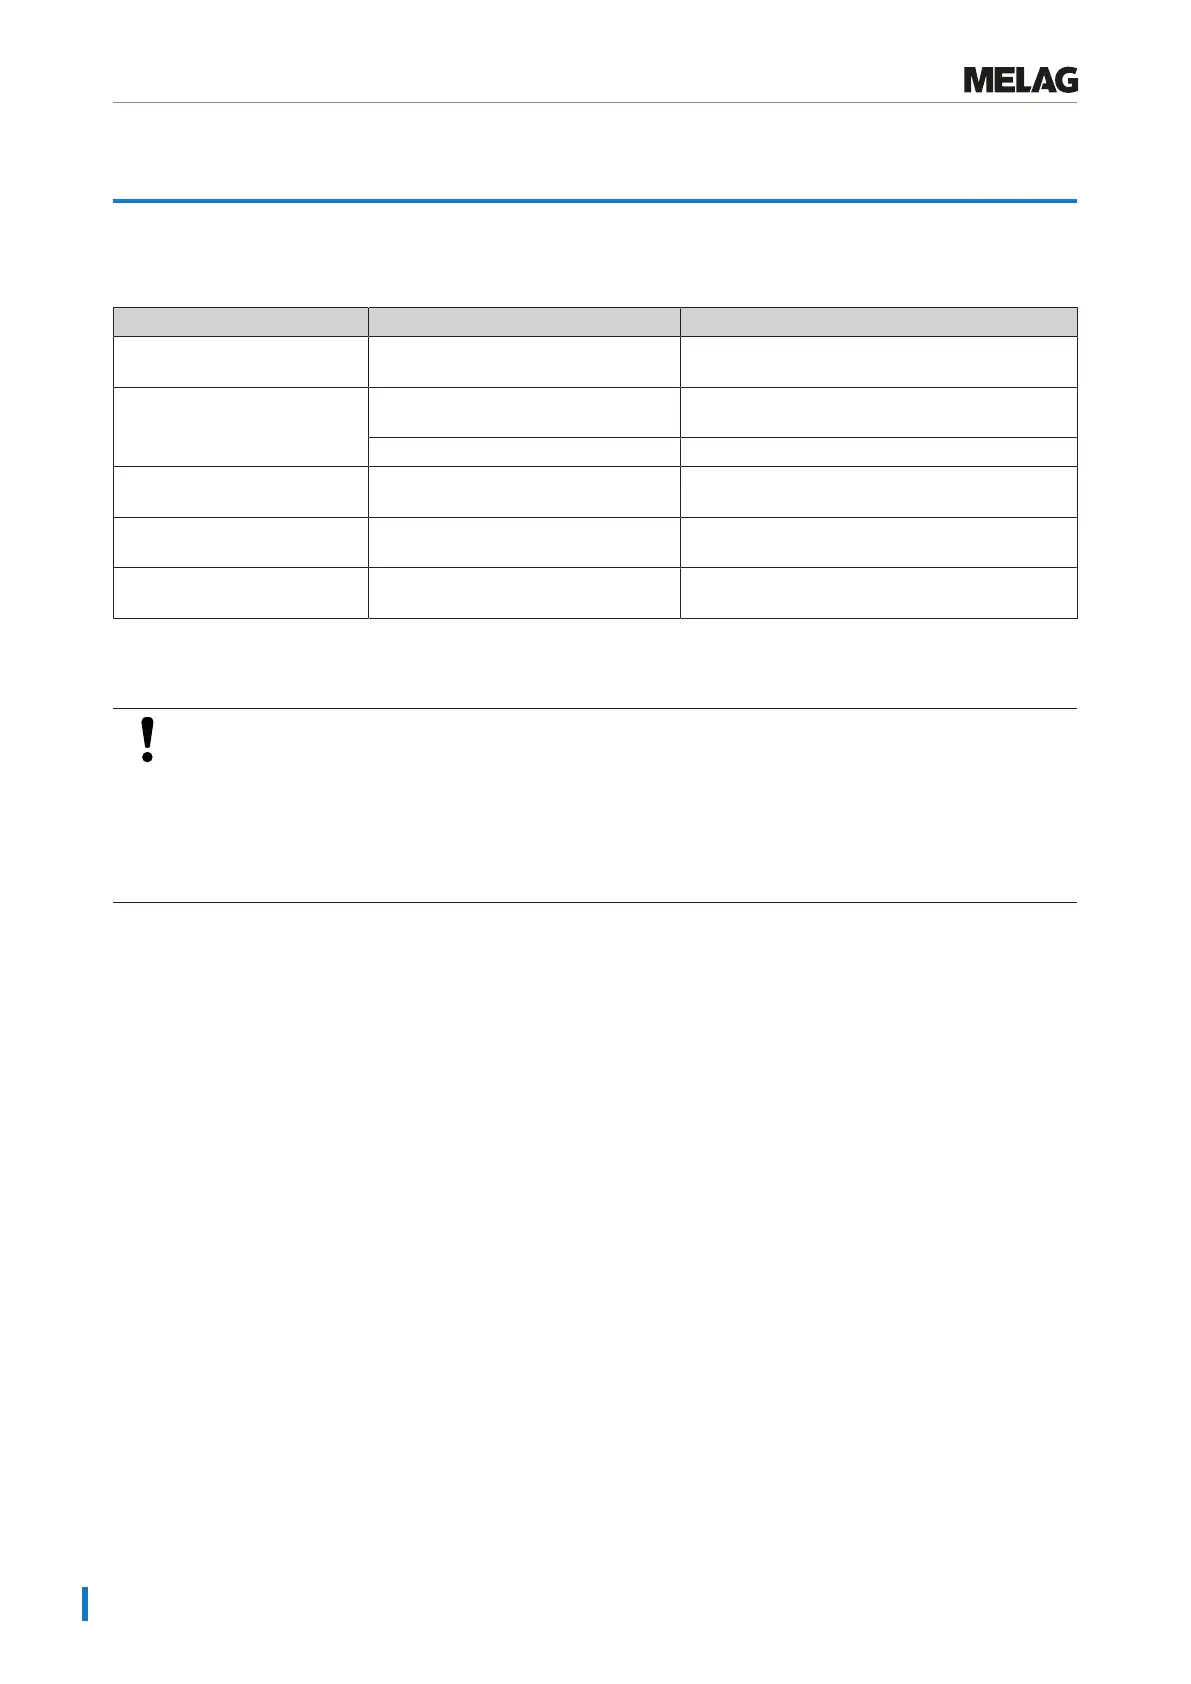
Maintenance intervals
Interval Measure Device component
With every filling of the feed
water container
Check the container for soiling and
clean it if necessary before filling
External feed water container
Weekly Check for soiling, deposits or damage Sterilization chamber including door gasket and
wiping rubber, universal basket for load
Check for discolouration Sterile filter (MELAquick 12+)
Every 4 weeks Check for soiling Insulating plug on the sterile filter
(MELAquick12+p)
As required Cleaning the surfaces Housing parts, sieve tray of the sterilization
chamber, external wastewater container
After 24 months or 3000
cycles
Maintenance by the authorised customer services working in
accordance with the maintenance instructions
Cleaning
NOTICE
Inappropriately performed cleaning can lead to the scratching of and damage to surfaces and the
development of leaks in sealing surfaces.
This also favours the development of soiling deposits and }corrosion in the }sterilization chamber.
n Comply with all information regarding cleaning of the part affected.
n Do not use any hard objects for cleaning such as a metal saucepan cleaner or a steel brush.
Door gasket and sterilization chamber
To maintain the value of your device and to avoid persistent soiling and deposits, MELAG recommends weekly cleaning
of the surfaces such as the sterilization chamber including the door gasket and wiping rubber (e.g. with the MELAG
chamber cleaning set).
The following must be fulfilled or present:
ü
The device has been switched off and the power plug has been unplugged from the socket.
ü
The device has been completely cooled.
ü
The sterilization chamber is empty.
1. Wet the surfaces to be cleaned completely with the cleaning fluid. PLEASE NOTE: You should not allow cleaning
fluid to enter the piping coming from the sterilization chamber.
2. Spread the cleaning fluid evenly with a non-fuzzing cloth.
3. Allow the cleaning fluid to act and evaporate for a sufficient time.
4. Using a new non-fuzzing cloth, spread ample amounts of demineralised water over the cleaned surfaces.
5. Wipe the surfaces thoroughly to remove cleaning residues. Repeat this process as necessary after wringing out the
cloth.
Ê Residues of cleaning fluids can ignite or cause deposits on the instruments.
6. Allow the cleaned areas to dry completely. This may take a few minutes.
7. Finally, wipe the cleaned surfaces with a dry, non-fuzzing microfibre cloth.
8. Clean the wiping rubber and the door seal using a commercially available, gentle liquid cleaning agent.