10 Maintenance
50
Avoiding staining
Only proper cleaning of the instruments prior to sterilization enables you to avoid residue from being released from the
load under steam pressure during sterilization. Loosened dirt residue can clog the filter, fittings and valves of the device
and deposit themselves on the instruments and in the sterilization chamber as deposits and stains.
All steam-conducting parts of the device consist of non-rusting material. This rules out the possibility of stain or rust
development being caused by the steam sterilizer. Any rust which develops is always extraneous rust.
Incorrect instrument reprocessing can result in the accretion of rust even on stainless steel instruments of leading manu-
facturers. Often, a single instrument which drops rust can suffice to cause the development of rust on other instruments
or in the device. Remove foreign rust from the instruments using chlorine-free stainless steel cleaning fluid (see Cleaning
[}page48]) or send the damaged instruments to the manufacturer.
The extent of stain accretion on the instruments is also dependant on the }feed water used for steam generation.
Replacing the door gasket
Replace the door gasket in good time if it shrinks, becomes very wavy or has cracks in the sealing lip. The consequence
can be leaks which can lead to the leakage of steam. Safe and successful sterilization may be impacted.
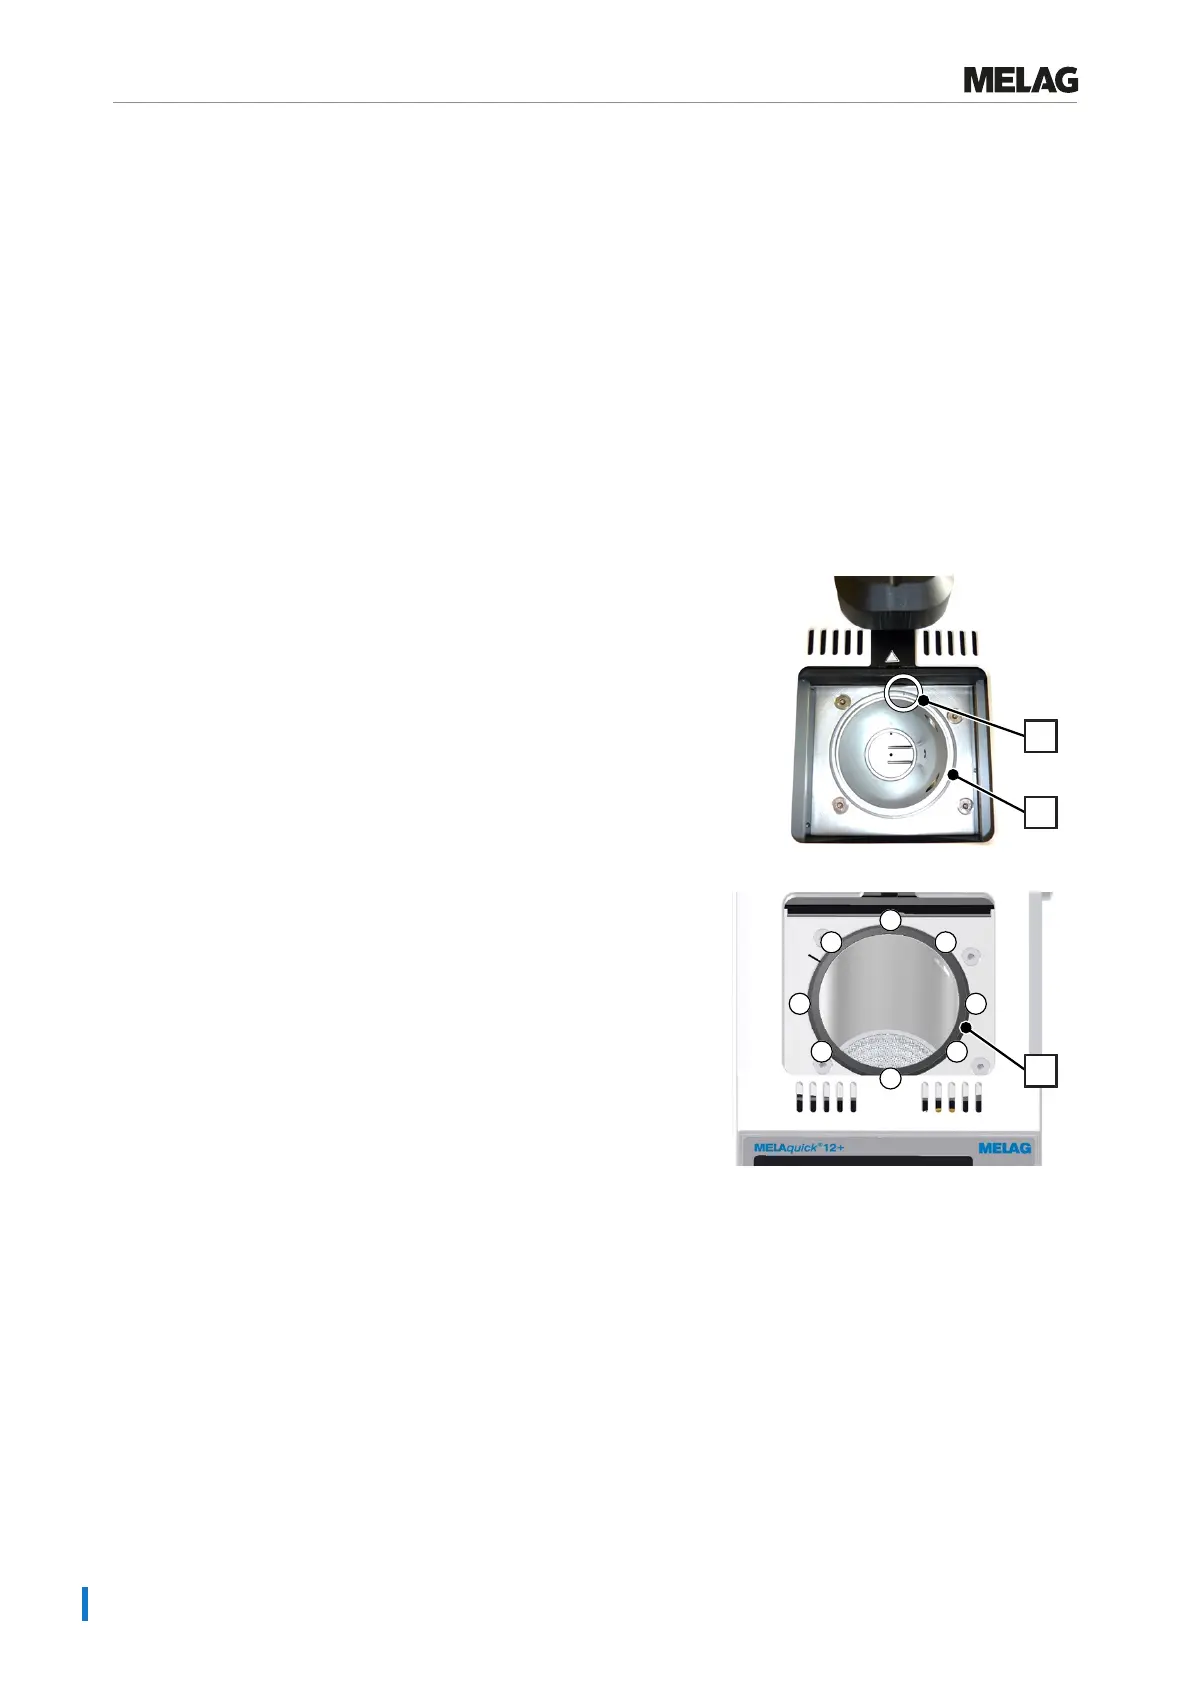
1. Remove the worn door gasket from the groove.
2. Check the groove (pos. b) for soiling and deposits.
3. If necessary, clean the groove with methylated spirit.
A ventilation hole (pos. a) is located in the base of the groove
(pos. b) in the chamber opening on the opposite side to the
operating panel through which the air underneath the gasket can
escape.
4. Spread a little washing-up liquid solution (1 part commercial
dishwashing detergent + 4 parts water) on the new door gasket
(pos. c) to make it easier to insert. NOTICE!Do not move the
door gasket in the groove.
5. Place the door gasket loosely on the groove and press it into the
groove at a point about 45° (position 1) offset from the ventilation
hole.
6. First press the door gasket into the groove on the opposite side
and then press it crosswise at points.
7. Press down the locations between these points already inserted
into the groove in a cross-wise fashion etc.
8. Finally, starting from position 5 on the left, press the door gasket
into the groove in short intervals working clockwise in the
direction of the ventilation hole.
9. Perform a trial run and then check the stability and position of the
door gasket. If necessary, press down any bulges with a blunt
instrument up to position 8 and then press the gasket into the
groove in this position as well.