■■■■■■■■■■■■■■■■■■■■■■
3 Installation
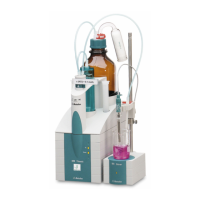
883 Basic IC plus
■■■■■■■■
9
3
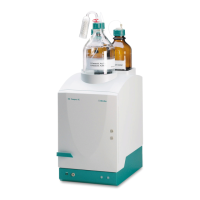
Installing the eluent path
■ Assemble the eluent aspiration tubing (6.1834.080) (3-1) and
connect it with the eluent bottle (see chapter 3.8, page 23).
■ Remove the stopper of connector 5 of the injection valve and
connect the column inlet capillary (6.1831.100) (3-2) using a PEEK
pressure screw (6.2744.014).
■ Connect the column inlet capillary (6.1831.100) (3-2) and the
capillary of the suppressor (3-4) labeled in to each other using a
coupling (6.2744.040) and 2 short pressure screws (6.2744.070).
The coupling is installed in the place of the separation column,
which may not be installed before the initial start-up.
■ Connect the capillary of the suppressor (3-5) labeled out and the
detector inlet capillary (3-6) to each other using a coupling
(6.2744.040) (3-18) and two short pressure screws (6.2744.070)
(3-15) (see "Connecting the detector input capillary to the sup-
pressor", page 44).
4
Installing the sample path
If you do not use a Sample Processor:
■ Guide the end of the sample aspiration capillary (3-19) out of the
instrument to the sample vessel and fasten it there.
■ Connect the end of the sample outlet capillary (3-20) from the
inside to the Luer connector of the door (6-1) using the PEEK
pressure screw (6.2744.070) (6-3). The sample can then be aspi-
rated from outside with a syringe.
If you use a Sample Processor:
■ Guide both capillary ends out of the instrument.
■ Connect the sample aspiration capillary with the Sample Processor
(see the manual for the Sample Processor).
■ Guide the sample outlet capillary into a waste container and fas-
ten it there.
5
Installing the peristaltic pump
(see chapter 3.14, page 38)
■ Connect the capillary (6.1803.020) used as aspiration capillary for
the regeneration solution (3-8) to the aspiration end of the pump
tubing (6.1826.320) (3-9) using a tubing olive (6.2744.034)
(3-16) and a short pressure screw (6.2744.070) (3-15). Shorten it
to the required length.
■ Place the pump tubing in a tubing cartridge.
■ Insert the tubing cartridge into the peristaltic pump.