LVS-95XX Series Barcode Quality Station Operations Manual
LVS-95XX Series Barcode Quality Station Operations Manual - English Page 61 of 94
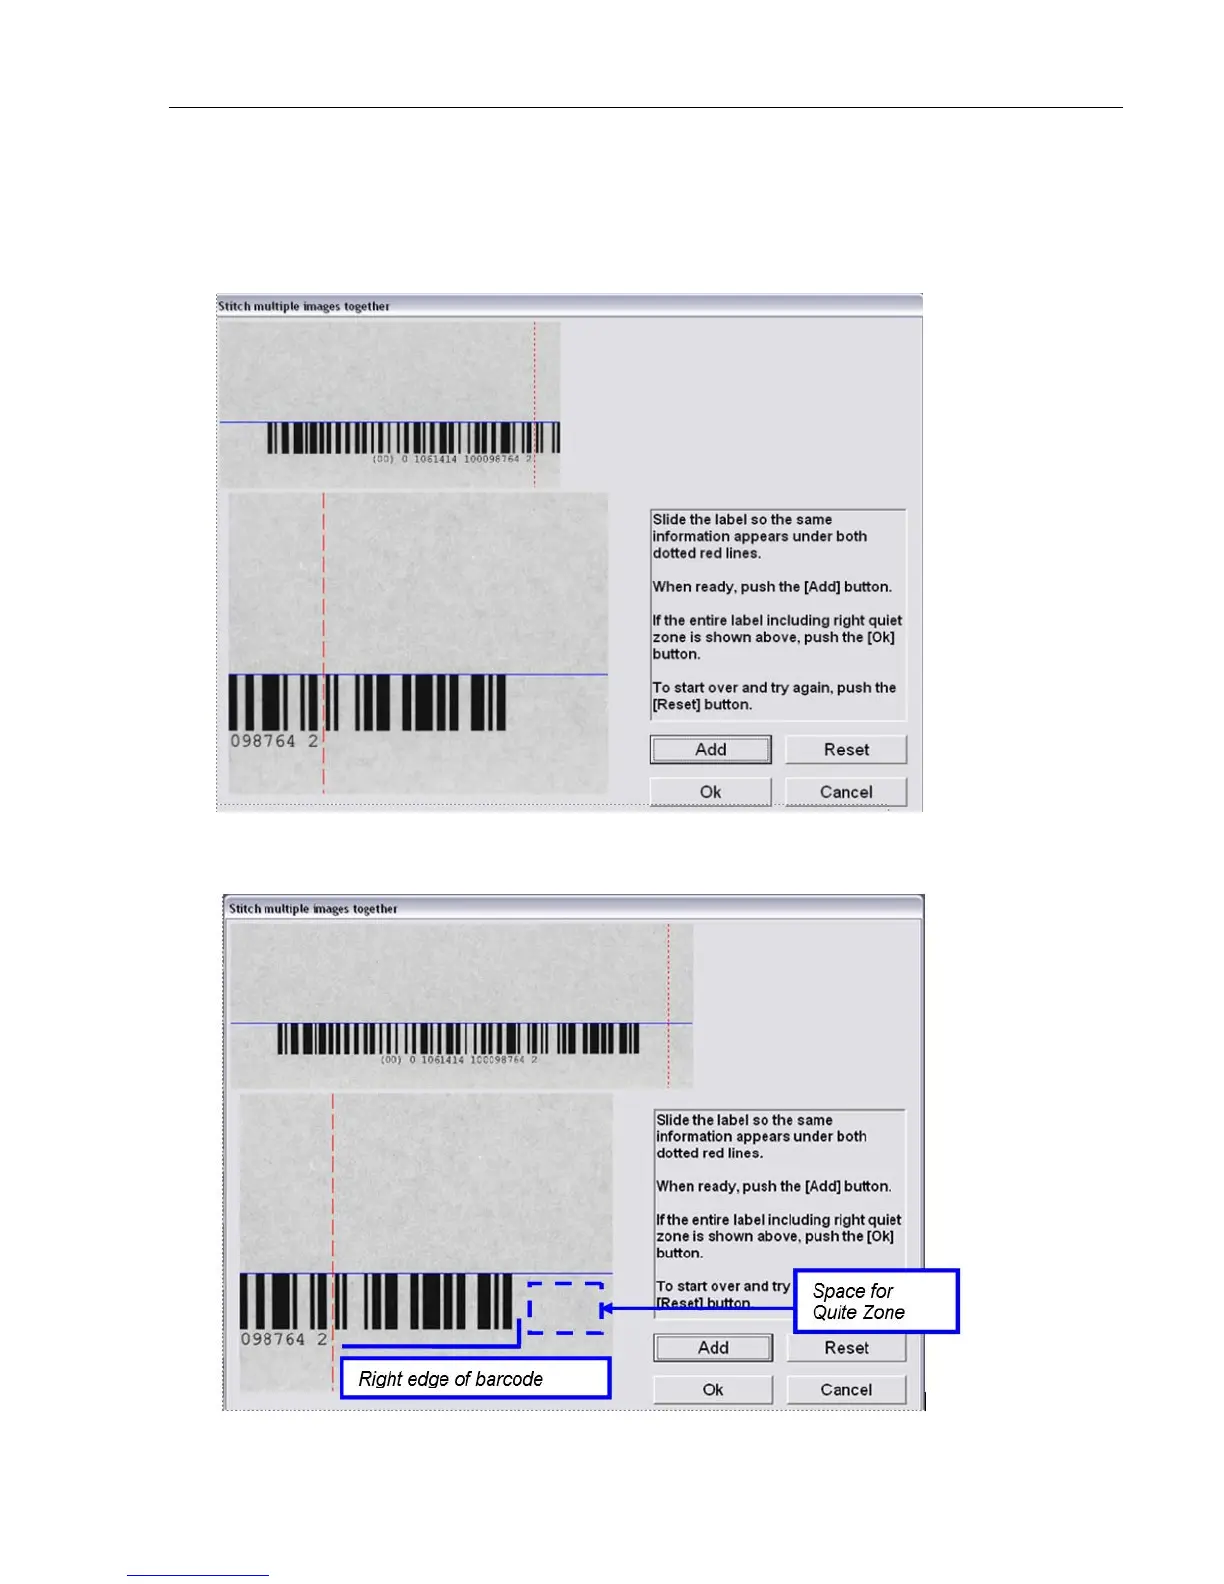
7. In the screenshot below, the label has been moved to its proper stitching position. Notice that the bottom
image is aligned to the red line in the same position as indicated in the stitched image. Also notice that
the bottom image barcode continues to be aligned perfectly to the blue line.
When done, press the “Add” button.
8. In the screenshot below, the right end of the barcode appears along with the appropriate space for a
quiet zone, indicating that no additional stitching is required. Press the “Ok” button.