2-10
About entering media remaining
amount
When you set [Media remaining amount display] to “ON”
( P.3-15), you are prompted to enter the media
remaining amount after completing the setting of the
Logical Seek.
1
When the setting of the Logical Seek is
completed, you are prompted to “Input
Media Length”.
• When you set “Media remaining amount display”
of the machine setting to “OFF”, this screen is not
displayed. ( P.3-15)
2
Press to enter the media
remaining amount.
3
Press the key.
Detecting media width when media
detection method is “MANUAL”
1
Press to select a media (roll or
leaf).
• The media detection screen appears.
2
Press to enter the number of
mounted media, and press the
key.
3
Press to enter the media right
end position, and press the key.
4
Press to enter the media
left end position, and press the
key.
• When the media detection is completed, the
screen of “Setting a roll media as described in
step 21 is displayed.
Follow the steps 22 and later.
Use the image quality confirmation
LED light to check the print
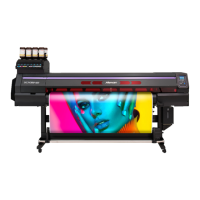
On the front of this unit, it has a quality confirmation LED
light to check the print by shedding the light from the back
side of the media (back light).
Before using the image quality
confirmation LED light
Use the image quality confirmation
LED light
Media Detect
Logical Seek
50.0m
Quality
Input Media Length
Media Detect
Set number of
MANUAL
1
Print Area
• Please ensure the power cable of the image
quality confirmation LED light is connected to the
AC outlet on the right side of machine.
• Make sure that the power switch of the image
quality confirmation LED light is ON.
You can adjust the light intensity of the image
quality confirmation LED light to suit the
position of the image to be printed.
• Two LED panels are available for image quality
confirmation: one on the right and the other on the
left.
• You can adjust the light intensity of each panel by
using the light intensity adjustment dial located on
the upper section of the panel. Because the light
intensity adjustment dial is provided on both the
right and left panels, you can separately adjust the
light intensity for the panels located on the right
and left.
DIMMER SW
DIMMER R
R
L
MIN
MAX
LED panel connection cable
By connecting the right and left of the LED panel,
supply the power to the left side of the panel.
Right side LED panelLeft side LED panel
LED lights change-over switch
Use this switch to select the light intensity
adjustment dial you want to use, either the one
on the left panel or the one on the right panel.
Light intensity adjustment dial
Adjust the amount of light on the LED light.

 Loading...


