EasyManua.ls Logo

Mindray BC-3000 Plus - User Manual

Mindray BC-3000 Plus
325 pages
Print Icon
To Next Page IconTo Next Page
Loading...
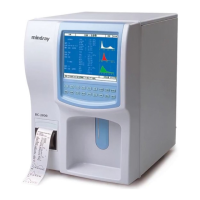
BC-3000 Plus
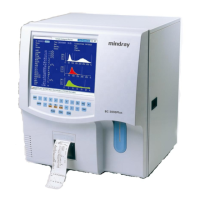
Auto Hematology Analyzer
Operation Manual

Table of Contents

Questions and Answers

  • V
    vhowardSep 1, 2025
    How to fix Lyse Expiry error on Mindray Measuring Instruments?
    • D
      Darrell RussellSep 1, 2025
      If the Mindray Measuring Instruments shows 'Lyse Expiry', it means the lyse is expired or the expiration setting is incorrect. Check if the lyse has expired. If so, change a new container of lyse. If not, reset the expiration date.
  • J
    James BarnesSep 2, 2025
    What to do if Mindray BC-3000 Plus shows Diluent Expiry?
    • K
      Karen MartinSep 2, 2025
      If the Mindray Measuring Instruments displays 'Diluent Expiry', it indicates that the diluent has expired or the expiration setting is wrong. Check if the diluent has expired, and if it has, change a new container of diluent. If not, reset the expiration date.
  • A
    Anthony DaltonSep 3, 2025
    How to resolve Rinse Expiry error on Mindray BC-3000 Plus?
    • L
      Lisa McmahonSep 3, 2025
      If the Mindray Measuring Instruments displays 'Rinse Expiry', it means the rinse is expired or the expiration setting is incorrect. Check if the rinse has expired, and if so, replace it with a new container of rinse. If not, reset the expiration date.
  • K
    Katrina KnightSep 3, 2025
    Why is my Mindray BC-3000 Plus Measuring Instruments printer offline?
    • W
      William GonzalezSep 3, 2025
      If the Mindray Measuring Instruments displays a 'Printer Offline' error, it indicates a poor connection between the printer and the analyzer. Check if the printer is well connected to the analyzer.
  • R
    rsmithSep 4, 2025
    What causes Barcode Com Error on Mindray BC-3000 Plus Measuring Instruments?
    • J
      Joshua PerezSep 4, 2025
      If the Mindray Measuring Instruments displays a 'Barcode Com Error', it indicates a poor connection between the scanner and the analyzer. Check if the analyzer is well connected to the scanner.
  • S
    susanwilliamsSep 5, 2025
    What to do if Mindray Measuring Instruments has liquid drips inside?
    • S
      Stephanie SantiagoSep 5, 2025
      If the Mindray Measuring Instruments experiences liquid drips from inside, it is likely due to a damaged pump hose or a blocked filter. Turn off the power and wipe the analyzer dry.
  • A
    amyjuarezSep 6, 2025
    What does Pressure 2 Low mean on Mindray BC-3000 Plus?
    • A
      Amy NewmanSep 6, 2025
      If the Mindray Measuring Instruments displays 'Pressure 2 Low', it means the pressure inside the pressure chamber does not reach the expected value within the given time. Enter the “Service ? System Test” screen and test the “Chamber Pressure”. The error will be removed if the test result is normal.
  • P
    Phillip ToddSep 7, 2025
    How to troubleshoot Vacuum Filter Error on Mindray BC-3000 Plus Measuring Instruments?
    • P
      patrick32Sep 7, 2025
      If the Mindray Measuring Instruments displays a 'Vacuum Filter Error', it means the air inside the vacuum chamber is not extracted within the given time. Enter the “Service ? System Test” screen and test the “Vacuum”. The error will be removed if the test result is normal. If the problem persists, change to a new filter.

Summary

1 Using This Manual

1.1 Introduction

Explains the purpose and content of the operation manual.

1.2 Who Should Read This Manual

Identifies the target audience for this manual.

1.3 How to Find Information

Guides users on how to locate specific information within the manual.

1.4 Conventions Used in This Manual

Explains typographical conventions used for clarity.

1.5 Special Terms Used in This Manual

Defines specific terms used throughout the manual.

1.6 Symbols

Explains symbols used in the manual and on the analyzer.

2 Understanding Your Analyzer

2.1 Introduction

Provides a general overview of the BC-3000 Plus analyzer.

2.2 Intended Use

Describes the purpose and applications of the analyzer in clinical laboratories.

2.3 User Interfaces

Details the front and back panel components and their functions.

2.4 Instrument Software

Explains the main screen layout and system menu options.

2.5 Reagents, Controls and Calibrators

Outlines the types of reagents, controls, and calibrators used with the analyzer.

4 Installing Your Analyzer

4.1 Introduction

Introduces the analyzer installation procedure.

4.2 Installation Requirements

Details space, power, and environmental requirements for installation.

4.3 Unpacking

Provides instructions for safely unpacking and inspecting the analyzer.

4.4 Installation Procedure

Guides through connecting components like reagent containers and probes.

4.5 Starting the Analyzer

Explains the initial startup and initialization process for the analyzer.

5 Customizing the Analyzer Software

5.2 Print

Describes how to configure printing options for reports.

5.3 Count time

Explains how to set reference times for WBC and RBC counts.

5.4 Password

Details user classification and administrator password settings.

5.5 Transmission

Covers communication settings for data transfer.

5.6 Setting system time (Date & Time)

Guides on setting the system's date and time.

5.7 Gain

Explains how to adjust gain settings for WBC, RBC, and HGB channels.

5.8 Auto Clean Time

Describes setting the interval for automatic fluidic line cleaning.

5.9 Reagent Exp. Date

Explains how to input and manage reagent expiration dates.

5.10 Report Title (external keyboard required)

Details setting custom titles for printed reports.

5.11 Parameter Units

Covers configuration of reporting units for various parameters.

5.12 Other

Covers miscellaneous system settings like beeper and LCD contrast.

6 Operating Your Analyzer

6.2 Initial Checks

Lists essential checks to perform before powering on the analyzer.

6.3 Power-on

Explains the procedure for turning on and initializing the analyzer.

6.4 Daily Quality Control

Emphasizes the importance of running daily quality control checks.

6.5 Sample Collection and Handling

Provides guidelines for proper sample collection and handling.

6.6 Running Whole Blood Samples

Details the steps for analyzing whole blood samples.

6.7 Running Prediluted Samples

Outlines the procedure for analyzing prediluted samples.

6.8 Shutdown

Describes the correct procedure for shutting down the analyzer daily.

7 Reviewing Sample Results

7.2 Browsing All Sample Results

Explains how to view saved sample results in table or histogram format.

7.3 Searching for Interested Sample Results

Guides users on how to search for specific sample results.

8 Using the QC Programs

8.2 “L-J Analysis” Program

Details the setup, running, and review of L-J analysis for QC.

8.3 “ X Analysis ” Program

Covers setup, running, and review of X Analysis for QC.

8.4 “ X -R Analysis” program

Explains setup, running, and review of X-R Analysis for QC.

8.5 “X-B Analysis” Program

Outlines setup, performing, and reviewing X-B Analysis for QC.

9 Using the Calibration Programs

9.2 When to calibrate

Specifies the conditions requiring analyzer calibration.

9.3 How to Calibrate

Details the procedures for auto and manual calibration.

10 Maintaining Your Analyzer

10.2 General Guidelines

Provides a schedule and overview of routine analyzer maintenance.

10.3 Using the “Maintenance” Program

Explains how to access and use various maintenance functions.

10.4 Using the “System Status” Program

Describes how to check the analyzer's functional status.

10.5 Using the “Valve Test” Program

Details how to test the analyzer's valves for malfunctions.

10.6 Using the “System Test” Program

Guides through running system tests for diagnostics.

10.7 Using the “Prepare to ship” Program

Provides instructions for preparing the analyzer for storage or shipping.

10.8 Using the “Error Message” Program

Explains how to view and interpret stored error messages.

10.9 Calibrating Sample Probe Position

Details the procedure for adjusting the sample probe position.

10.10 Replacing the Probe Wipe.

Provides instructions for replacing the probe wipe.

10.11 Replacing the Filter of the Vacuum Chamber

Guides on replacing the vacuum chamber filter.

10.12 Using the [Flush] key

Explains the use of the flush key for unclogging apertures.

10.13 Using the [Startup] key

Describes the function of the startup key for fluidic lines.

11 Troubleshooting Your Analyzer

11.2 Errors without available error messages

Lists common errors and their solutions not indicated by error messages.

11.3 Errors indicated by error messages

Details error messages, causes, and recommended actions for various issues.

12 Appendices

A Index

Provides an alphabetical index of terms and their corresponding page numbers.

B Specifications

Provides technical specifications for the analyzer and its components.

C Precautions, Limitations and Hazards

Lists important safety precautions, limitations, and potential hazards.

D Communication

Details data transmission methods and formats for external communication.

Mindray BC-3000 Plus Specifications

General IconGeneral
TypeAutomated Hematology Analyzer
CategoryMeasuring Instruments
Power SupplyAC 100-240V, 50/60Hz
PrinterBuilt-in thermal printer
ReagentsDiluent, Lyse, Cleaner
HGB Measurement Range0-300 g/L
Throughput60 samples per hour
DisplayLCD display
InterfaceRS232
PrinciplesElectrical impedance for cell counting
WBC Counting Range0.0-99.9 x 10^9/L
RBC Counting Range0.00-9.99 x 10^12/L
PLT Counting Range0 - 999 x 10^9/L
Operating EnvironmentTemperature: 15-30°C, Humidity: 30-85%
ParametersWBC, RBC, HGB, HCT, MCV, MCH, MCHC, PLT

Related product manuals