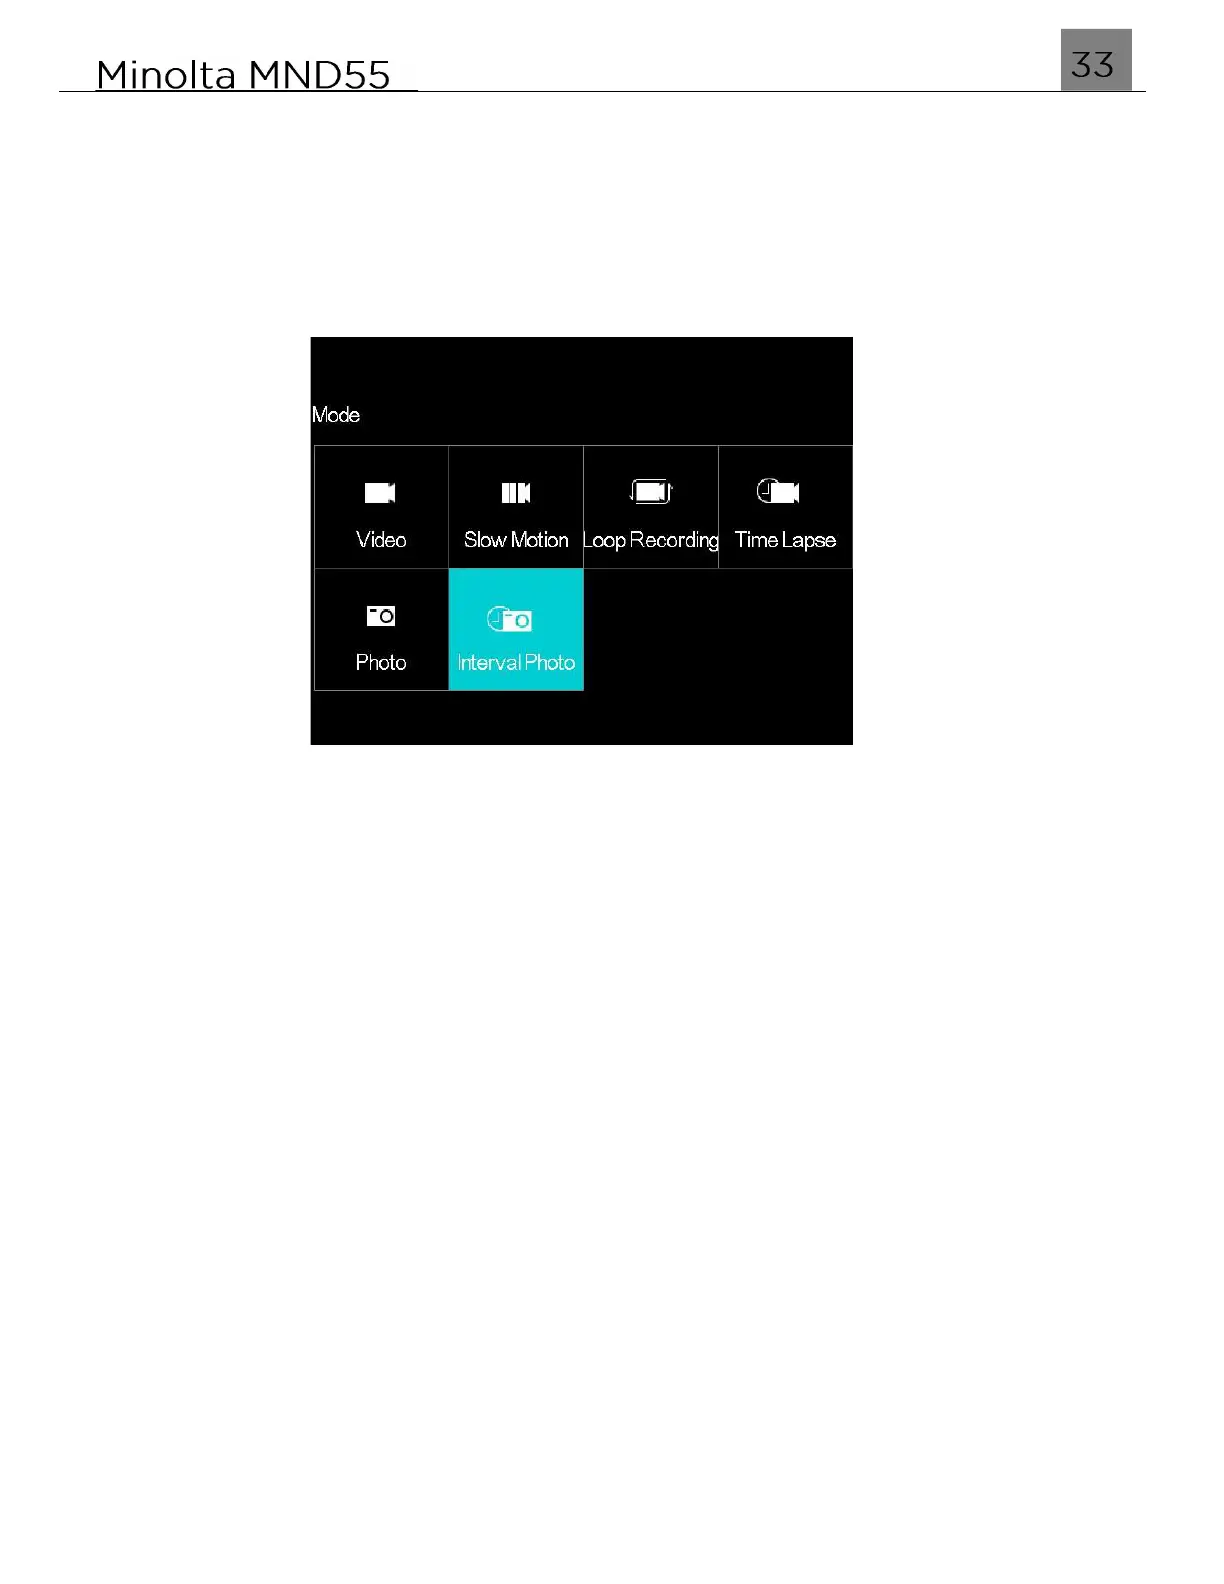
3.2 Interval Photo Capture Mode & Settings Menu
Interval Photo mode will allow the camera to automatically capture a single photo at a
set interval until stopped.
To enter Interval Photo mode, power the camera on and press the MODE/OK button.
Use the LEFT or RIGHT buttons to select Interval Photo and press the MODE/OK
button to enter the Interval Photo Mode.
1.
Line up your shot by looking at the LCD screen to see what is in the shot.
2.
Press the SHUTTER button halfway to focus on the subject. When the focus frame
turns green, press the SHUTTER button down completely to capture the photo.
3.
When half-pressing the SHUTTER button, the lens will attempt to focus on your
intended subject. Once a satisfactory focus is achieved, the monitor will display a
green rectangle to notify you that it has a achieved a clear focus. You may then fully
press the SHUTTER button to the capture the photo. If the monitor displays a red
rectangle, then the lens cannot achieve a clear focus and you need to adjust your
shooting distance or the photo will capture blurry.
4.
At the end of each countdown, a new photo will be captured, each captured photo will
be saved as an individual file.
5.
To end the interval photo, press the SHUTTER button.
6.
The number of photos that can be captured at a particular resolution will be displayed
in the top right corner of the screen.
7.
The number of remaining photos is determined by the selected photo resolution. The
higher the photo resolution, the lower the number of photos you are able to be save to
the memory card. Before capturing any photos, you can select a preferred photo
resolution.
3.2.1 Photo Resolution
This function sets the photo resolution. The higher the resolution, the greater the photo
quality and the larger the file size of the photo.
1.
In Interval Photo Mode press the MENU button.
2.
Select the Camera icon on the top of the left side of the screen using the UP or
DOWN buttons.
3.
Press the RIGHT button to enter the settings menu.