Chapter 3 Software And Hardware Installation 3-3
Bar Code Printer Driver Installation
Refer to the CD provided
by Mirae Industries Inc.,
or the one provided by the
printer maker.
Connect the
printer to the
parallel port and
then install the
driver.
The following
procedure is
based on
Windows 2000
Professional
version.
1. Open
Explorer -
>Control
Panel ->
Printer folder,
and click
“Add Printer”.
2. The start window of "Printer Add Wizard" appears. Then, click
'Next'.
3. “Local or Network Printer” window of "Printer Add Wizard"
appears.
Select ”Local Printer” button, and click 'Next'.
4. “Select Printer Port” window of "Printer Add Wizard" appears.
Select the port to which the printer is connected, and click ‘Next’.
5. The window to select a printer type in "Printer Add Wizard"
appears.
Select Disk Exists, and click ‘Next’.
6. "Install from Disk" window appears. Select the directory where
the driver file is stored, and click 'OK '. Lastly, you shall select
the directory [file] corresponding to the installed OS.
The printer name can be
normally recognized
when it is set either as
[SATO CT400] or as
[ELTRON TLP2742].
7. Select the
type of the
connected
printer in
"Printer Add
Wizard" and
click ‘Next’.
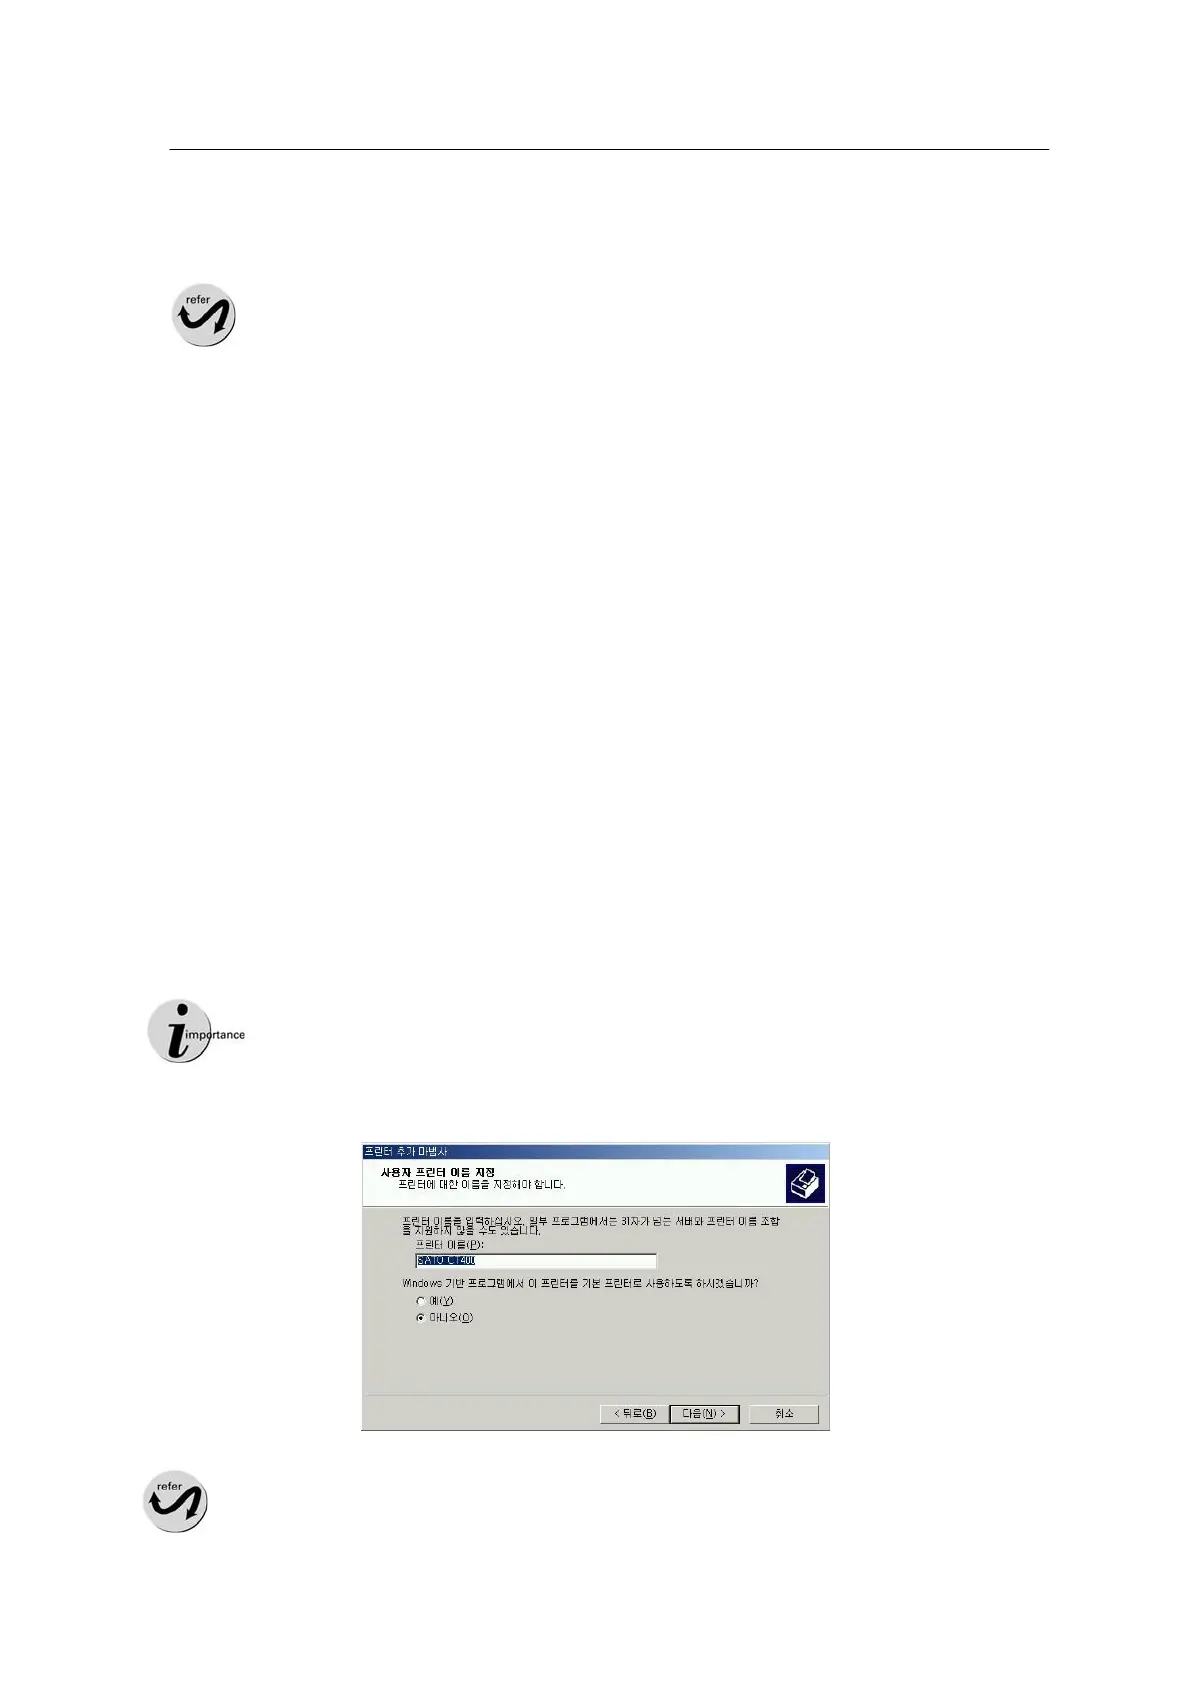
8. "Specify User Printer Name" window appears. Enter the printer
name, and click ‘Next’.
The printer name should be set as a compatible printer name, either
[SATO CT400] or [ELTRON TLP2742].