12-42 Simple inspection and service
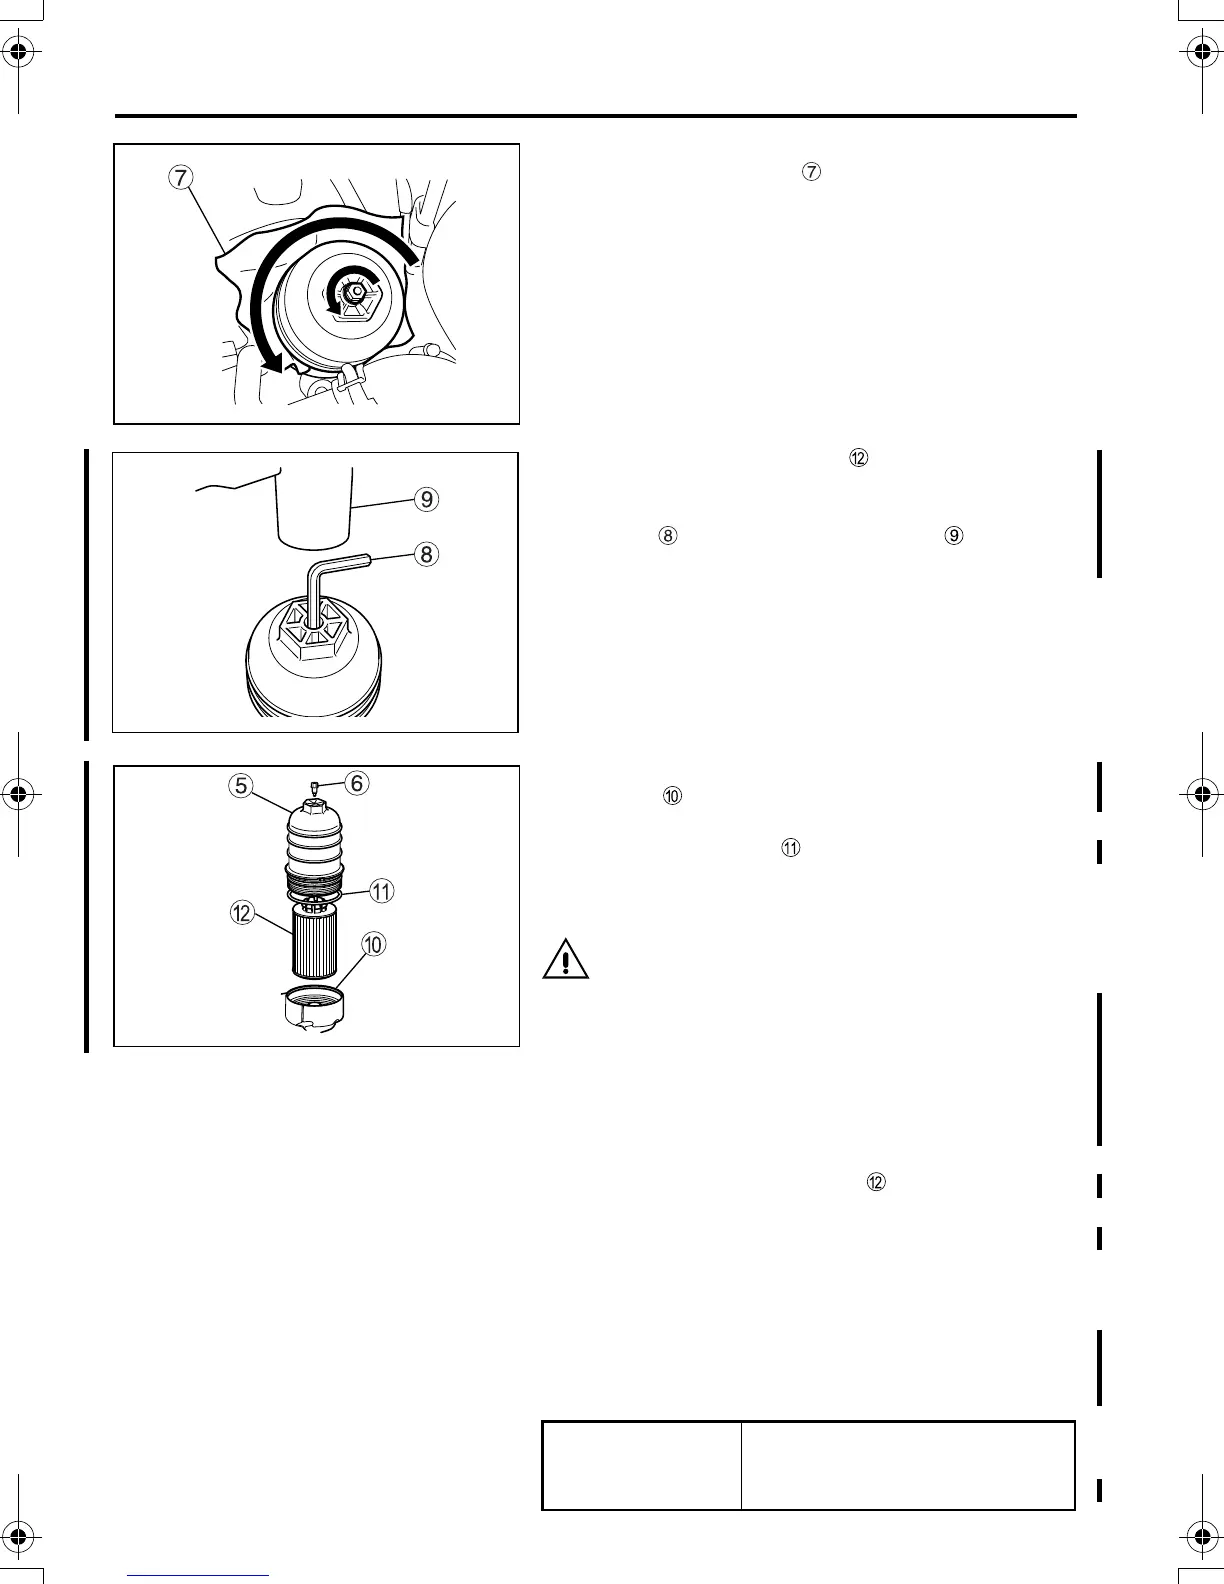
6. Remove the oil filter case by turning it counter-
clockwise. Use a rag to prevent oil from drip-
ping down.
7. Remove the filter element from the filter case.
If the claw of the filter element is too firmly
engaged to remove the element, insert an Allen
wrench and tap it with a hammer to remove
the element.
8. Clean the O-ring contact surface of the oil filter
support and the O-ring groove of the oil filter
case.
9. Replace the O-ring of the oil filter case with a
new one. Apply a light coat of engine oil to the
new O-ring before installing it.
CAUTION
• Use only the O-ring supplied with a new
replacement filter element.
• Do not tighten the air plug and filter case
beyond the specified torque. The air plug
and filter case could be broken if over-tight-
ened.
10. Replace the filter element with a new one;
use only a genuine filter element.
11. Install the new filter element with its holed end
facing down. Insert the holed end of the filter
element snugly into the groove inside the oil fil-
ter support.
12. Install the air plug to the oil filter case.
Use a new air bleeder plug provided with a new
element.
Tightening
torque
1.5 ± 0.6 N·m
(1.1 ± 0.4 ft.lbs.,
0.15 ± 0.06 kgf·m)
Z21175
Z22308
Z21178
FE_FG.book Page 42 Monday, December 19, 2011 4:22 PM

 Loading...