12
No. 99MBC139A
2 Setup
2.2 Linear Gage Connection
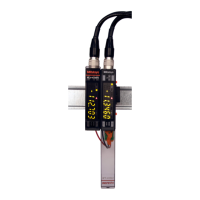
Connecting a Linear Gage to the EJ Counter.
1
Remove the protective cover from the EJ Counter's Linear Gage connector.
2
Plug the connector on the Linear Gage into the Linear Gage connector on the EJ Counter.
Align the key on the connector of the Linear Gage with the slot in the Linear Gage connector on the EJ
Counter, and then press the connectors together until they click into place.
Key slots (5) for plug alignment
End of the connector of
Linear Gage
3
When disconnecting a Linear Gage, slide the lock cover on the connector of the Linear Gage in
the direction away from the EJ Counter, and then pull to disconnect the connectors.
• Do not forcibly pull the connectors apart, as doing so could destroy the Linear Gage.
• When connecting only a single Linear Gage, leave the protective cover in place on the connector that is not
used. Leaving the connectors uncovered could result in introduction of noise, accumulation of contaminants
on the terminals, or damage to the EJ Counter.
• BeforeconnectingordisconnectingtheLinearGage,besuretoshutothepower.Failuretoobservethis
precaution may result in damage.
• Fasten the Linear Gage so that it does not put any strain on the EJ Counter. See the Linear Gage User's
Manual for the connection procedure.
Tips
• When connecting only a single Linear Gage, set Parameter Number 03 to 6 or 7. For details about Parameter
Number 03, see "■Advancedparameters"onpage34.
• For details on Linear Gages that can be connected to this product, see "1.3 Supported Linear Gages" on page 3.
 Loading...