No. 99MBA091A
3-2
3.3 Confirming the Filament Position of the Halogen
Illuminator
No centering a bulb is needed after replacing it. Confirm that the bulb is installed to the
socket correctly.
(For information about replacing the bulb, refer to 4.3.1 “Replacing halogen bulbs”)
3.3.1 Confirming the filament position of the halogen vertical reflected illuminator
① Mount a low-magnification objective.
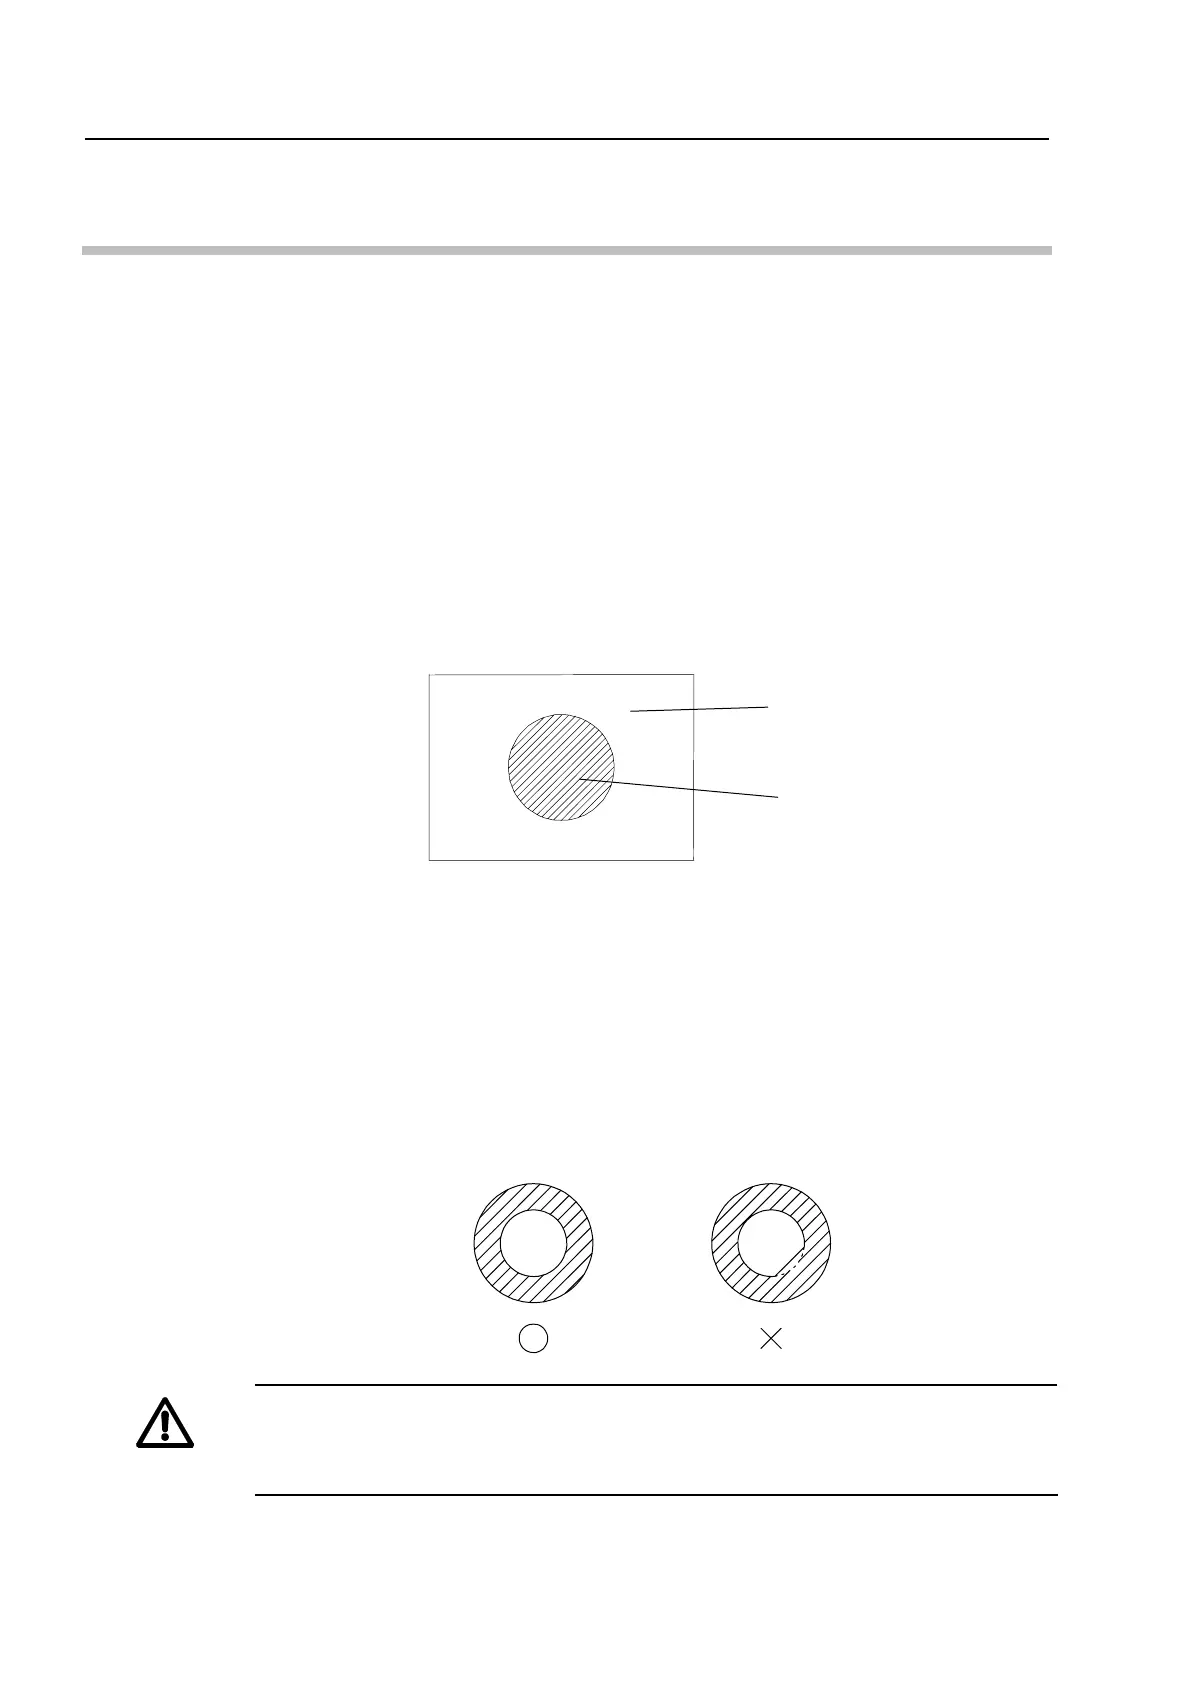
② Place a white paper on the stage.
③ Turn the light on by turning the vertical reflected illumination knob.
④ Bring the eyepiece into focus
⑤ Confirm that the illumination on the white paper is circle.
⑥ If the illuminated circle is not round or uniform intensity, the bulb is not installed
correctly. Turn the power switch off, and insert the bulb all the way until it reaches the
end of the socket after the bulb becomes cool.
3.3.2 Confirming the filament position of the halogen transmitted illuminator
① Mount a low-magnification objective.
② Turn the light on by turning the transmitted illumination knob.
③ Fully open the aperture diaphragm for transmitted illumination.
④ Remove the eyepiece to look into the objective from the optical tube.
⑤ Confirm that the illumination projected on the objective is circle.
⑥ If the illuminated circle is not round or uniform intensity, the bulb is not installed
correctly. Turn the power switch off, and insert the bulb all the way until it reaches the
end of the socket after the bulb becomes cool.
CAUTION
Right after the light is turned off, the bulb and its peripheral part are very hot.
When cool enough to handle, replace the bulb carefully. (Wait for about 30 minutes
as a guide.)
White paper
Illuminated circle
 Loading...