6. Specifications
No. 99MBA091A
6-11
6.7.4 Connecting Micropak
It is necessary to perform the Micropak 9 / 7 / 5 setting when connecting the Micropak to the
counter unit.
For information about setting up Micropak 9 / 7 / 5, refer to the Micropak user’s manual.
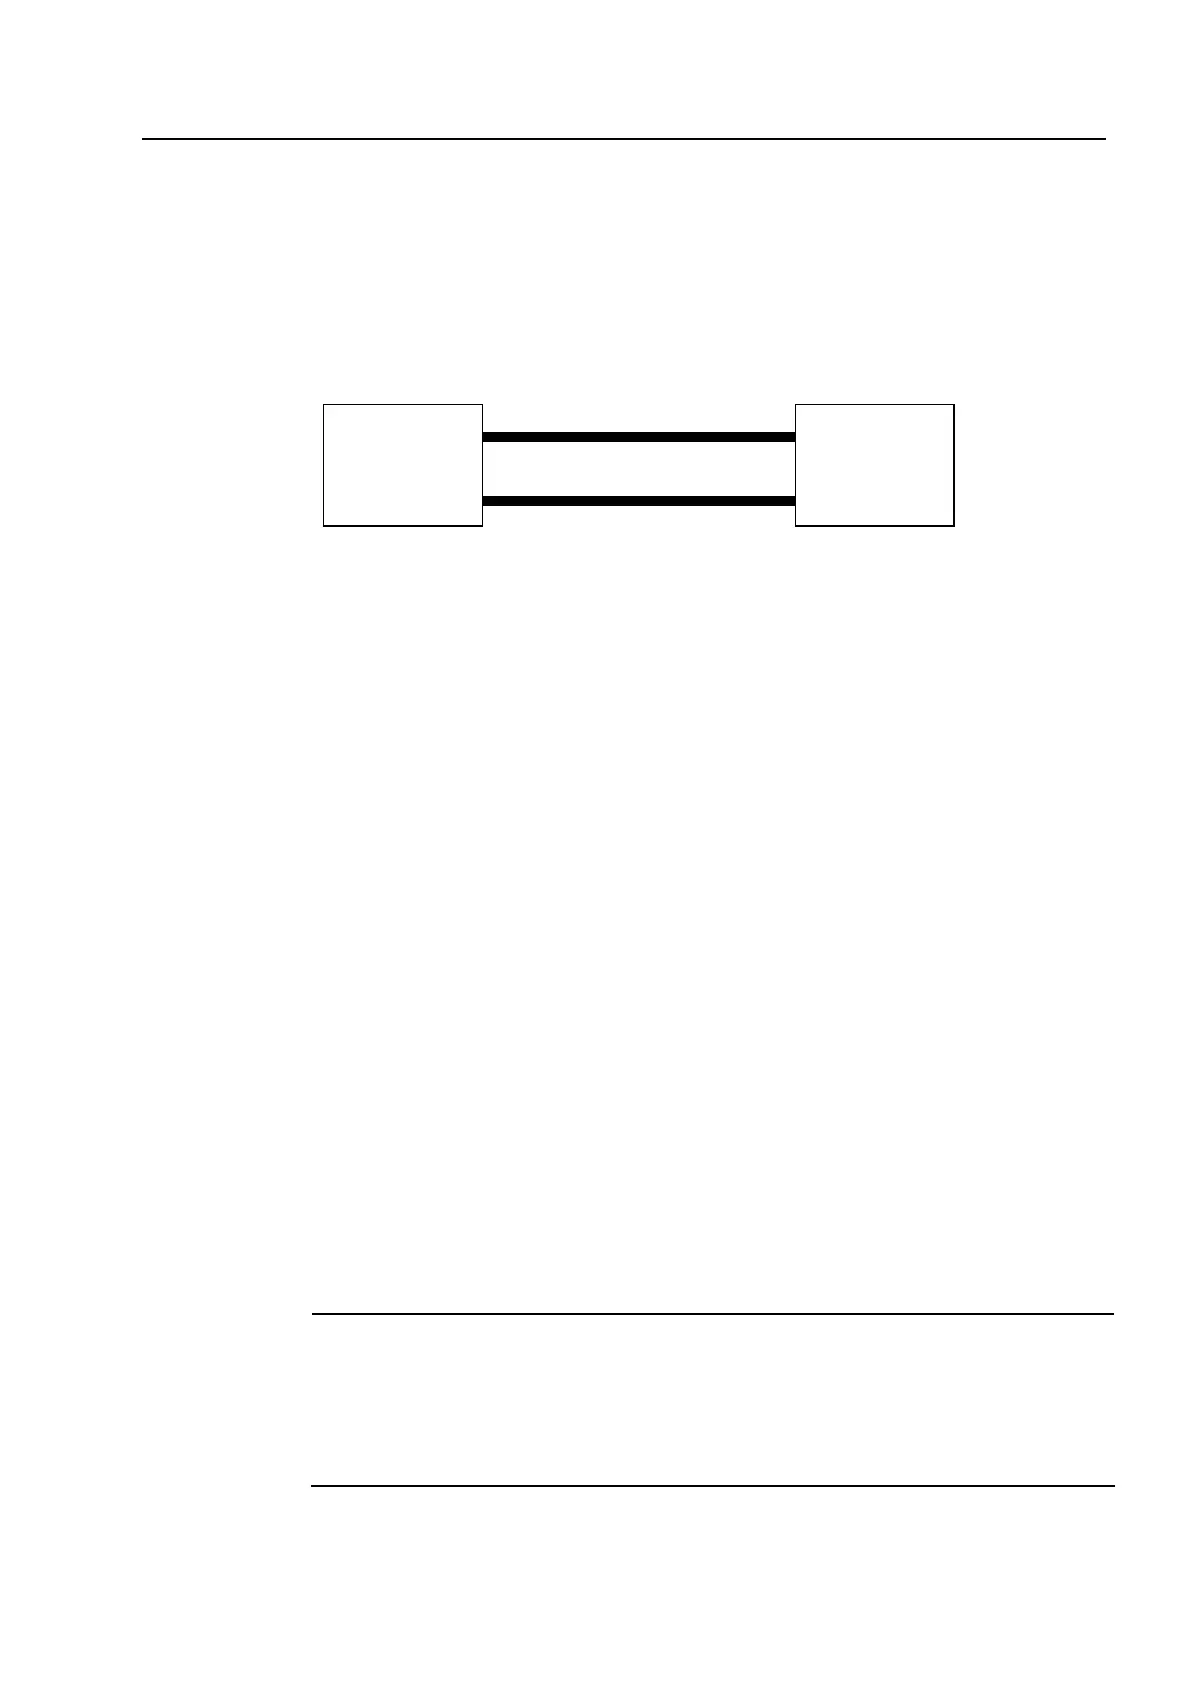
(1) Connection
(2) Micropak 9 setup
① Set Equipment-->Counter-->Baud Rate-->9600 bps
② Set Equipment-->Counter-->X-axis Counter-->RS-232C Connection
Y-axis Counter-->RS-232C Connection
Z-axis Counter-->RS-232C Connection
③ Set Equipment-->Counter-->Counter connected-->MF
④ Set Conditions-->Measuring Rang-->X Y Z
(3) Micropak 7 setup
① Set Equipment-->Counter-->Baud Rate-->9600 bps
② Set Equipment-->Counter-->X-axis Counter-->RS-232C Connection
Y-axis Counter-->RS-232C Connection
Z-axis Counter-->RS-232C Connection
③ Set Equipment-->Counter-->Counter connected-->Others-->Counter(100ms)
④ Set Conditions-->Measuring Rang-->X Y Z
(4) Micropak 5 setup
Set the Dip switch DPS1 and DPS2 according to the following.
① DPS1 No.1:ON,No.2:OFF,No.3:OFF,No.4:OFF 4800 bps
② DPS2 No.5:ON,No.6:OFF
Modify also the parameter setup of the counter simultaneously.(Set "4800bPS" at the
parameter number F07-1 according to "1.2.4.1 About parameters".)
NOTE
To connect the counter to Micropak 5, unless the default setting are modified, the
counter cannot be connected to Micropak 5. (Because MPK-5 does not accept the
Z-axis data.)Modify also the parameter setup of the counter so that Z-axis output may
not be performed.(Set "2 AS" at the parameter number F08 according to "1.2.4.1
About parameters".)
EXT.LOAD
SERIAL
EXT.LOAD
INPUT
Counter unit
MPK-9/7/5 mkⅡ
Order No.937998
External load cable
Order No.12AAA202
Connecting cable
(Set No.12AAA500 for two pieces of above mentioned cable)
 Loading...