3-5
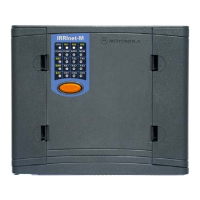
3.3 Front Panel Display Controls and Connectors
3.3.1 LED Display
A matrix of 5 x 4 LED’s is used for diagnostics and testing of both the CPU and I/O
modules (See Figure 3-3). The upper row indicates to which module the LED matrix
corresponds as detailed below:
• CPU - CPU Module
• M1 - I/O Module 1
• M2 - I/O Module 2
• M3 - I/O Module 3
The blue numbers (1 to 16) on the LED panel are I/O indications. Refer to the appropriate
I/O module section for details on these LEDs.
CPU M1 M2 M3
LOAD
1
CONF
5
APPL
9
MON
13
RST
2
Tx1
6
Tx2
10
Tx3
14
ERR
3
Rx1
7
Rx2
11
Rx3
15
BAT
4
CM1
8
CM2
12
CM3
16
Figure 3-3 CPU LED Display
3.3.2 Front Panel Controls
To start and reset the CPU Module, turn the Main Power Supply switch off and then on
again.
The pushbutton is used for the following operations:
• Activate the LED Display Panel.
• Toggle the LED panel to display the status of the CPU or one of the I/O modules.
• Initiate software downloading to the CPU.
• Erase user flash memory.
Table 3-2 describes the status or diagnostic indication of the LED Matrix Display for the
CPU module (i.e., upper left corner CPU LED on):
CPU Statues Messages
P.B.
 Loading...