9-10
“Confidential, Do Not Duplicate without written authorization from NEC.”
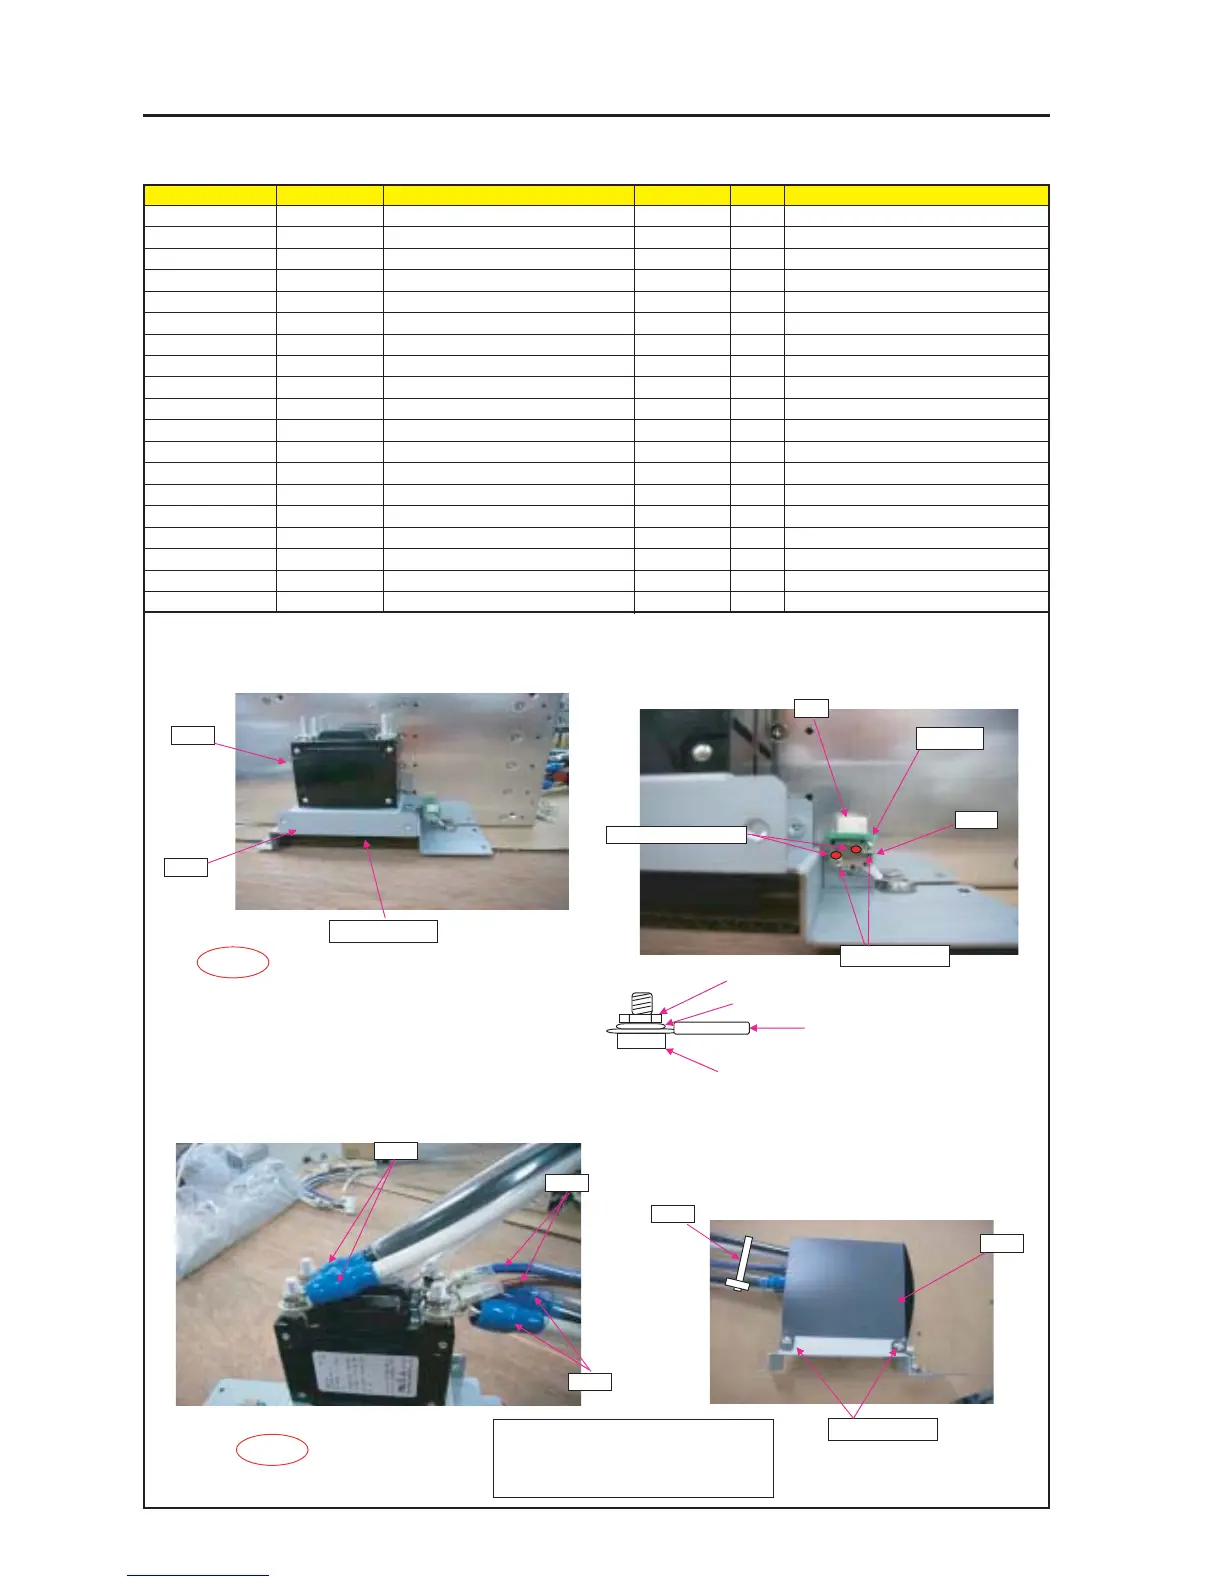
ASSEMBLY DIAGRAM
Diagram symbol Circuit symbol Part name Part code Q’ty Remarks
PRT1 IELHK-1-11-61-50A 6N500018 1 Amperage rating 50A
SRW139 PL-CPIMS*3*6*3KF 24V00571 4 Torque check
PRT2 BRACKET(TAMPER)A 24H60411 1
PWB1 ETC3_PWB PWB ASSY 81N94Z01 1
SRW143 CBIMS*2*8*3GF 24V01031 2 Torque check
PRT3 HOLDING PLATE(TAMPER PWB) 24H61171 1
T3 CN3P(T3)550W,1061-26 7NW3W091 1
SW CN2P(SW)575W,1283-8 7NN2N007 1
NF CN2P(NF)575W,1015-12 7NN2N006 2
PRT4 BARRIER(SW) 24J34851 1
SRW089 SCREW,PL-CPIMS*3*8*3GF 24V00111 4 Torque check
PRT5 BAND(L=100,T18R) 24C09121 2
GLUE,SCREW LOCK 92201082
SW
PRT1
PRT2
1 Mount the CIRCUIT PROTECTOR (6N500018) on the
BRACKET(TAMPER)A.
3 Attach the CABLE on the CIRCUIT BREAKER ASSY.
5 Attache BARRIER(SW) on BRACKET(TAMPER)A.
4 CABLE attaches using the SPRING WASHER & NUT as an attachment of CIRCUIT BREAKER.
(Attach the round type terminal → Spring Washer → Hexagonal Nut in order.)
2 Mount TAMPER PWB on the BRACKET(TAMPER)A.
SRW139 x4p
PWB1
SRW143 x2p
SAFETY
* Check Amperage Rating 50A
T3
* Insert "T3".
PRT3
SW
NF
PRT4
* Match the CABLE color with collinear circuit.
SRW089 X4p
NF
* Bundle together the CABLE SW and NF with
the BAND, and cut excess off.
PRT5
Take out a NUT from CIRCUIT PROTECTOR,
and tighten it up.
4 places
Tighten Torque : Torque : 32±2kgf•cm
Circuit Protector
Cable
Spring Washer
Hexagonal Nut
GLUE,SCREW LOCK
SAFETY