9-67
“Confidential, Do Not Duplicate without written authorization from NEC.”
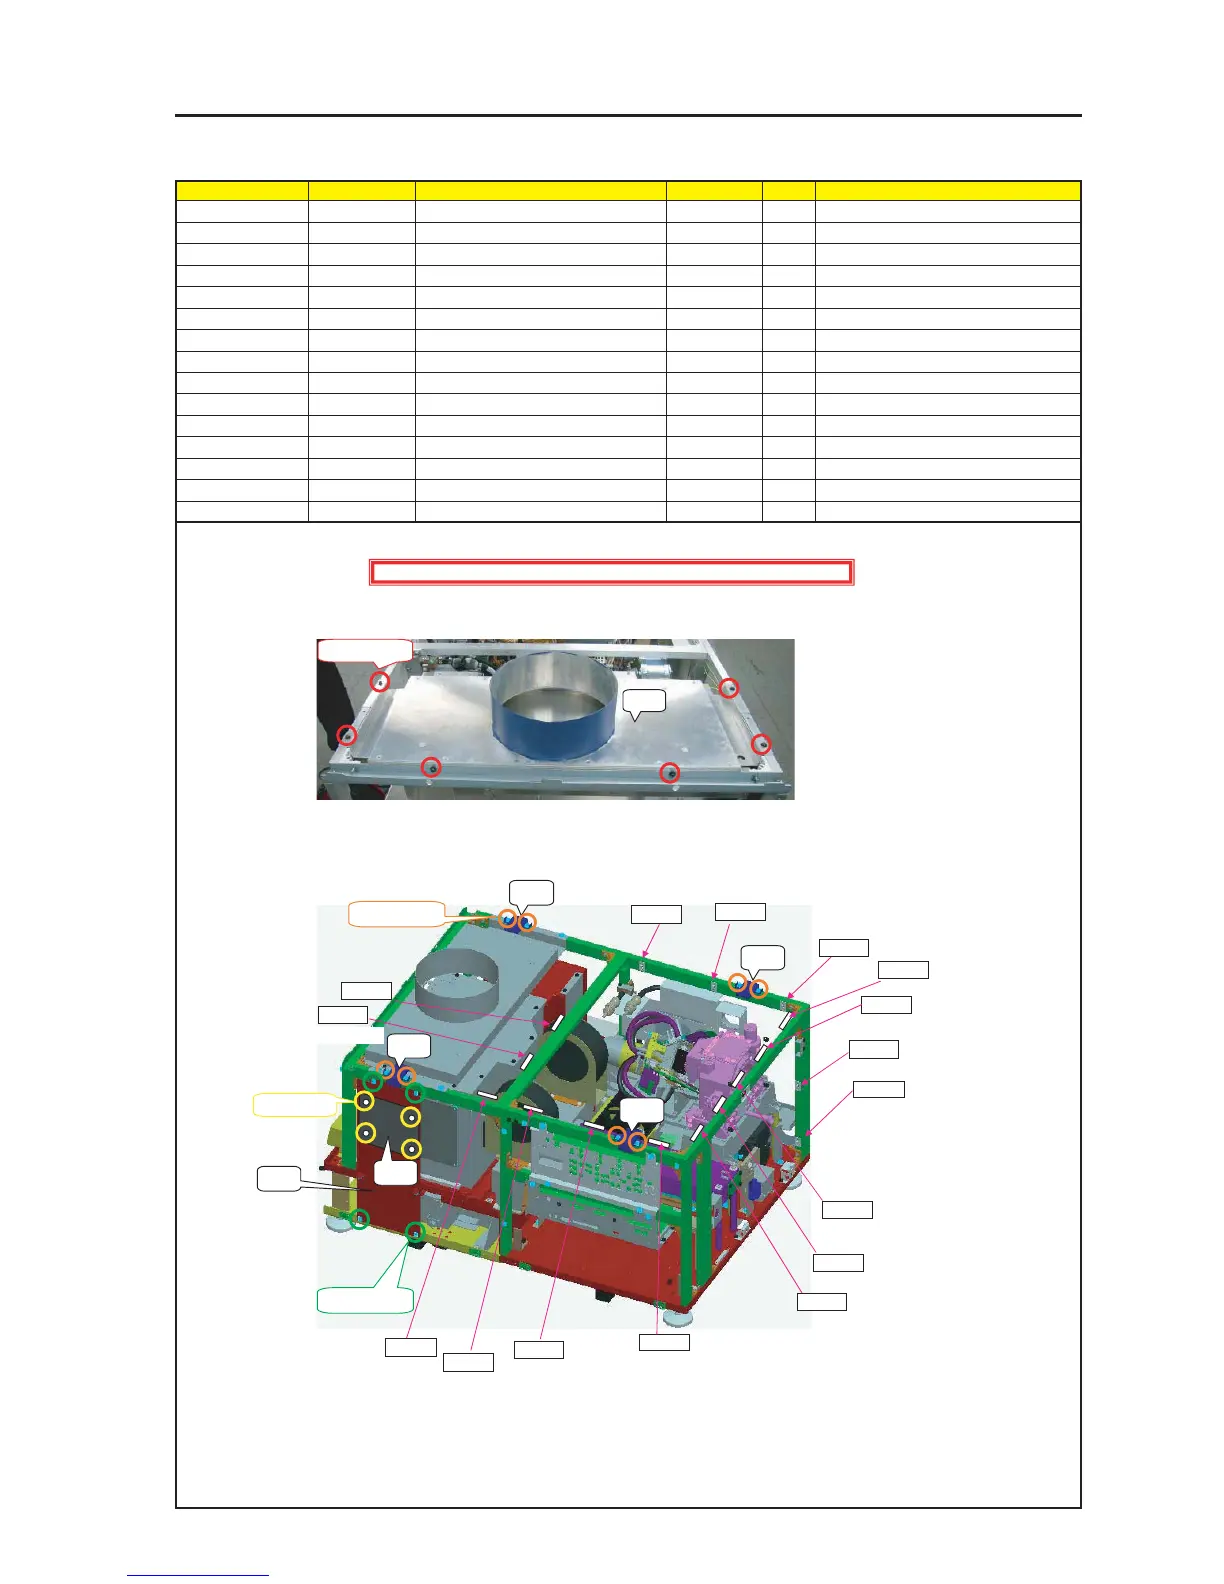
ASSEMBLY DIAGRAM
MT Duct Top
Diagram symbol Circuit symbol Part name Part code Q’ty Remarks
PRT1 DUCT(TOP)ASSY 24PS5331 1
SRW105 PL-CPIMS*4*10*3KF 24V00461 4
PRT2 BRACKET T 24P04591 4
SRW091 PL-CPIMS*4*10*3KF 24V00461 8
PRT3 INSULATION PLATE A 24J34831 1
SRW087 PL-CPIMS*4*10*3KF 24V00461 4
PRT4 INSULATION PLATE B 24J34841 1
PRT5 PUSH RIVET(NRP460) 24C08461 4
PRT6 CABLE CLIP(FCA-10) 24C02841 16
1 Install the Duct (Top) Assy.
2 Install the Bracket T and the Insulation Plate A.
3 Fix the Insulation Panel B to the Insulation Plate A by means of the Push Rivets.
Install the external parts.
PRT1
SRW105 X 6P
SRW091 X 8P
PRT2
PRT2
PRT2
PRT2
SRW087 X 4P
PRT3
Caution : External parts shall be handled carefully so that they are not damaged.
PRT5 X 4P
PRT4
PRT6
PRT6
PRT6
PRT6
PRT6
10 ~ 20mm from the end
10 ~ 20mm from the end
10 ~ 20mm from the end
10 ~ 20mm from the end
10 ~ 20mm from the end
10 ~ 20mm from the end
10 ~ 20mm from the end
Almost in the center
Almost in the center
Almost in the center
PRT6
Side position of
the bimetal
PRT6
Almost in the center between
end and CABLE CLIP
PRT6
PRT6
Almost in the center
of the lens
PRT6
PRT6
PRT6
10 ~ 20mm from the side of the
TI Shield Case Sassy (left side)
10 ~ 20mm from the side of the
TI Shield Case Sassy (right side)
PRT6
PRT6
PRT6
PRT6