SECTION 2
INSTALLING THE PRINTER
18
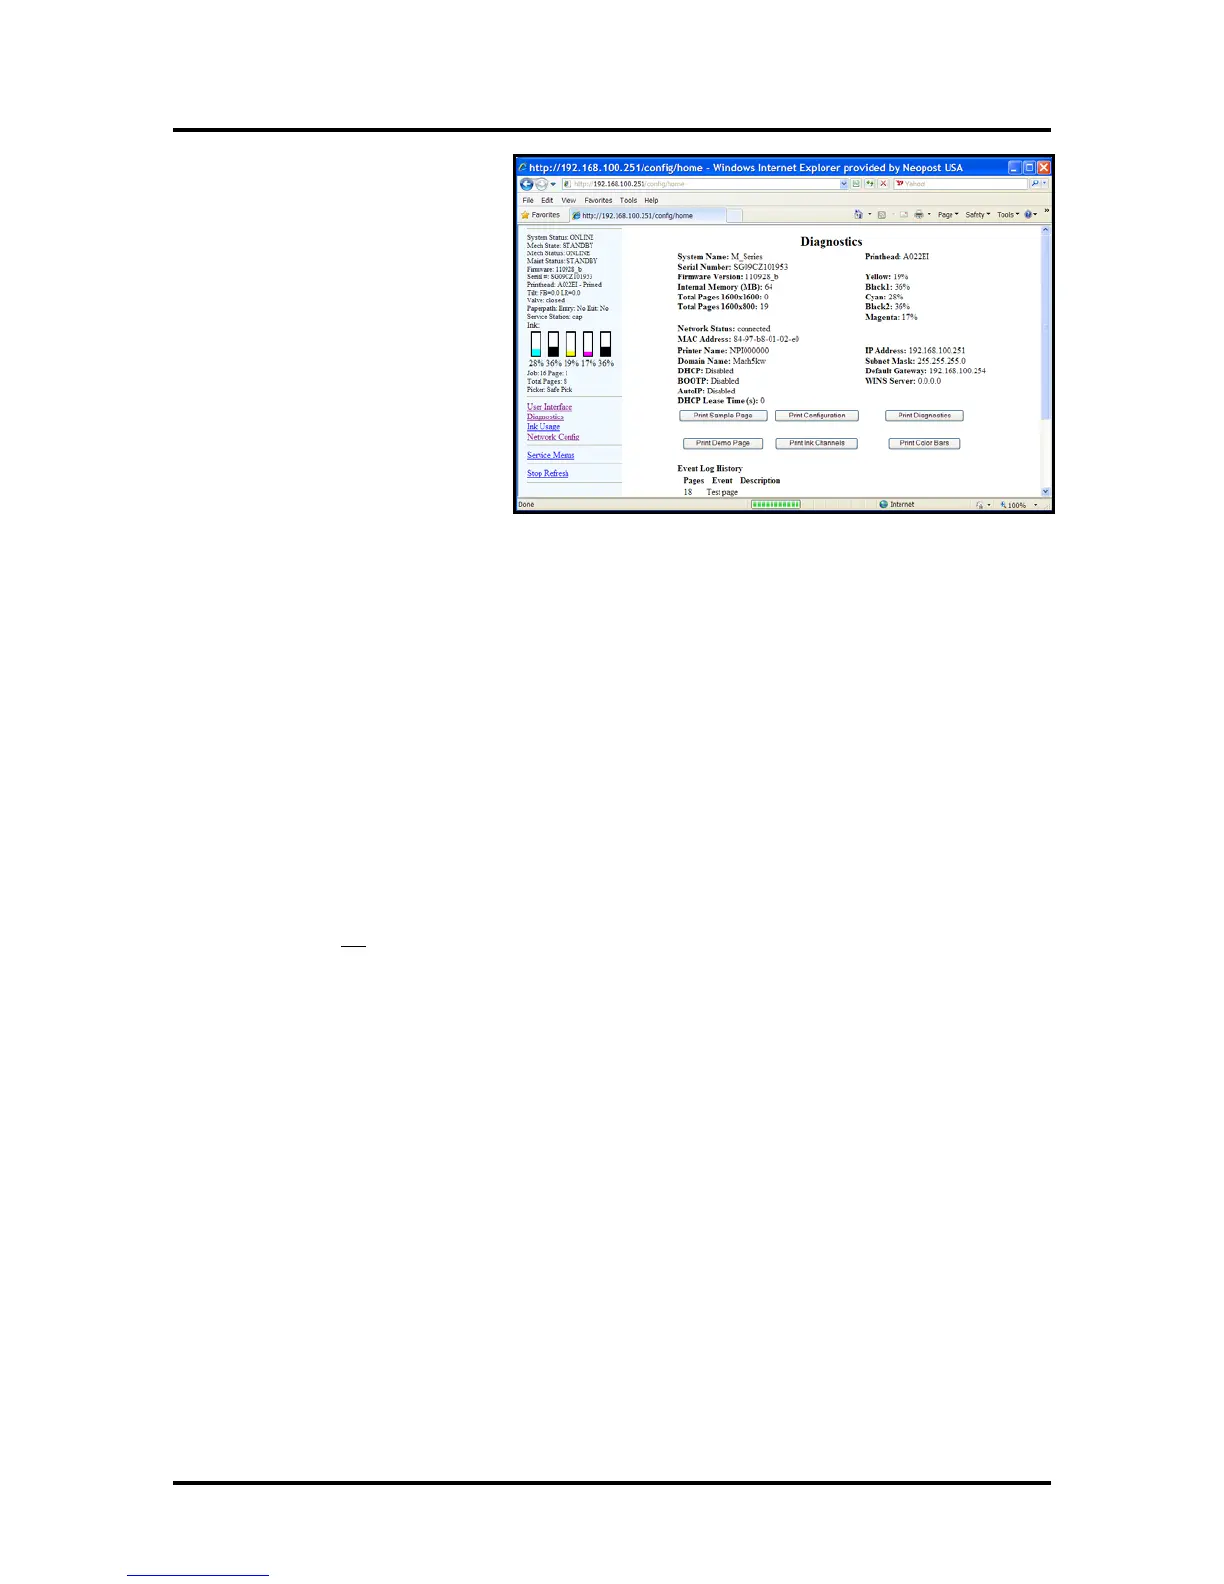
6. Click on “Diagnostics”.
Th
e “Diagnostics” window will
open; displaying a lot of
information about the printer. This
information will include the
Network Status and configuration
settings
.
7
. If the “Network Status:” is shown
as “disconnected”; click on the
refresh button in the browser
window.
If you have entered compatible
network settings for your network
and the printer; the "Network
Status:" line in the Diagnostics
window should change from
"disconnected" to "connected". If the status doesn’t change to “connected” please contact your IT
support person for help with the network settings.
8.
Run the Printer Software (Printer Driver, R12.01) installation again; but this time choo
se "Add
another printer".
9. When prompted to choose the Printer Connection; select "Configure to print over the Network".
Then click Next.
The install program will search the network for printers. It sh
ould automatically locate the printer at
the IP address provided by the network or that you configured in step 4.
In this example the printer has the IP Address 192.168.100.251.
Note: If the driver install program cannot locate the printer automatically, then you will be presented
with a window to enter the Host name and IP Address for the printer. Enter the IP Address for the
printer and click Next (You do NOT need to enter a Host name). If the printer is found at the IP
Address provided; the driver install will continue automatically (skip to 10).
If the printer is not
found then, in general, you have not provided a valid IP Address or network
configuration for the printer. In this case CANCEL the driver install and repeat from Step 2. Please
obtain help from your IT support people.
10.
Select the printer that is displayed. Then
click Next
11.
When the “Finished software installation” window appears; displaying “Network Connection
Successful”; select if you want to “Print Test Page” or “Set this printer as the default printer”. Then
click Finish.
If selected
, a test page will be sent to the printer to be printed.
Tip: To help distinguish between multiple Drivers on your system; Open the “Printers and
Faxes” (Devices and
Printers) folder. Then rename the network configured printer “Printer Driver
(Network)” and the USB configured printer “Printer Driver (USB)”.
Opening (launching) the “To
olbox” utility over an Ethernet connection:
Valid for Printer Driver version R12.01 and printer firmware version 20130820.
To open the Toolbox utility; click on Start, All Programs, Memjet, Printer Driver, Toolbox.
If you have more than one copy of the Printer Driver installed, you may be prompted to choose the device
you want the Toolbox to connect to. Be sure to choose the proper device.
Example:
Printer Driver - configured for USB. Suggestion: Rename to “Printer Driver (USB)”
Printer Driver (Copy 1) - configured for Network. Suggestion: Rename to “Printer Driver (Network)”
 Loading...