SECTION 5
MAINTENANCE
90
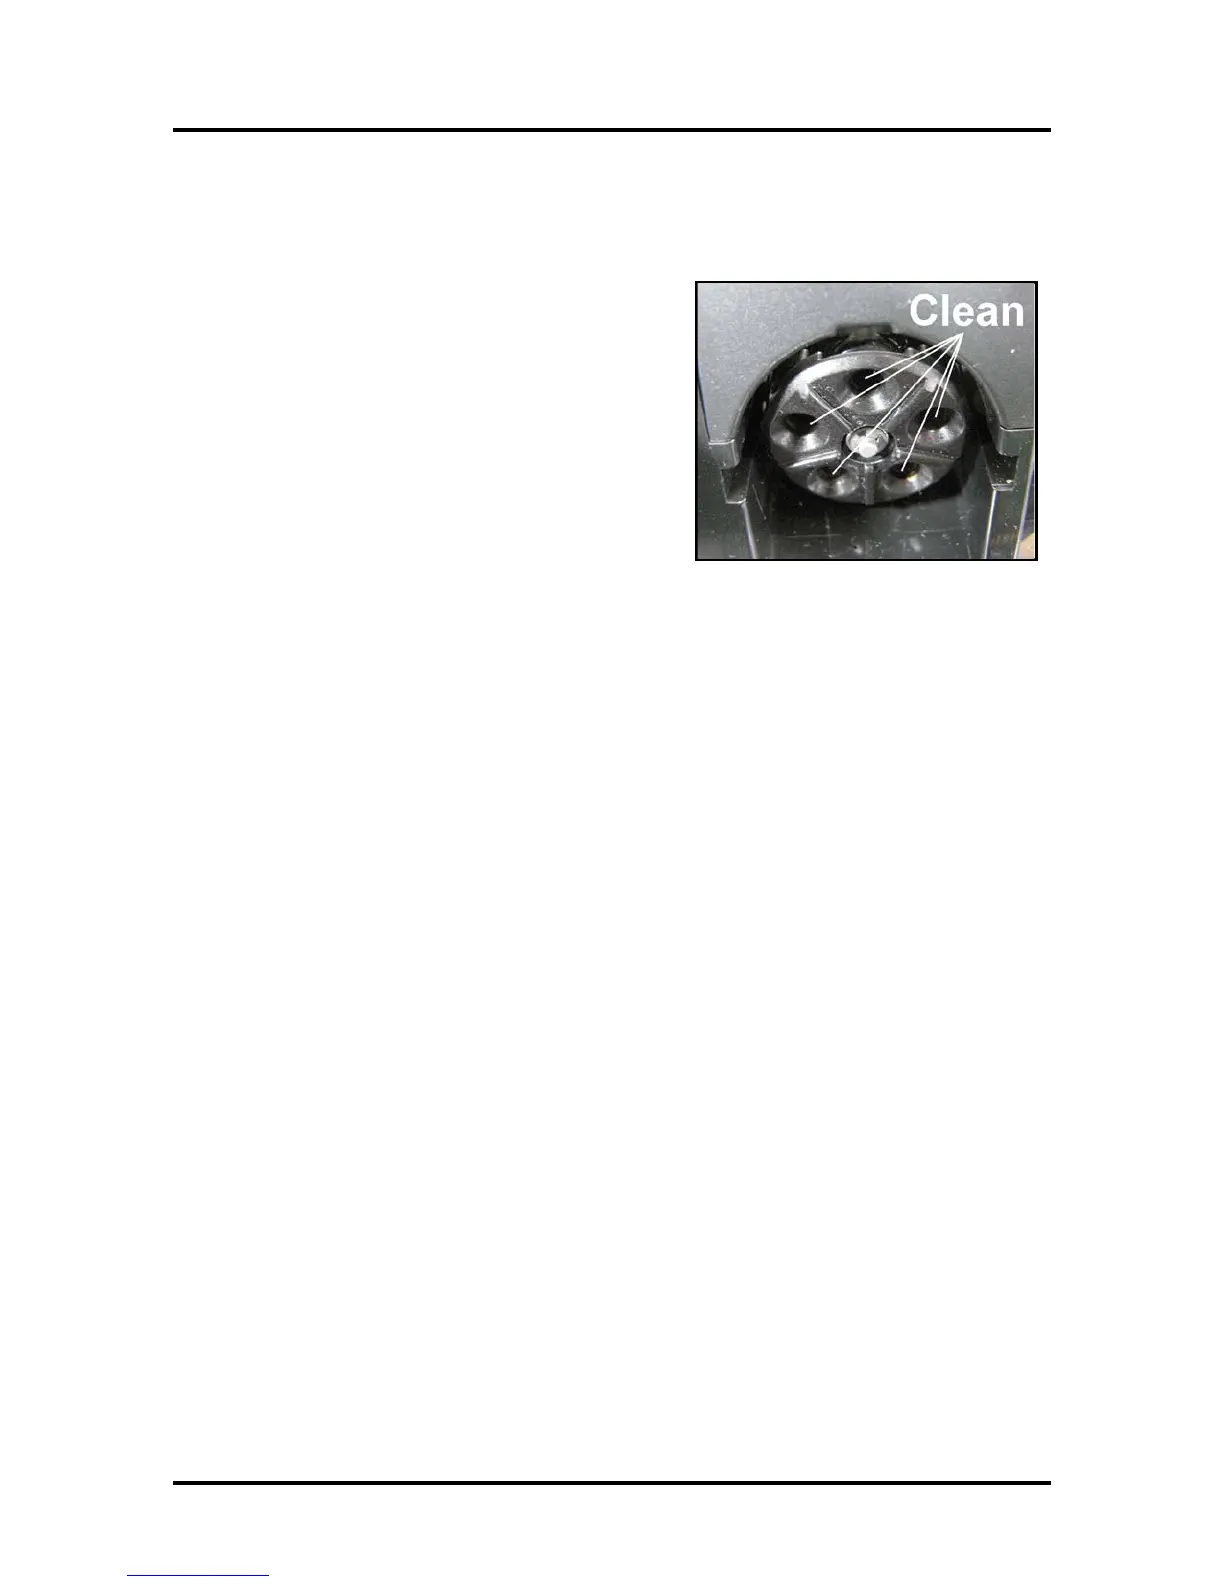
Cleaning the Ink Revolver Couplings
This process should be performed just before a printhead cartridge is installed or re-installed; to remove
contaminated/dry ink and other debris from the Ink Revolver Couplings. If this step is skipped; the
printhead and or ink system could become contaminated resulting in an increase in print quality issues.
1. If Printhead Cartridge is installed; follow the
procedure for releasing and removing the Printhead
Cartridge. See section titled “Replacing the
Printhead Cartridge”.
2. If the printer is on; press the ON/OFF button to
power-down the print engine. Wait about 45 seconds
until the system shuts down (all control panel lights
will go off). Turn off the Main Power Switch and
unplug the printer from the power receptacle.
3. Lightly moisten a foam swab with distilled water.
4. Insert the swab into one of the ink channel holes and
rotate the swab to clean the chamber.
5. Use a new swab for each of the remaining ink channels, until all 10 openings are clean. (5 on each
side.)
6. Install the Printhead as described in the section titled “Installing the Printhead Cartridge”.