SECTION 2
INSTALLING THE PRINTER
17
Connecting the Printer via Network (Ethernet Port)
Valid for Printers with firmware version 20130820 installed in printer and R12.01 Driver installed
on computer. They should be used as a set.
1. If you haven’t already done so; install the Printer Software (Printer Driver and Toolbox), via USB,
by following the instructions in the previous section.
Note: Initially the USB connection is needed in order to configure the printer’s internal
network settings. Once the software installation is complete; you can proceed to the next step.
2. Open the Printer “Toolbox” utility.
To open the Toolbox utility; click on Start, All Programs, Memjet, Printer Driver, Toolbox.
The Toolbox will open in a Web Browser (Example: Internet Explorer) window.
Tip: If you receive warning that Windows Firewall has blocked some features of this program. Please
select Private Networks and then click on Allow Access.
3. F
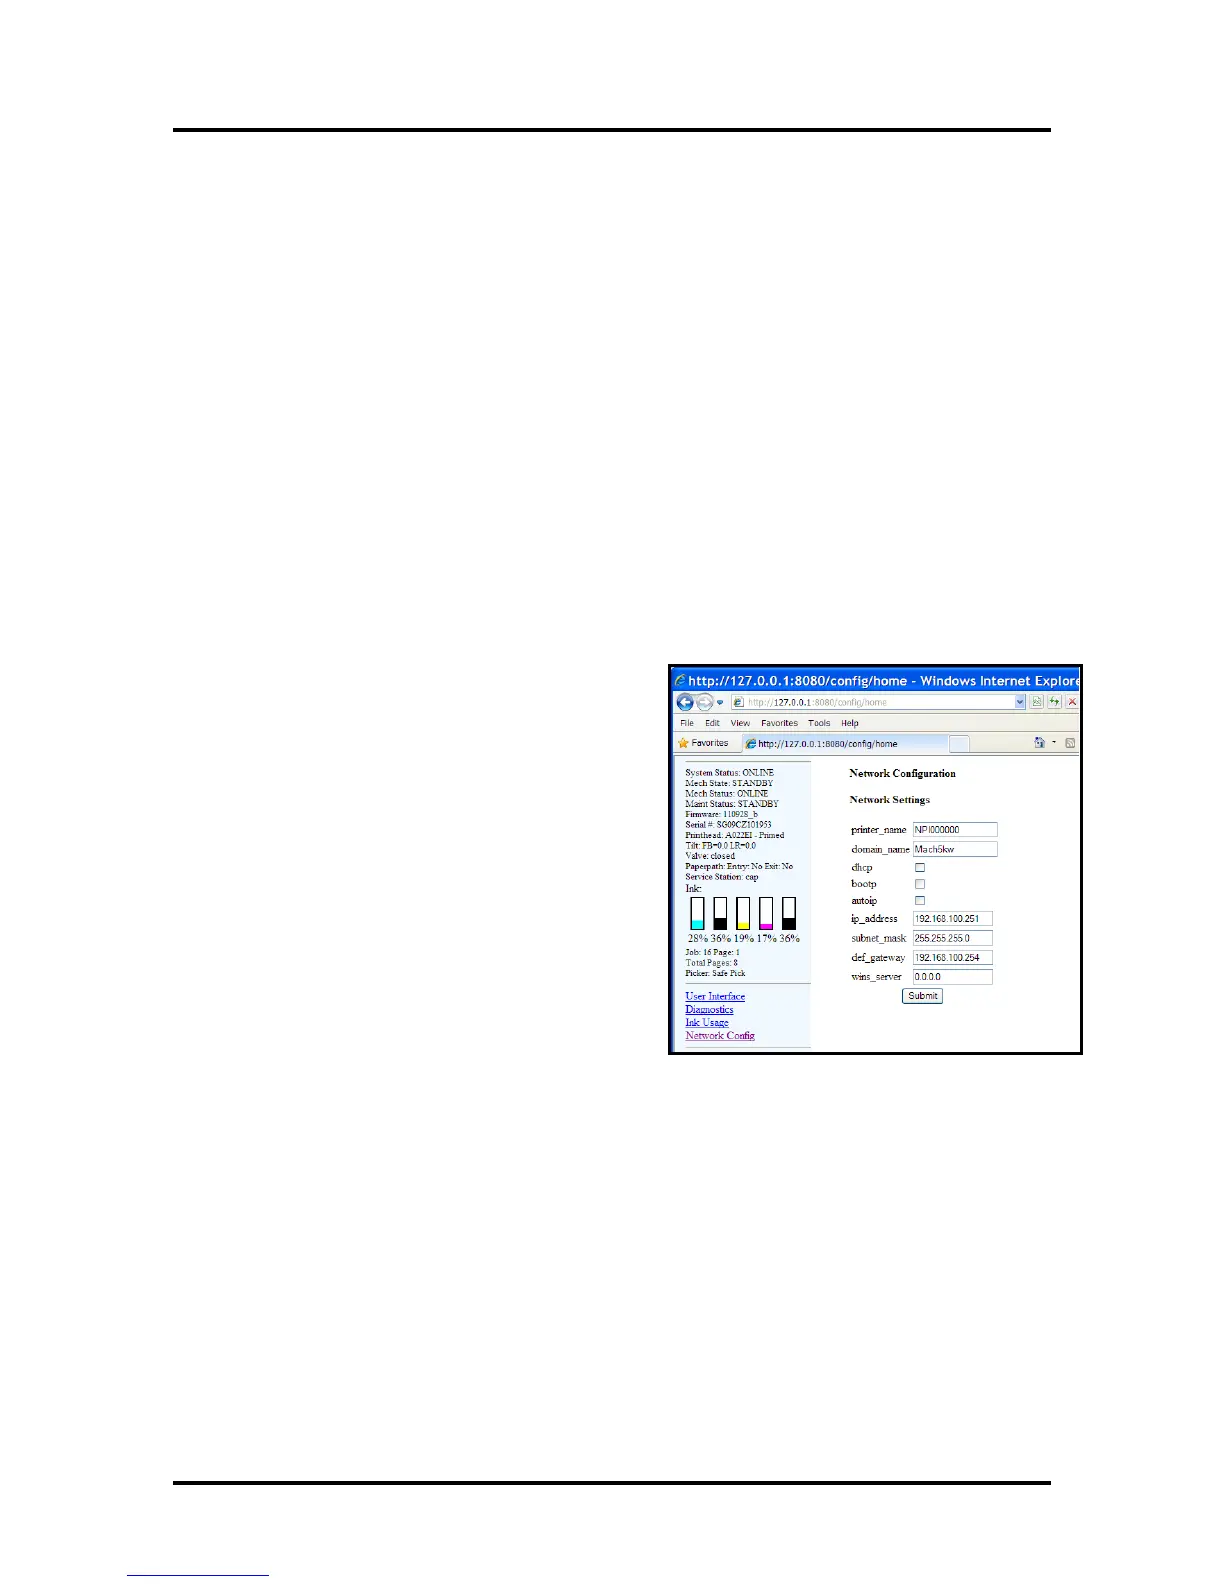
rom the User Interface window of the Toolbox; click on “Network Config”. Note: Your Toolbox
layout may look different then shown.
4. When the “Network Configuration” window appears; configure the printer's network settings as
needed. See example.
Check with your IT support person for help with
these settings.
Be sure to click on “Submit” after entering new
information.
NOTE: The information shown on this page is just an
example. You must use settings that are compatible
with your network and settings that are not in direct
conflict with other devices on the network.
AutoIP Network Tip:
For network systems that automatically assign or
obtain the IP Address; make sure the appropriate
items (dhcp, bootp, autoip), for your particular
network, are checked (selected).
Static IP Network Tip:
Running "ipconfig", from the Command Prompt of a
computer that is being used on the same network,
may help you define some of the information needed for this setup. In general you can use the same
"Subnet Mask" and "Default Gateway" that are shown in the "Windows IP Configuration". However
you need to provide a unique "IP Address" for the printer. For example if the "Windows IP
Configuration", IP Address for your computer's connection is shown as 192.168.100.222 you may be
able to use 192.168.100.223 for the printer; if this IP Address is not in use by some other device.
If you want to check for an open IP Address you can ping the address before you save the settings and
connect the printer. Type "ping [ip address]" (Example: ping 192.168.100.223) at the command
prompt.
An open IP Address will show "Request timed out".
An IP address that is in-use and working will show replies (Reply from 192.168.100.223:....)
Check with your IT support person for help with these settings.
5. Using a Cat5 network cable; connect the printer to your network via the Ethernet port.