SECTION 3
OPERATING THE PRINTER
41
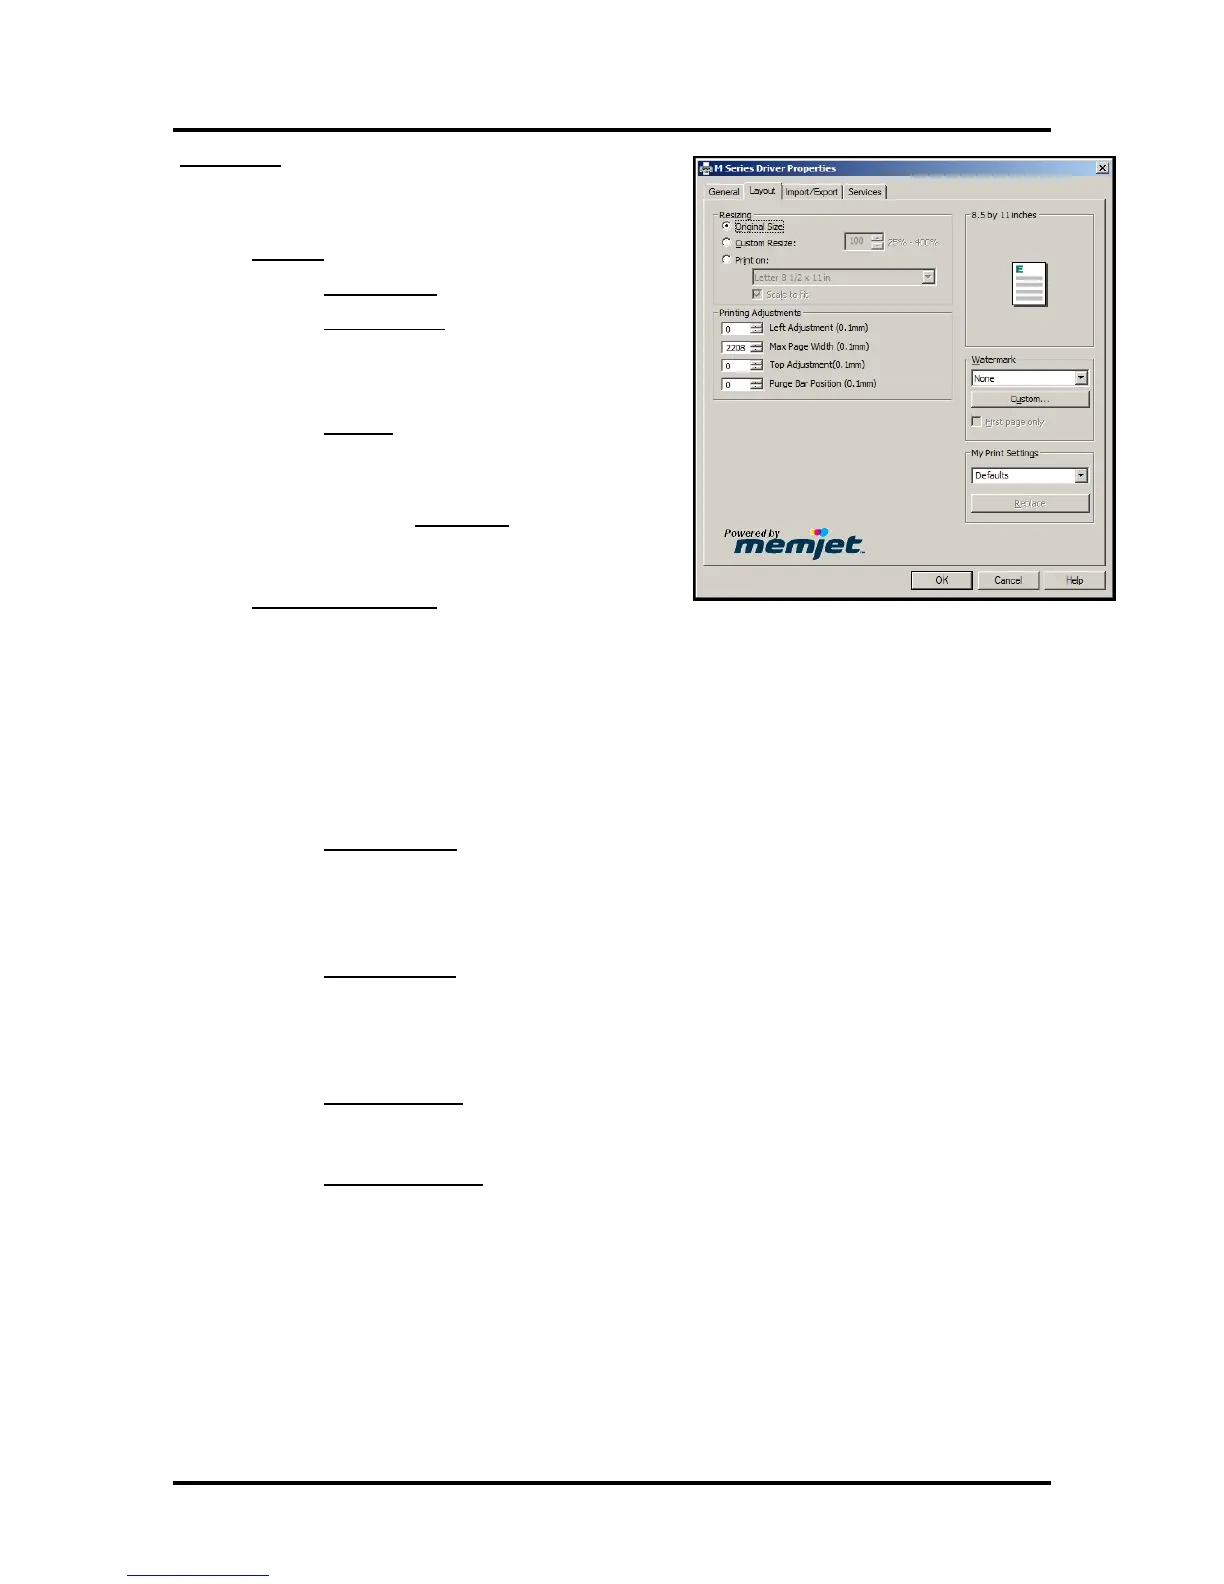
Layout Tab
Layout allows you change how/where the document prints
without changing the original document.
• Resizing
o Original Size – no changes
o Custom Resize - lets you resize the original
as a % of normal size. The printer will print
the document in the size you selected
regardless of the size of the paper selected.
o Print on: Lets you specify the particular
size of paper that you want to print on
regardless of the size of the original
document.
Checking “Scale to Fit
” automatically
resizes the document to fit on the new page
size.
• Printing Adjustments – Allows you to make minor
changes to the print position and print area; in
relation ship to the media feed direction.
NOTE: The values entered, in the following adjustments, do NOT override the values set in the
Toolbox (User Interface and Service Menus - Printer Control Config). Instead, the values entered
are added to or subtracted from the values set in the Toolbox. The range values (min and max),
provided below, assume that the Toolbox values for “tof_adjustment” and “left_adjustment” are
set to zero (0) and the Purge Bar Position in the Toolbox, User Interface screen, is set to zero (0).
Exceeding these min or max values may cause the printer to print nothing (feed the media blank).
o Left Adjustment – Lets you shift the printed image left or right.
Range: -30 (-3mm) left to 2000 (+200mm) right. Default = Zero (0)
negative value = shift right (towards operator side)
positive value = shift left (towards non-operator side)
Zero (0) = left edge of media; if Media Registraion Side Guide is set to “inner position”.
o Top Adjustment - moves the image up or down on the media.
Range: -50 (-5mm) up to 2000 (+ 200mm) down. Default = Zero (0)
negative value = shift up (towards leading edge)
positive value = shift down (towards trailing edge)
Zero (0) = leading edge of media.
o Max Page Width – Lets you limit how wide the actual print area will be. This feature can
be used to “cut-off” the right-side (operator side) of an image; at a set position.
Range: 5 (0.5mm) to 2208 (220.8mm). Default = 2208 (full print width)
o Purge Bar Position* – This feature allows you to adjust the purge bar location; to
account for the extra length needed to reach the actual gap between pieces.
Range: -538 (-53.8mm) up to 2000 (+200mm) down. Default = 0
negative value = shift up (purge sooner
positive value = shift down (purge later)
In normal operation, the printhead spits a small amount of ink into the gap between
pieces; to keep the nozzles refreshed. For irregular-shaped pieces (like an envelope
flap), the Paperpath Entry sensor may “read” the trailing edge too soon; causing the
printer to purge (spray a line of ink) onto the flap.
Tip: Optimally, this value should be set so the purge bar is positioned about 3 mm
past the trailing edge of the media.
NOTE: The value set should not exceed the physical gap that the “Paperpath Entry
 Loading...