Press the [B] button to exit the test program. This unit
enters the ordinary mode.
Adjust the input signal voltage so that the output voltage
obtained at the channel 1 output terminal is 40 Vrms (=
+34.3 dBu), and press the [B] button.
The output voltage monitor is automatically calibrated,
and the following display appears.
Adjust the input signal voltage so that the output voltage
obtained at the channel 2 output terminal is 40 Vrms (=
+34.3 dBu), and press the [B] button.
The output voltage monitor is automatically calibrated,
and the following display appears.
Adjust the input signal voltage so that the output voltage
obtained at the channel 3 output terminal is 40 Vrms (=
+34.3 dBu), and press the [B] button.
The output voltage monitor is automatically calibrated,
and the following display appears.
Adjust the input signal voltage so that the output voltage
obtained at the channel 4 output terminal is 40 Vrms (=
+34.3 dBu), and press the [B] button.
The output voltage monitor is automatically calibrated,
and the following display appears.
Connect the 8 Ω resistor to the channel 1 output termi-
nal.
Adjust the input signal voltage so that the output voltage
obtained at the channel 1 output terminal is 40 Vrms (=
+34.3 dBu), and press the [B] button.
The output current monitor is automatically calibrated,
and the following display appears.
Connect the 8 Ω resistor to the channel 2 output termi-
nal.
Adjust the input signal voltage so that the output voltage
obtained at the channel 2 output terminal is 40 Vrms (=
+34.3 dBu), and press the [B] button.
The output current monitor is automatically calibrated,
and the following display appears.
Connect the 8 Ω resistor to the channel 3 output termi-
nal.
Adjust the input signal voltage so that the output voltage
obtained at the channel 3 output terminal is 40 Vrms (=
+34.3 dBu), and press the [B] button.
The output current monitor is automatically calibrated,
and the following display appears.
Connect the 8 Ω resistor to the channel 4 output termi-
nal.
Adjust the input signal voltage so that the output voltage
obtained at the channel 4 output terminal is 40 Vrms (=
+34.3 dBu), and press the [B] button.
The output current monitor is automatically calibrated,
and the display returns to the test menu screen.
(If an error occurs, “ERROR” appears and the test pro-
gram is stopped.)
4-18. STANDBY test
Press the [B] button to enter the standby mode. The fol-
lowing display appears.
Measure the primary power consumption, and check
that the measured value is 23 W or less. Press the [B]
button for one second or more, and the display returns
to the test menu screen.
4-19. QUIT (Exit the test program)
Input the 1 kHz, +10 dBu sine wave to the channel 4 in-
put terminal.
Adjust the ENCODER so that the output voltage ob-
tained at the channel 4 output terminal is +38.1 dBu,
and press the [B] button.
The analog output level is automatically calibrated, and
the following display appears.
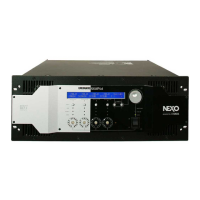
NXAMP4x4
70
17CALIBRATION
CH1OUTPUTSIGNALOK?
17CALIBRATION
CH3CONNECT8OHMLOAD
17CALIBRATION
CH4CONNECT8OHMLOAD
00CHOOSETEST<>
18STANDBY
18STANDBY
00CHOOSETEST<>
19QUIT
17CALIBRATION
CH2OUTPUTSIGNALOK?
17CALIBRATION
CH3OUTPUTSIGNALOK?
17CALIBRATION
CH4OUTPUTSIGNALOK?
17CALIBRATION
CH1CONNECT8OHMLOAD
17CALIBRATION
CH2CONNECT8OHMLOAD
 Loading...