1. Preparation
1-1. Downloading and installing the software for update
1) Download http://www.st.com/stonline/products/support/micro/files/standalone_jtag.zip.
2) Unpack the StandaloneJTAG_1_20.zip.
3) Double click the StandaloneJTAG_1_20, and the following install screen appears. (Fig. 1)
4) Click the [Finish] button to start installing the software for
update.
5) Click the [Next] and [Yes] buttons to finish installing.
6) Restart the PC after completing the installation.
1-2. Connection
Connect the USB port of the PC to the connector CN005
of the CONTROL circuit board with the USB-JTAG adaptor
(RLINK-ST).
Note:
When you connect the USB-JTAG adaptor (RLINK-ST) for
the first time, the USB driver will be required. The USB driver
is included in the downloaded file at previous step 1-1. Locate
and install the driver.
2. Updating operation
1) Turn on the power to this unit.
2) Start up the installed JTAG Programmer.
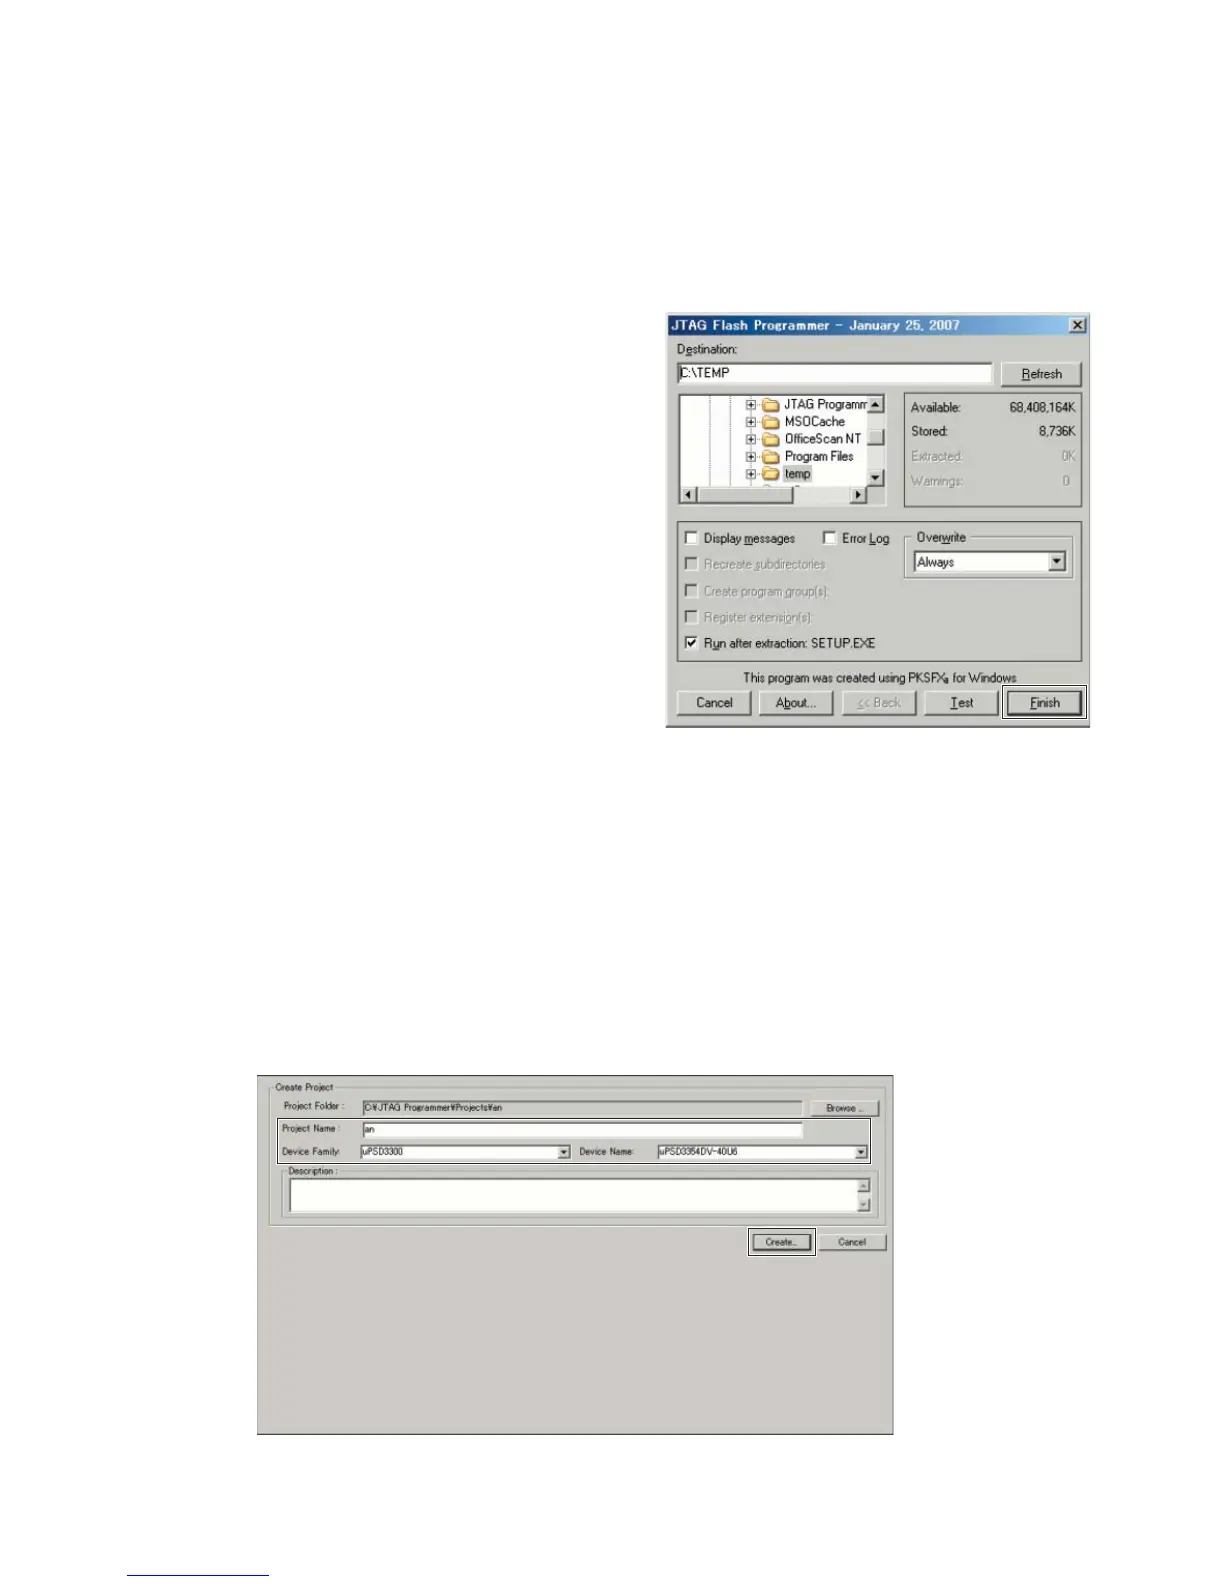
3) Select a new project from the project menu. The following “Create Project” screen appears. (Fig. 2)
4) Input the Project Name, Device Family and Device Name as the followings.
Project Name : an (any name may be used)
Device Family : uPSD3300
Device Name : uPSD3354DV-40U6
Fig. 1 Install screen
Fig. 2 Create Project screen
■
UPDATING THE FIRMWARE
NXAMP4x4
88
 Loading...