73
Reference section 4 — Creating waypoints and routes
Creating a route from the chart
Reference Manual Revision D
4. If the Use Chart menu key is displayed,
press it to change from list-based entry to
chart-based entry.
5. Press ENTER.
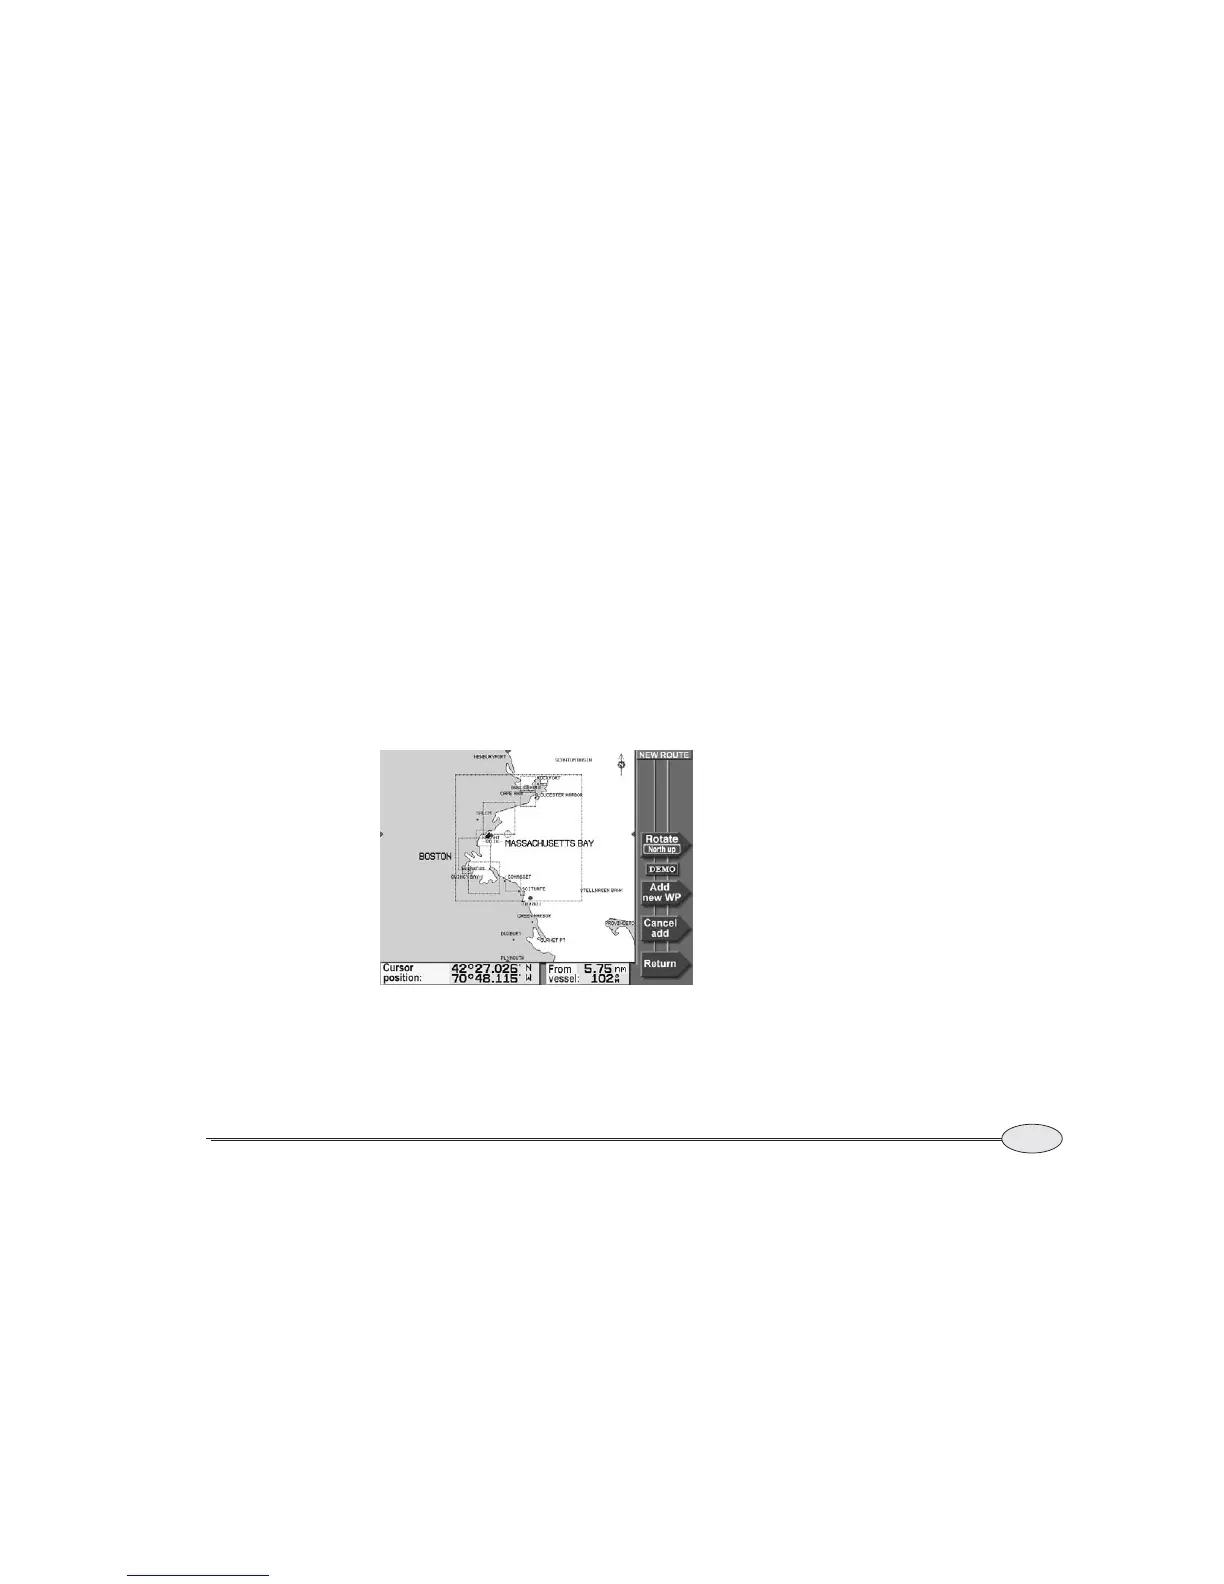
The NEW ROUTE chart screen is dis-
played; you may now start selecting way-
points for the new route.
6. To add waypoints to the route, move the
cursor to the first waypoint’s location,
which can be a nav aid, an existing way-
point, or any unmarked point on the chart.
Press Add new WP. (If an existing way-
point is selected, the menu key will read
Add waypt.)
Newly created waypoints are named
(0001), (0002), etc. The parentheses
indicate that the waypoint was automati-
cally named, and the four-digit number
uniquely identifies each waypoint. Also,
each new waypoint is automatically given
a description showing the time and date
you stored the waypoint.
7. Continue creating the route by moving the
cursor to each desired waypoint location
and pressing either Add waypt or Add
new WP
. A line is drawn on the new
route screen connecting the waypoints,
with small arrows indicating the direction
of the route.
8. At any time, you can press Cancel add
to stop appending waypoints, and then
select a route leg or waypoint to continue
editing a different part of the route.
9. When you’re done, press
Return to
switch to the NEW ROUTE screen to see all
of the route’s waypoints.
New Route chart screen


 To Next Page