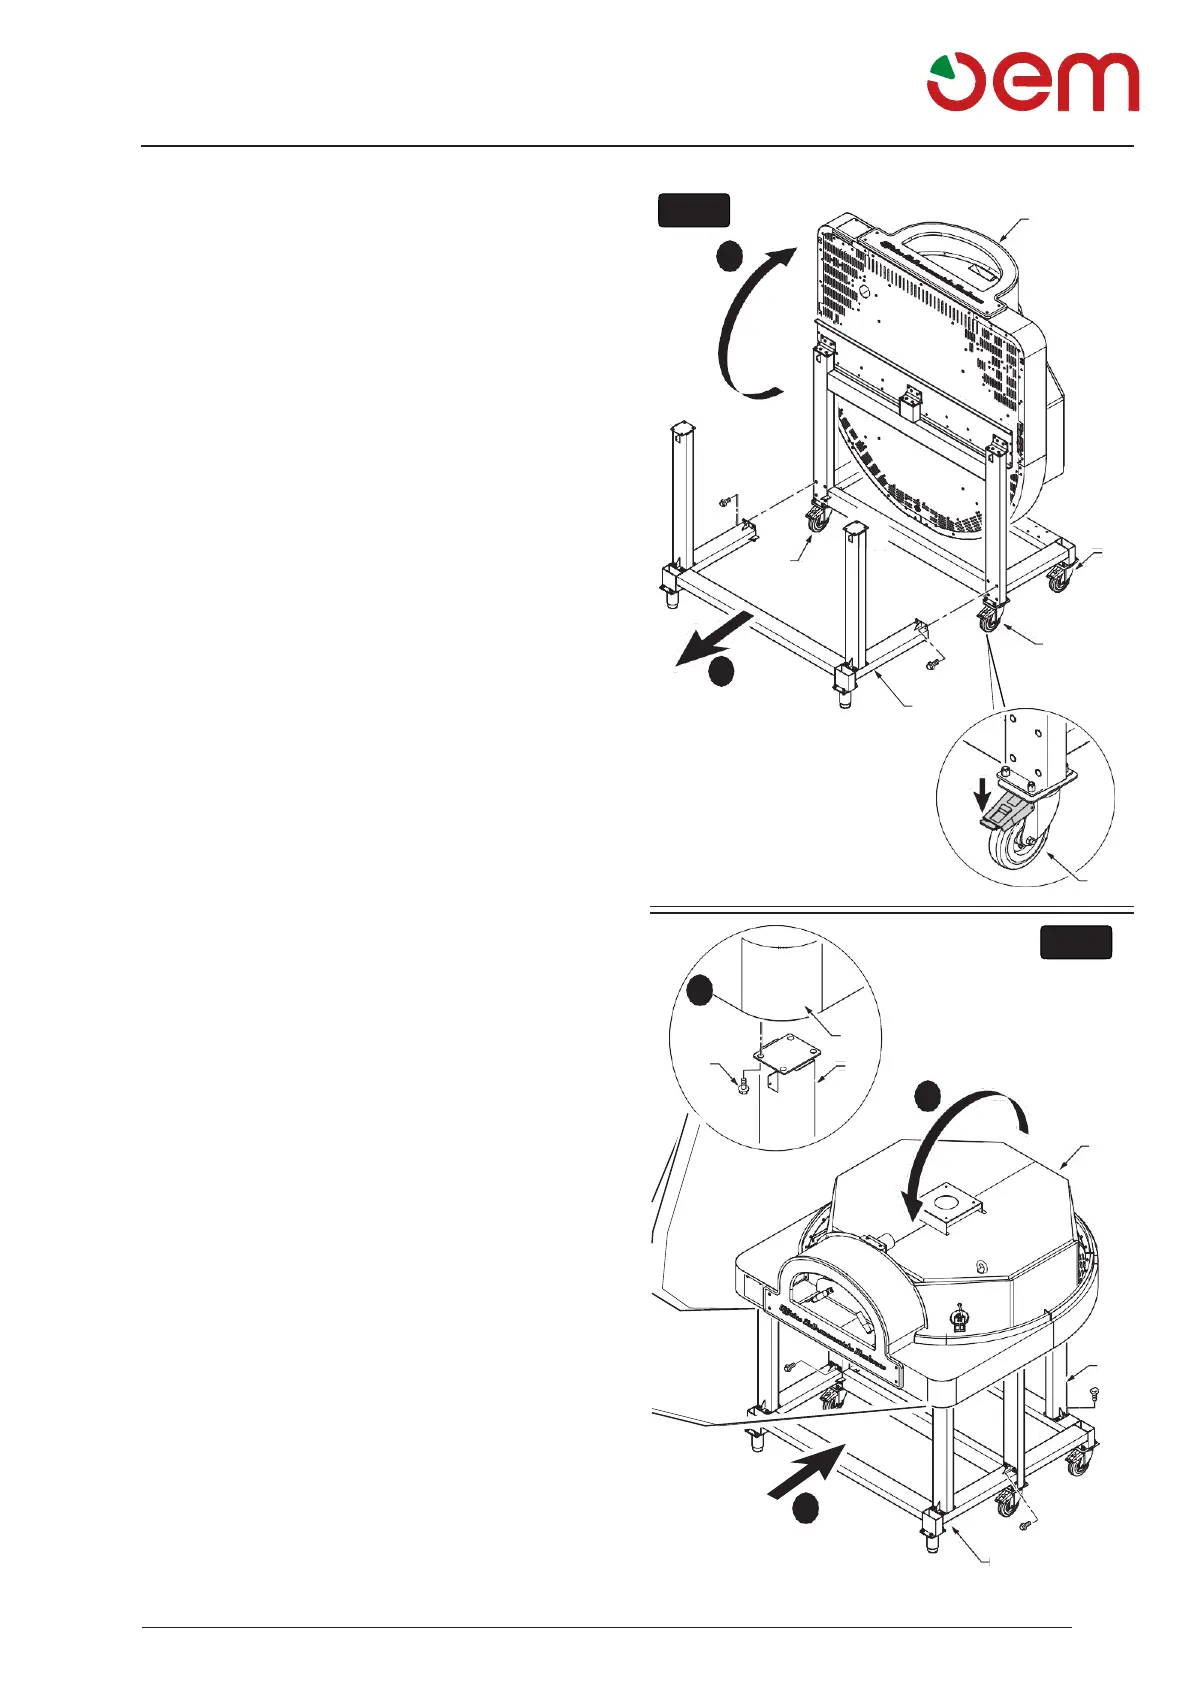
• Overturn the oven (9) backwards. (Fig. 9)
• Remove the fixed support (10) by unscrewing the
screws. (Fig. 9)
• Move the oven along a short path and place it in the
final zone.
• Block the wheels (11) to secure it in position. (Fig. 9)
• Once in position proceed with the correct reposition-
ing of the oven.
• Reassemble the fixed stand (10) by screwing the
screws. (Fig. 10)
• Place the oven (9) in the horizontal position. (Fig. 10)
• Fix the oven (9) to the front support (10) with screws
(12). (Fig. 10)
• Assemble the two rear legs (8) and secure them with
the relevant screws. (Fig. 10)
• Reassemble the stones of the floor (5), the panels
(6) and the crumb-collecting grid (7).
• Reassemble the chimney kit (5) by screwing the
screws.
• Reassembling the chimney tube (3)
• Proceed by putting the stones back together (4), start-
ing from the last stone you removed and proceeding
clockwise.