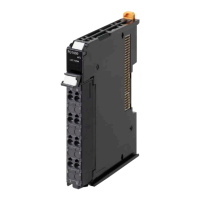
8-3
Input Range Selection
8-3-1
Function Applications and Overview
This function sets the input range of analog input.
8-3-2
Details on the Function
You can set the input range according to the characteristics of the output device.
Set the input range in the Unit operation settings. The settings are shown in the following table.
Setting name Setting description
Default
value
Setting range Unit Update timing
Ch1 Range Set-
ting
Set the analog input range.
Y
ou can set one of the following:
• -10 to 10 V
• -5 to 5 V
• 0 to 10 V
• 0 to 5 V
• 1 to 5 V
• 0 to 20 mA
• 4 to 20 mA
0
0 to 6
*1
--- After the Unit is restart-
ed
Ch2 Range Set-
ting
Ch3 Range Set-
ting
Ch4 Range Set-
ting
*1.
The meanings of the set values for Ch£ Range Setting are as follows.
Set value Meaning
0 -10 to 10 V
1 -5 to 5 V
2 0 to 10 V
3 0 to 5 V
4 1 to 5 V
5 0 to 20 mA
6 4 to 20 mA
8-3-3
Setting Method
This section describes how to configure settings with the Sysmac Studio.
1 Display the Edit Unit Operation Settings Tab Page.
For how to display the tab page, refer to A-8 Displaying the Edit Unit Operation Settings T
ab
Page on page
A - 54.
2 Select the input range from the list of Input Range Setting for the channel (Ch£) you want to
set.
Refer to A-9 Edit Unit Operation Settings Tab Page on page A - 57 for how to edit the Unit
operation settings.
3 Click the Transfer to Unit
Button.
The settings are transferred from the Sysmac Studio to the NX Unit.
8 Functions
8 - 6
NX-series Analog I/O Units User’s Manual for High-speed Analog Input Units (W592)