CHAPTER EIGHT
DPOAE test
68
DPOAE test
8 DPOAE test
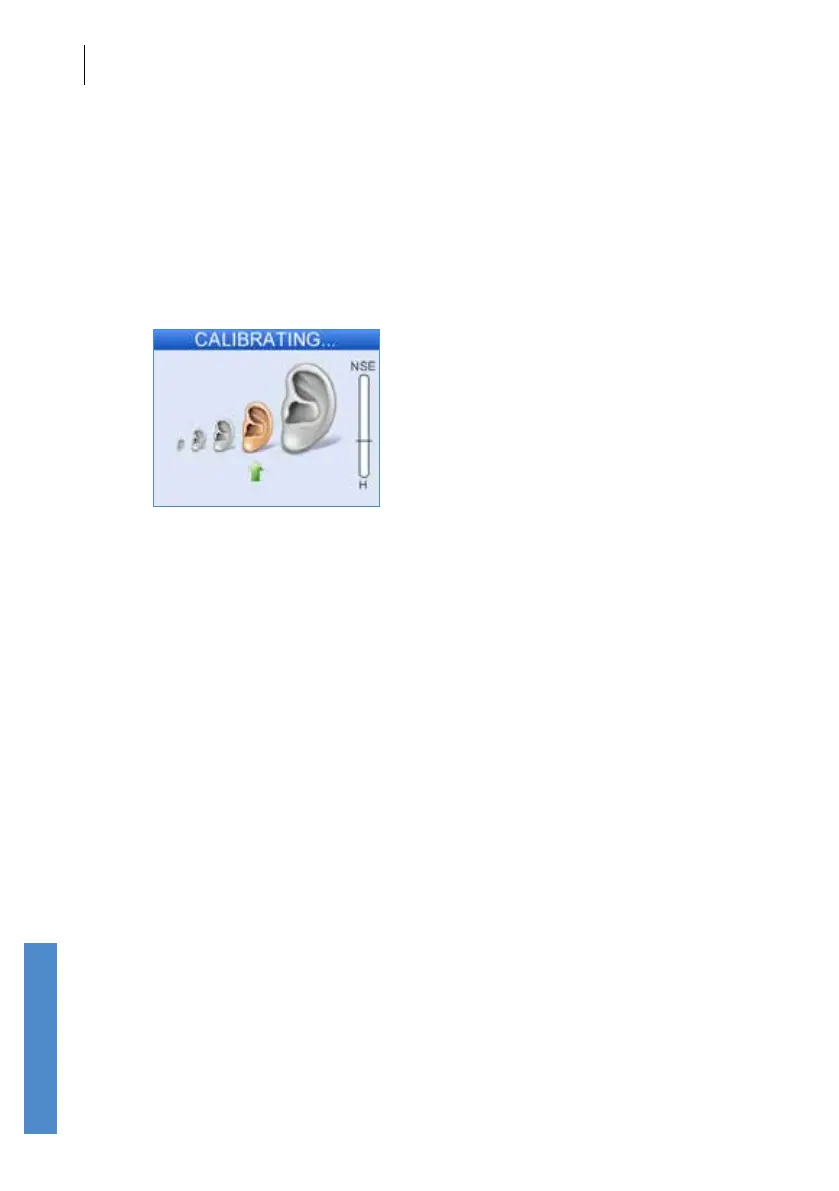
8.1 DP stimulus calibration
Before starting the test the Otoport will calibrate the levels of the stimulus
tones which are to be used in the test. By default, this process will start
automatically following Checkt, or if Start is selected. This is necessary
to account for the acoustic properties of individual patients’ ear canals. If
the required levels cannot be reached then the Otoport will display the
message Unable to calibrate. Check probe t and return to the Checkt
screen.
If calibration fails, check the probe t and check that the probe coupler
tubes are clear. Excessive noise may inhibit calibration, so ensure
environmental noise levels are low. Make sure a DP (UGD - grey) probe is
connected to the Otoport and not a TE (UGS - red) probe.
If calibration continues to fail, regardless of the position of the probe in the
ear, it is likely that the probe has become blocked. In this case, inspect the
probe coupler tubes and replace them if necessary, then run probe checks
(see chapter 17) to test the probe and Otoport performance.
Following Stimulus Calibration, the OAE recording begins and data
is collected and displayed on a choice of three test screens - an OAE
histogram, a data table and an SNR progress (Circles) display. The screens
are continually updated to give a real time representation of the OAE
response. The left and right arrow keys can be used to toggle between the
screen choices when a test is in progress. Common to all three screens
is a noise level indicator to the right of the display, the title bar at the top of
the screen and the Cancel and End options.
With Neonate mode On, the user is warned if the response from the probe
indicates a large ear canal (see section 15.2.1).