CHAPTER SIXTEEN
Printing and downloading
152
Printing
16.4 The printing process
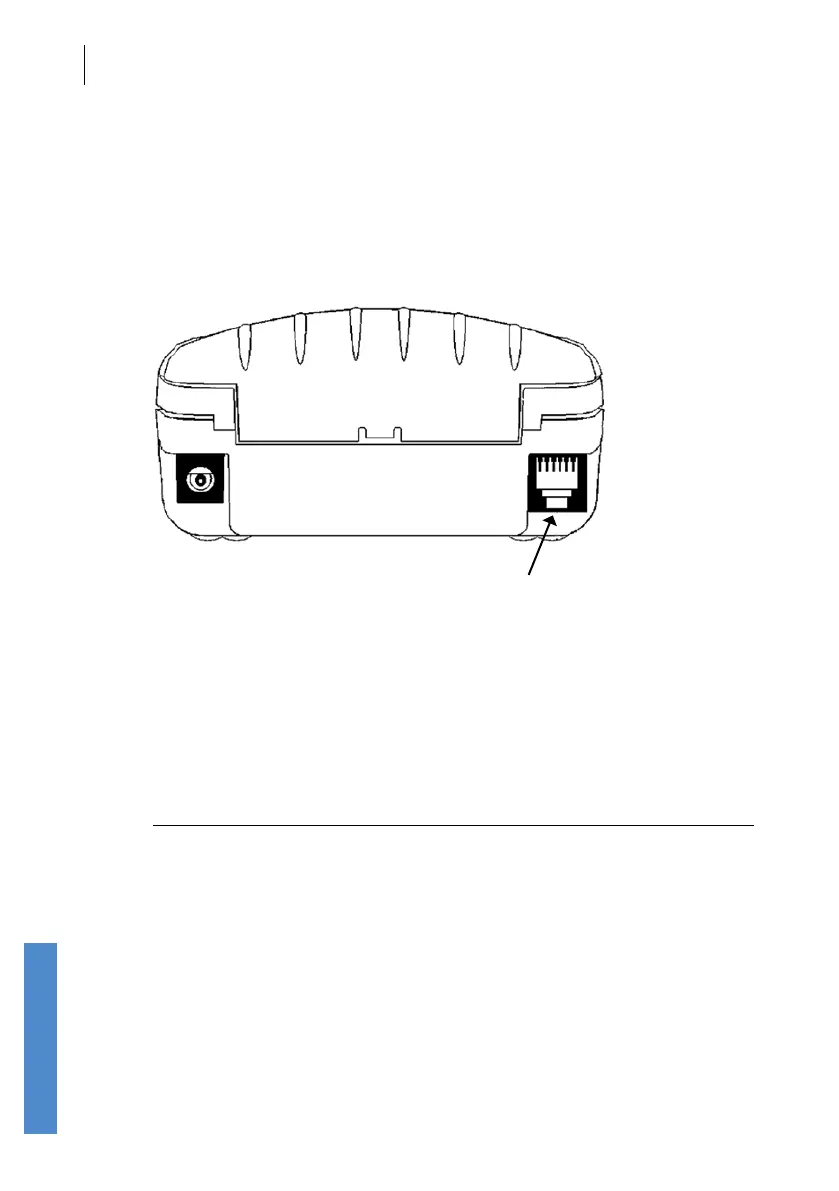
If you are using the wired printing method ensure the printer is connected
to the Otoport using the printing cable provided. Connect the at connector
to the Otoport with the arrows facing upwards and the square connector to
the back of the printer.
Printer cable socket
The wireless printing method has a range of up to 10m in direct line of
sight. It is recommended that the printing distance is reduced to 5m to help
ensure robust communication. Remain within this range for the duration of
the printout. Printouts will not complete if wireless communication is lost.
The Print option will be shown in green if the Otoport is currently
connected to a printer wirelessly. Otherwise, the Print option is shown in
black.
Note:
When using multiple Otoports with wireless connection to a
single printer, the last Otoport to print must be switched o
before another Otoport can print.
The printer is powered from batteries, or can be connected to mains
power when printing. Prior to printing, switch on the printer, using the
power button on the top. When the printer is powered, a green light will
be displayed. To save power, the printer will automatically switch o after
30 minutes of inactivity. If it is connected to mains power, the printer will
remain on indenitely.