Otoport OAE+ABR
User Manual for Otoport DP+TE model
87
ABR test procedure
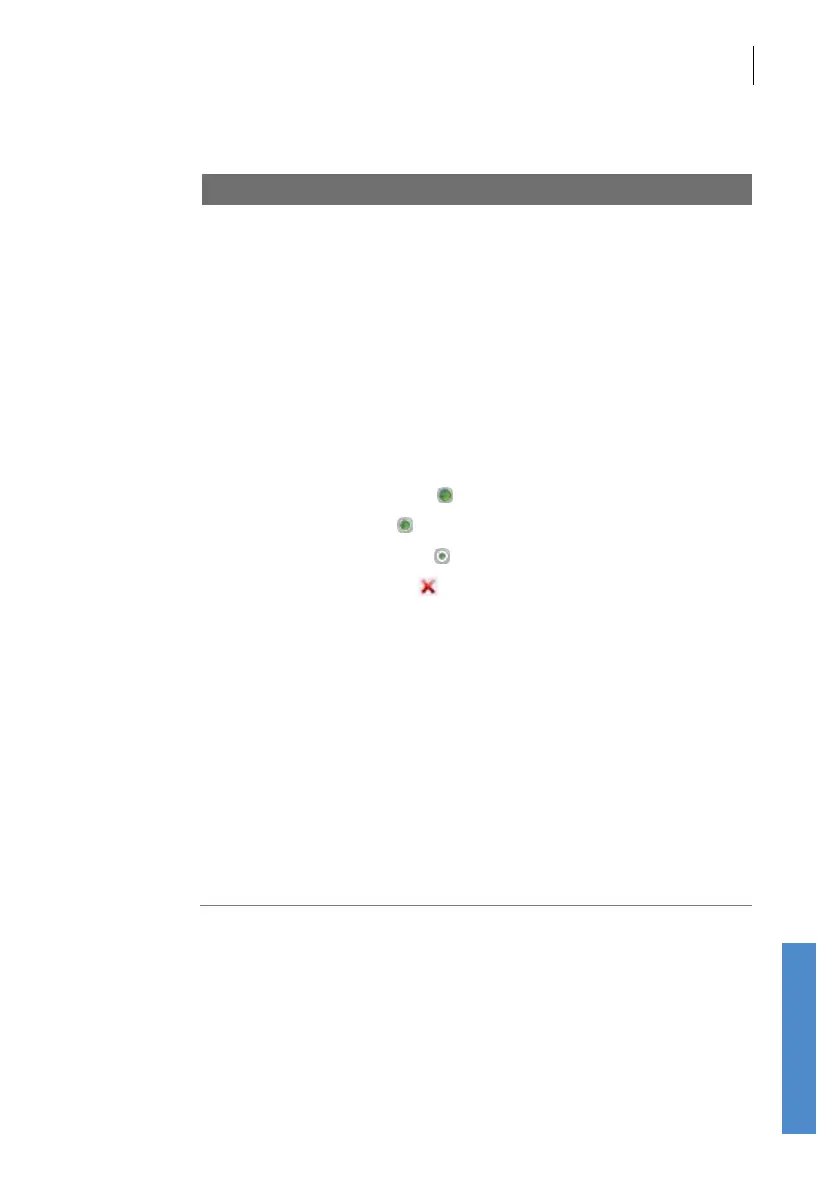
Otoport impedance measurements
The impedance of each electrode, Forehead (+ve), Nape (-ve) and Common
are shown in the Impedance Check panel.
Green circles are displayed for all impedance values where testing is
possible.
The larger the green circle, the better the electrode connection (i.e. the lower
the impedance). A red cross is shown at levels where impedance is poor and
testing is not possible.
The ranges for each symbol displayed are:
• Less than 4 kΩ: Optimum ( )
• 4 kΩ to 12kΩ: Good ( )
• 12 kΩ to 16kΩ: Moderate ( )
• More than 16 kΩ: Poor ( )
The green LED lights on the top of the ABR unit will be lit if the connection
of the electrode closest to that light is optimum, good or moderate. Autostart
requires that all impedances are optimum or good.
The Balance result indicates the dierence in the skin impedance between
the Nape and Forehead electrodes. Balances higher than 12 kΩ are Poor (X)
and will prevent the test from starting.
If the impedance values are too high refer to
6.2 ABR test problems.
Note that testing is possible on the Otoport with moderate electrode
impedances if there is sucient balance between the electrodes and the
powerline interference is low. This is decided automatically by the Otoport.
Select Check to re-run the impedance check.
Further advice on ...