58
Oxford Technical Solutions
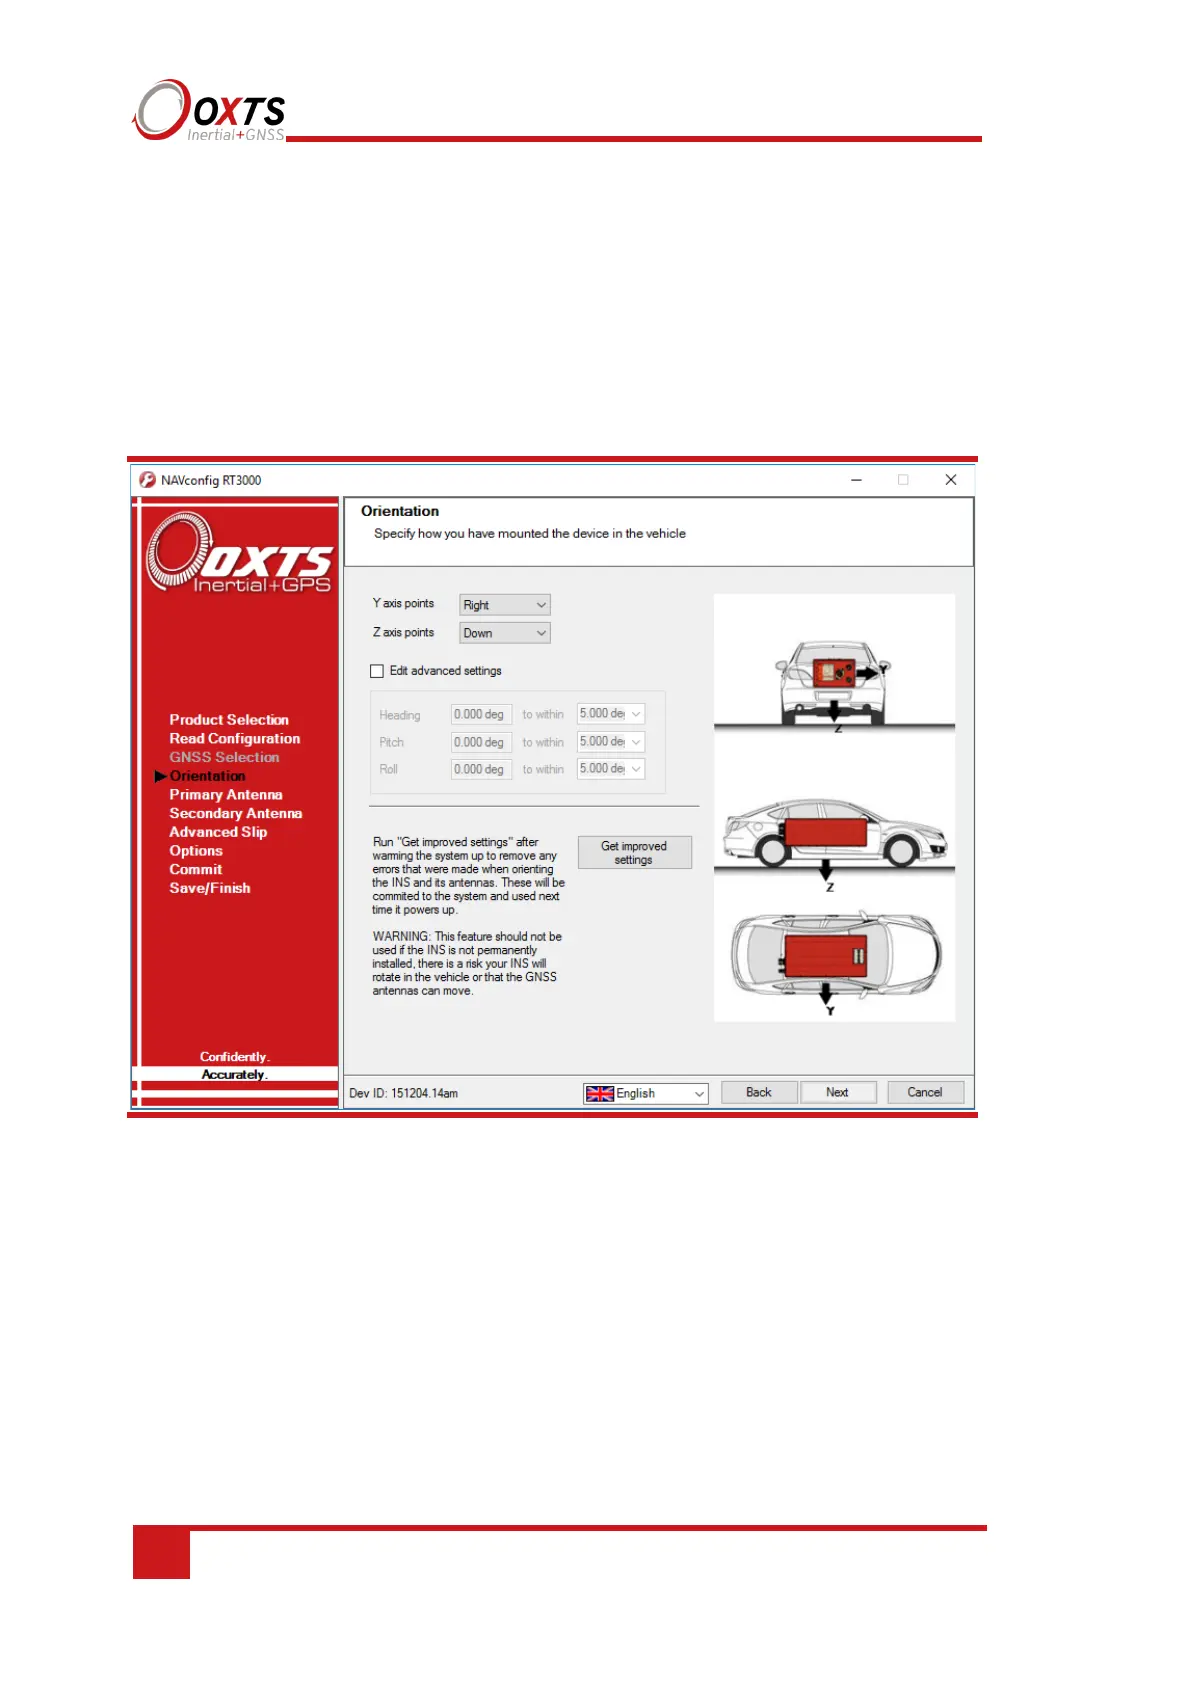
Use the Y axis points and the Z axis points box to specify which way the RT’s axes
point in the vehicle. Figure 6 on page 38 shows the RT axes directions. The Orientation
page of the configuration wizard, shown in Figure 19, also has illustrations to visualise
the orientation of the RT in a vehicle based on the settings input. The advanced settings
will change to show the three rotations associated with orientation input even when
unavailable.
Figure 19. NAVconfig Orientation page
For correct initialisation, it is necessary to get the heading orientation correct. The RT
gets its initial heading by assuming the vehicle is travelling forwards in a straight line. If
the definition of the vehicle’s x-axis (forward direction) is incorrect in the RT then it will
not initialise correctly when the vehicle drives forwards.
If the vehicle level option (see Vehicle starts, page 67) is used, then the pitch and roll
orientations must also be correct.
To make small adjustments, select the Edit advanced settings checkbox to enable the
rotations for editing. This allows any slip angle, pitch or roll offsets to be zeroed.