63
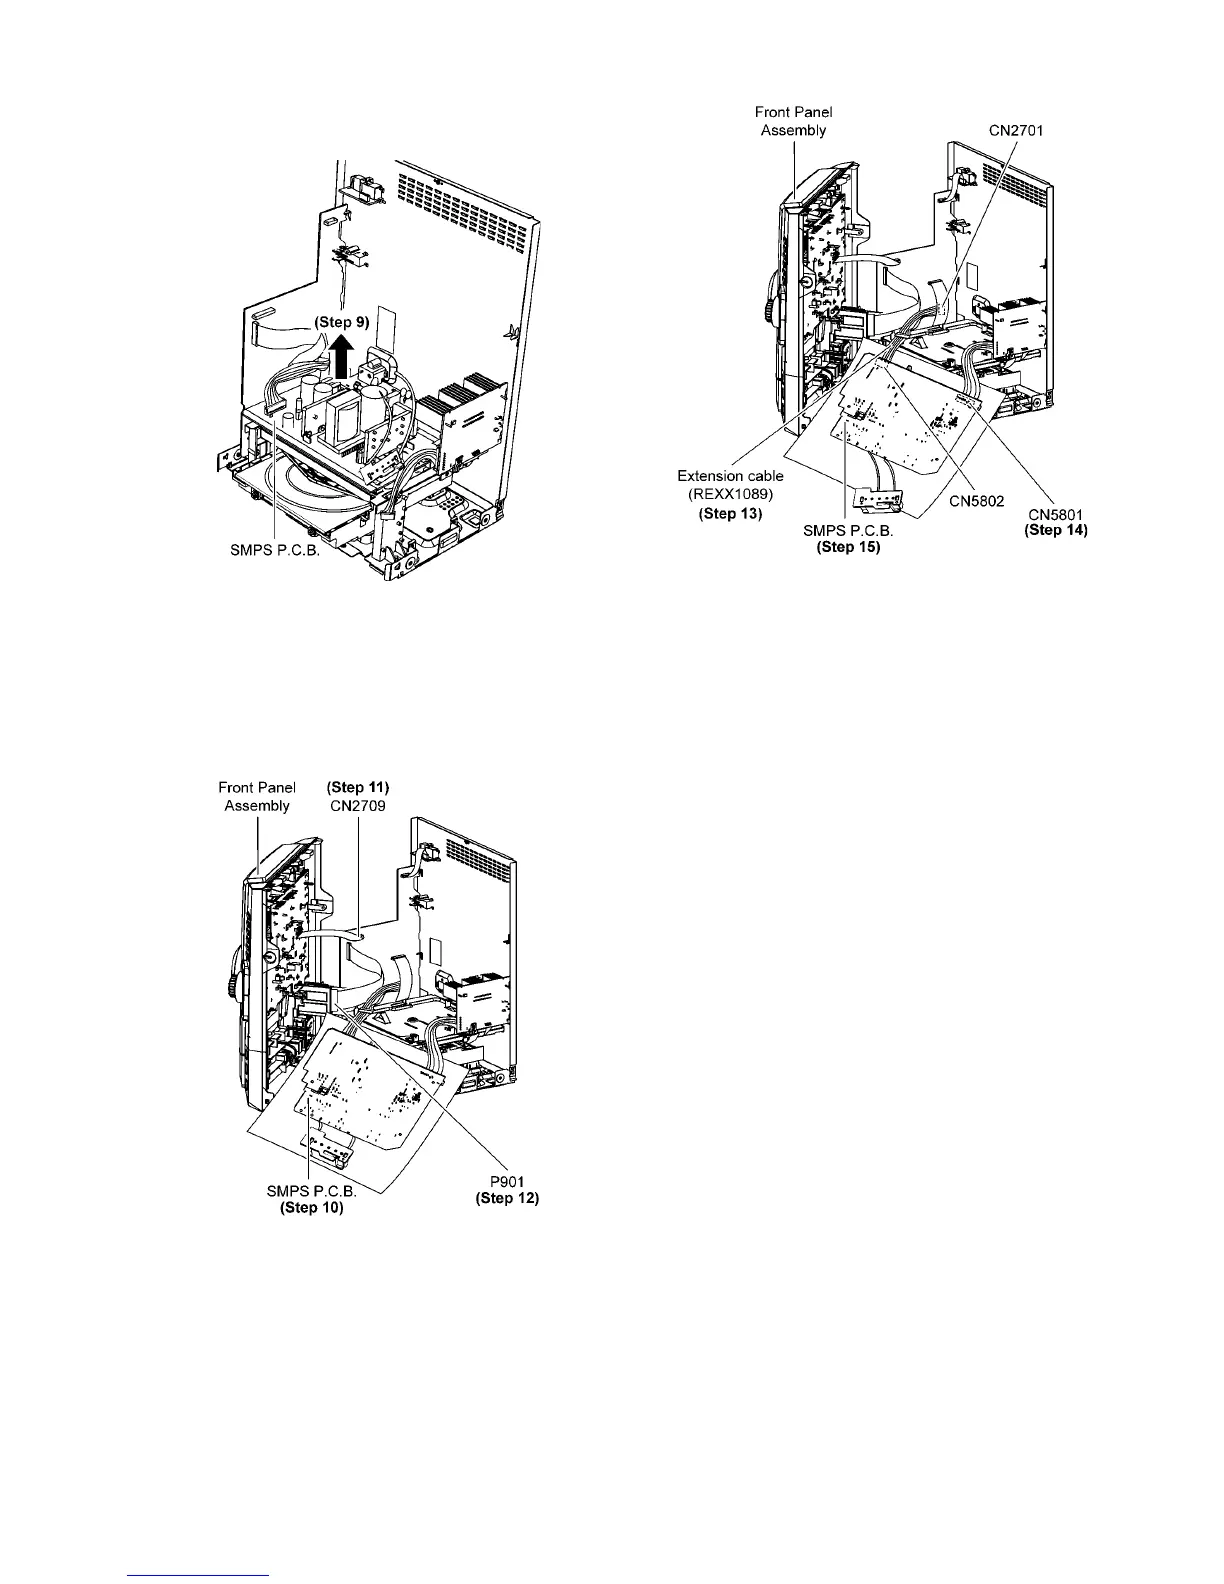
Step 9 Remove SMPS P.C.B..
Caution:Lift up SMPS P.C.B. slowly in order not to damage
both the Main P.C.B. & D-Amp P.C.B..
Step 10 Position Front Panel Assembly & SMPS P.C.B. as dia-
gram shown.
Caution: Insulated Material is required to insulate SMPS
P.C.B. from other parts.
Step 11 Attach 17P FFC to the connector (CN2709) on Main
P. C. B ..
Step 12 Attach 22P FFC to the connector (P901) on USB
P. C. B ..
Step 13 Extend the wire with extension Cable Wire
(REXX1089) (11P Cable Wire from CN2701 to CN5802).
Step 14 Connect 6P Cable Wire to the connector (CN5801) on
SMPS P.C.B..
Step 15 SMPS P.C.B. can be checked & repaired as diagram
shown.