40
10.20. Disassembly of Digital Ampli-
fier IC (IC2501/IC2502/IC2503/
IC2504)
• Refer to “Disassembly of Main P.C.B.”.
10.20.1. Disassembly of Digital Amplifier IC
(IC2501/IC2502/IC2503/IC2504)
Caution: Handle the Main P.C.B. with caution due to it’s
high temperature after prolonged use. Touching it may
lead to injuries.
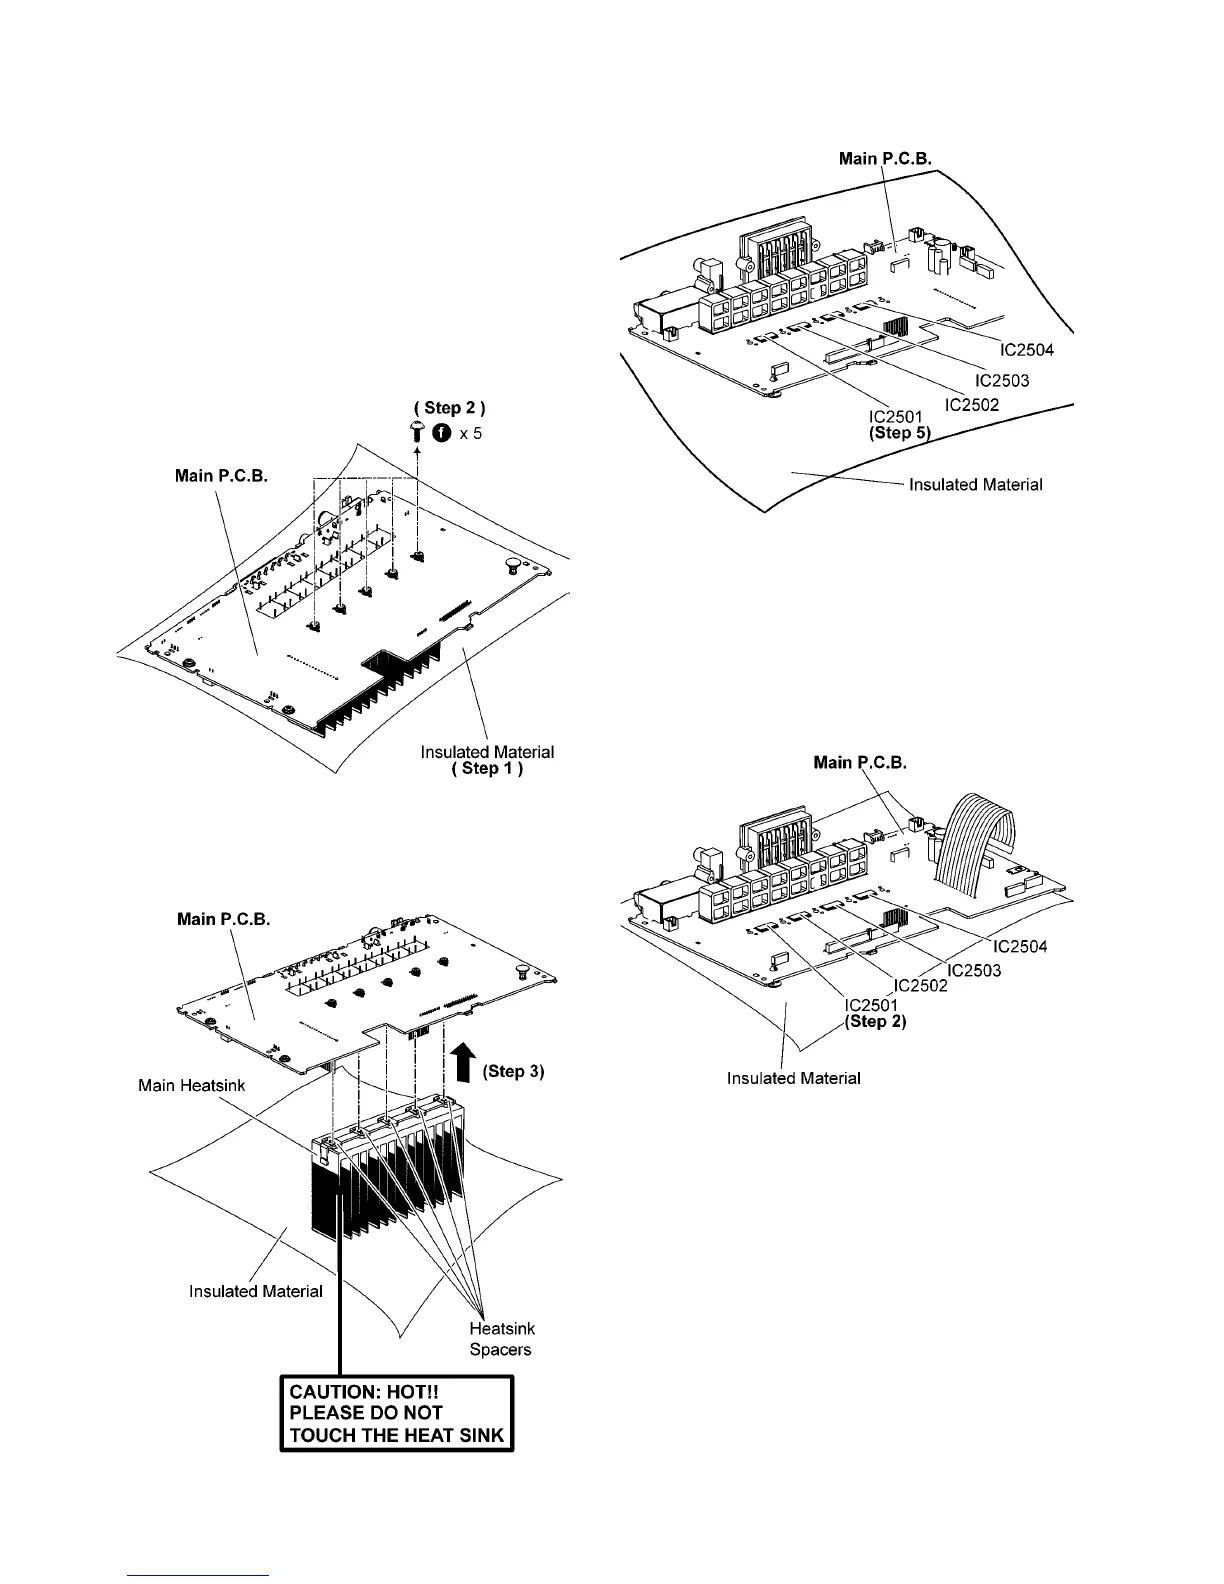
Step 1 Place the Main P.C.B. on an insulated material.
Step 2 Remove 5 screws.
Step 3 Lift up the Main P.C.B. as arrow shown.
Caution: Keep the Heatsink Spacers in safe place. Avoid
denting it, place it back during assembling.
Step 4 Desolder the pins of the Digital Amplifier IC.
Step 5 Remove the Digital Amplifier IC.
10.20.2. Assembly of Digital Amplifier IC
(IC2501/IC2502/IC2503/IC2504)
Step 1 Fix the Digital Amplifier IC onto the Main P.C.B..
Step 2 Solder the pins of the Digital Amplifier IC.
Cautions: Ensure that the pins of the Digital Amplifier IC is
positioned correctly on the Main P.C.B. before soldering.