BA_PH_690-100_EN_10-22.docx
• Move the saw blade set to 0° to the uppermost position
• Then switch off the main switch and secure or lock it.
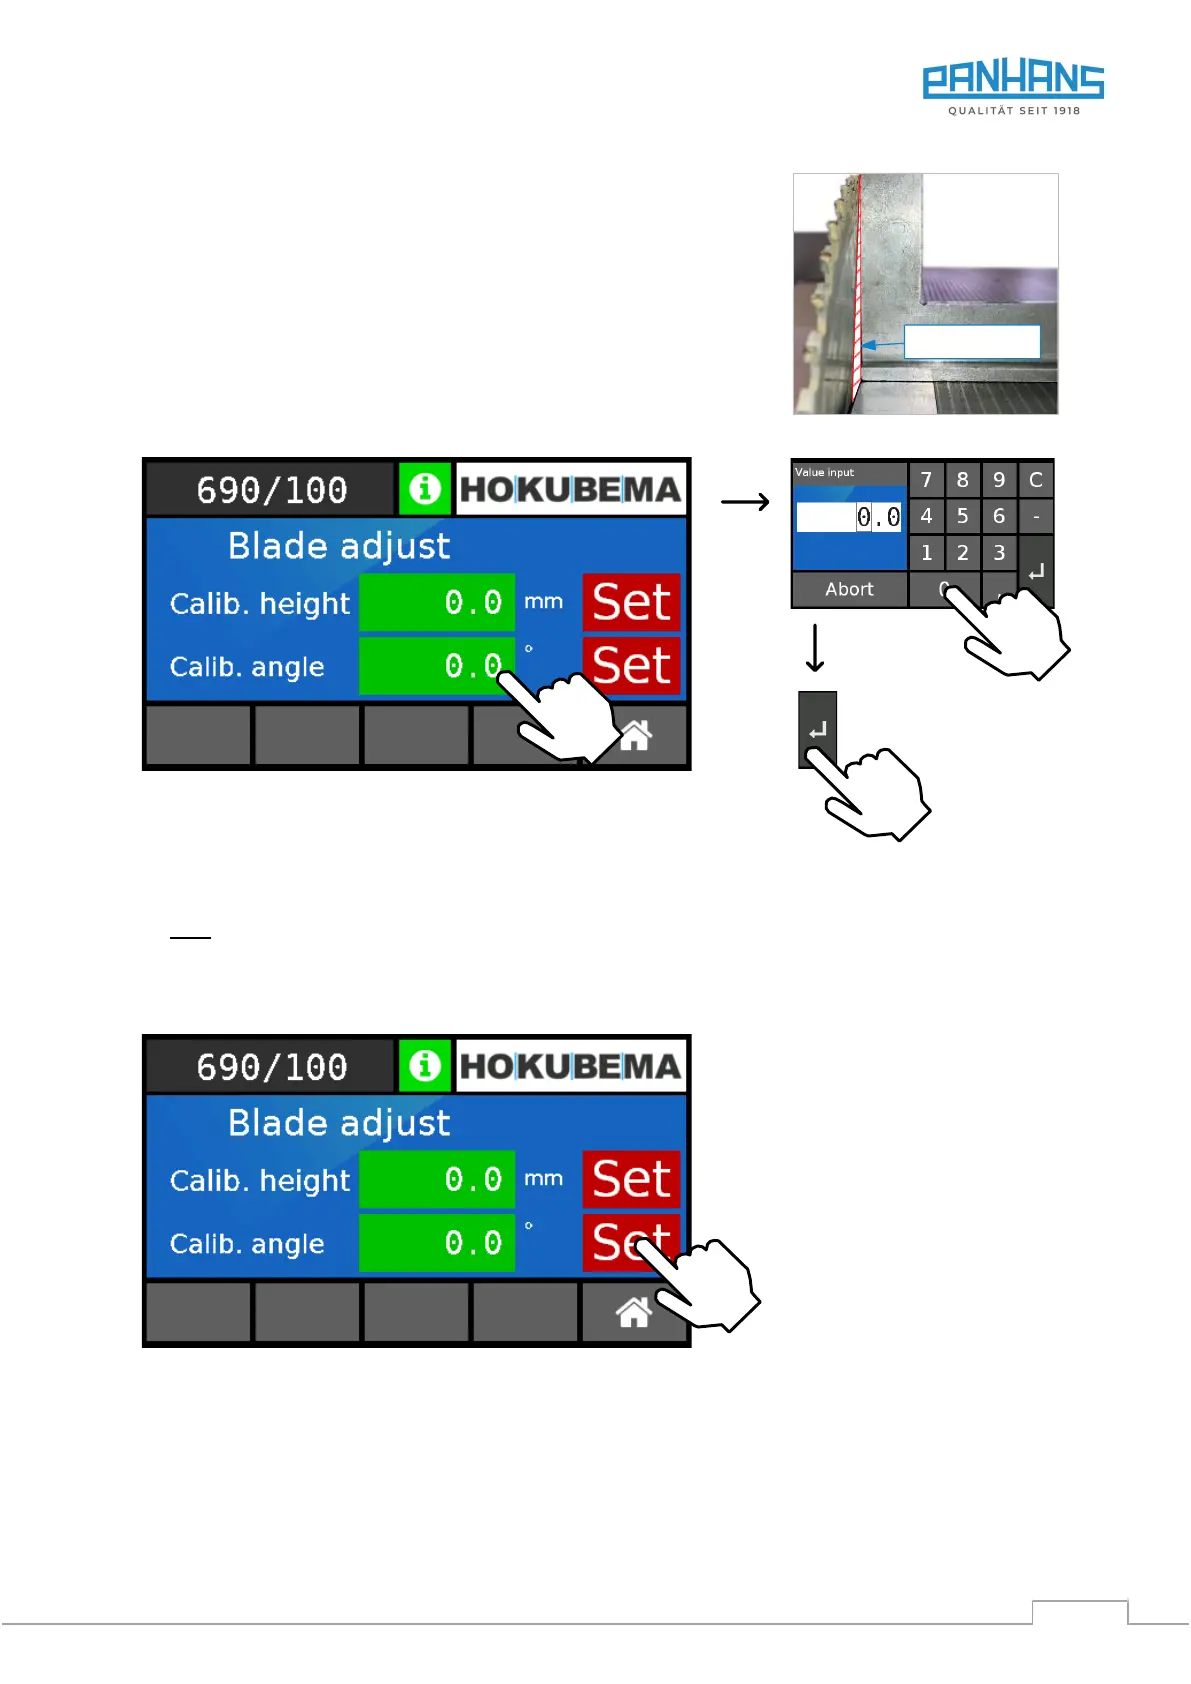
• Use a 90° stop angle to check that the saw blade is square.
• If an angular gap appears here, the angular axis must be calibrated.
→ Switch on the main switch and correct the angle via the positioning
keys until the angle gap has completely disappeared again. In the 0°
position, the saw blade is then exactly 90.0° to the table top.
→ In the overview “Machine >> Angle” (see Figure 38) a value
deviating from 0.0° now appears (e.g. 0.4°).
Figure 40: Calibrate angle
1. Touch the value field “Calib. angle”
→ The keyboard (see figure above right) appears.
2. Enter the reference angle 0.0° for the saw blade here.
Note: If 0.0° is already entered here, no entry is necessary.
3. Confirm with “ENTER”
→ The correct 0° position is adopted into the “Calib. angle” field:
Figure 41: Adopt calibration value for angle
4. Press the “Set" button to reference the value in the “Calib. angle” field.
→ As confirmation, the display jumps back to the overview (see Figure 35).
→ The calibration procedure for the saw blade angle is completed.