13XF Camera System Manual |
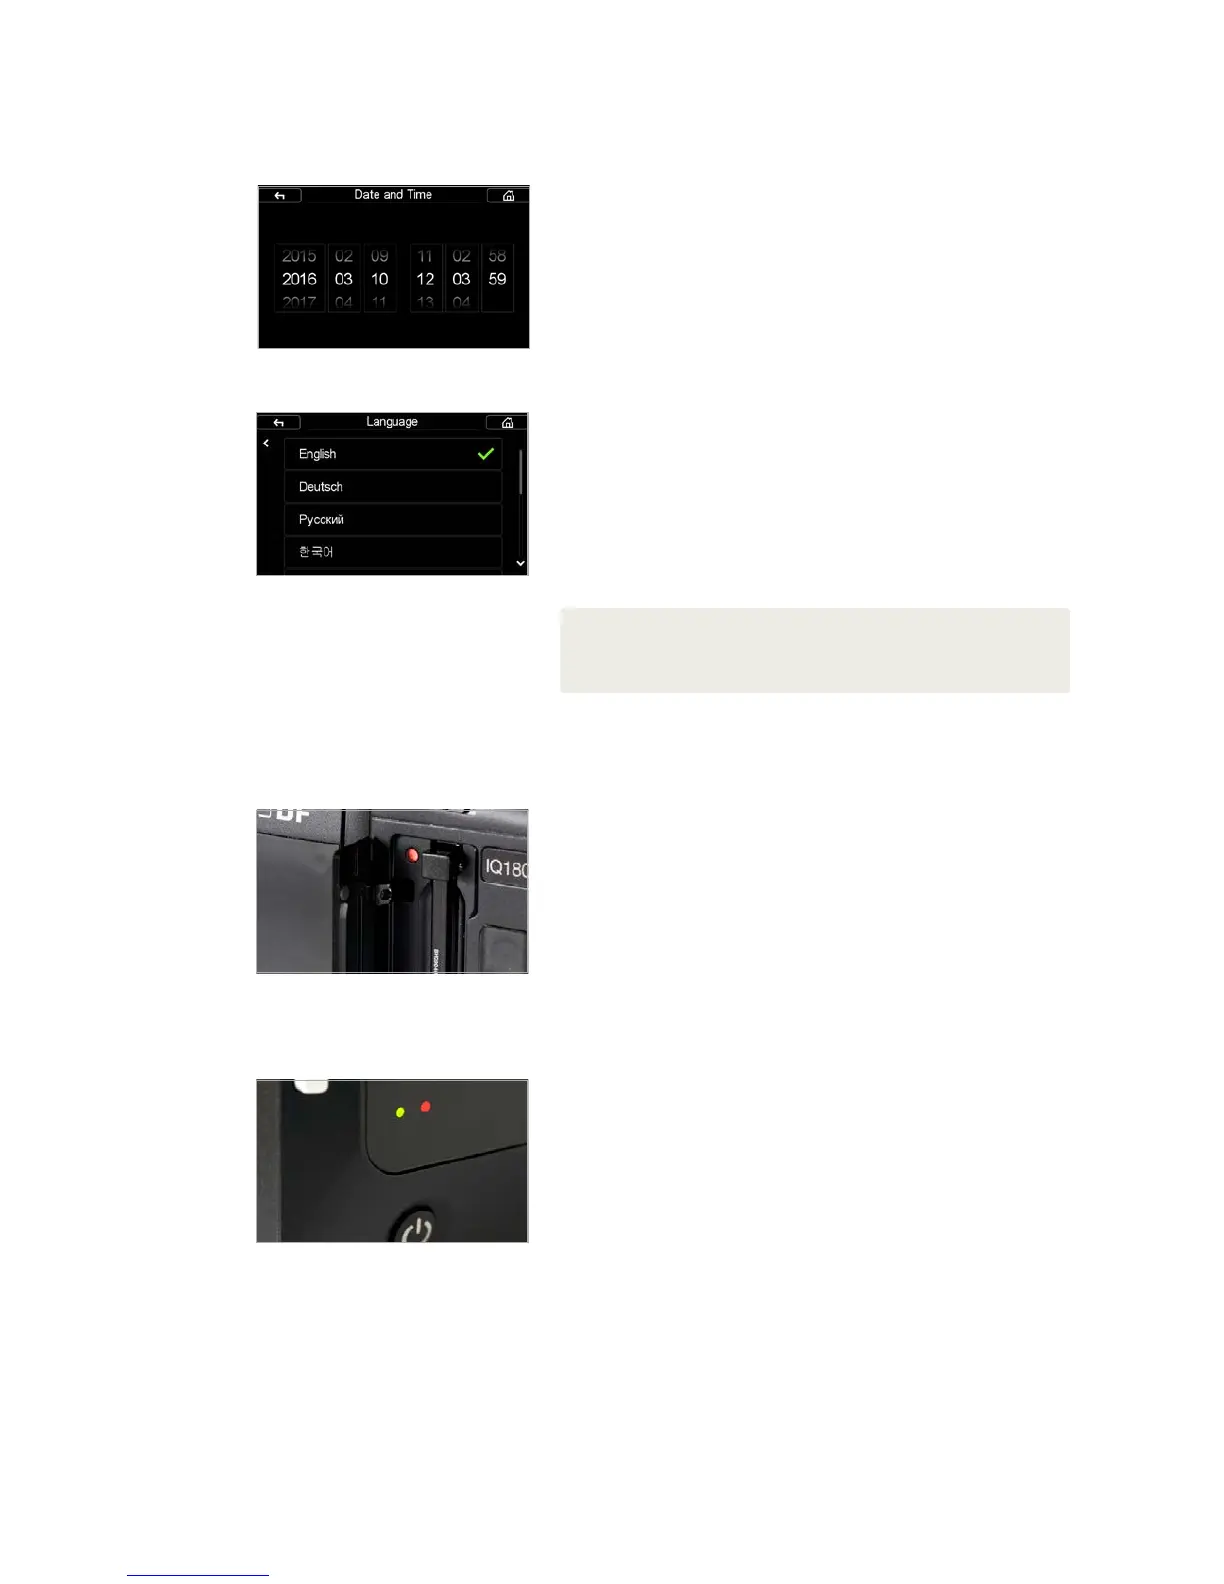
Setting the Date and Time
on the IQ Digital Back
Setting Date, Time and Language
Setting the Date and Time on the IQ Digital Back
Date and time are set and controlled via the IQ Digital Back’s menu. When the
IQ Digital Back is initially shipped from factory, or If the IQ Digital Back has been
without power for a long period of time, it will automatically prompt you to set
the time and date.
Touch the screen and scroll through the numbers to attain the appropriate date
and time. Tap the “Home” icon in the top right corner of the screen to exit the
dialog and go to the Home Screen of the IQ Digital Back. The time and date is
applied to the EXIF data in all files captured with the IQ Digital Back.
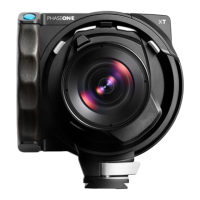
Setting Language on the IQ Digital Back
The XF Camera System is delivered, by default, with the language set to
English. Follow the steps below to change the language of the IQ Digital Back
to one of nine others available, including German, French, Swedish, Italian,
Spanish, Chinese (simplified), Japanese, Korean and Russian.
1. From the Home Screen on the IQ Digital Back, press Menu.
2. Navigate to Language by touching the screen and scrolling down.
3. Select the preferred language option. A green check mark icon indicates
the selected language.
4. Press the Upper Left Key on the IQ Digital Back to exit the menu.
Using memory cards
The Phase One XF Camera System supports Type 1 CompactFlash (CF) cards
only. Phase One recommends UDMA 7 type cards (800x speed or better) for
optimal performance, however slower cards can be used. Microdrives and CF
Type II cards are not recommended for use with IQ Digital Backs.
Installing and removing the CF card
Insert the CF card into the media storage slot on the left-hand side of the IQ
Digital Back with the card’s front label facing the display-screen of the IQ
Digital Back. If resistance is felt, stop immediately and check the card is
oriented correctly.
Remove the card by pressing the black release lever just above the card – this
first press will make the lever protrude and you can now press it a second time
to eject the card. Make sure the eject lever is correctly closed before loading
another card.
LED Lights
IQ Digital Backs feature two main LEDs located below the bottom left corner
of the screen.
When capturing an image the Green LED will blink rapidly to indicate that the
IQ Digital Back is busy. When the IQ screen is dimmed this Green light will
continuously display to indicate that the camera is still ready to shoot.
A Red LED indicates that the IQ Digital Back is writing to the storage media,
and therefore the buer has not been emptied. On some older IQ1 Digital
Backs there is an additional Red LED indicator located next to the CF card slot
(beneath the cover). It is assigned to indicate CF card activity only.
NOTE:
If you choose a language by mistake, and can no longer read the menu, look for the menu
item ending with (L). This is the Language menu option. Each choice is displayed using
the native language, with English as the first option.
Installing and removing the CF card
LED Lights