39XF Camera System Manual |
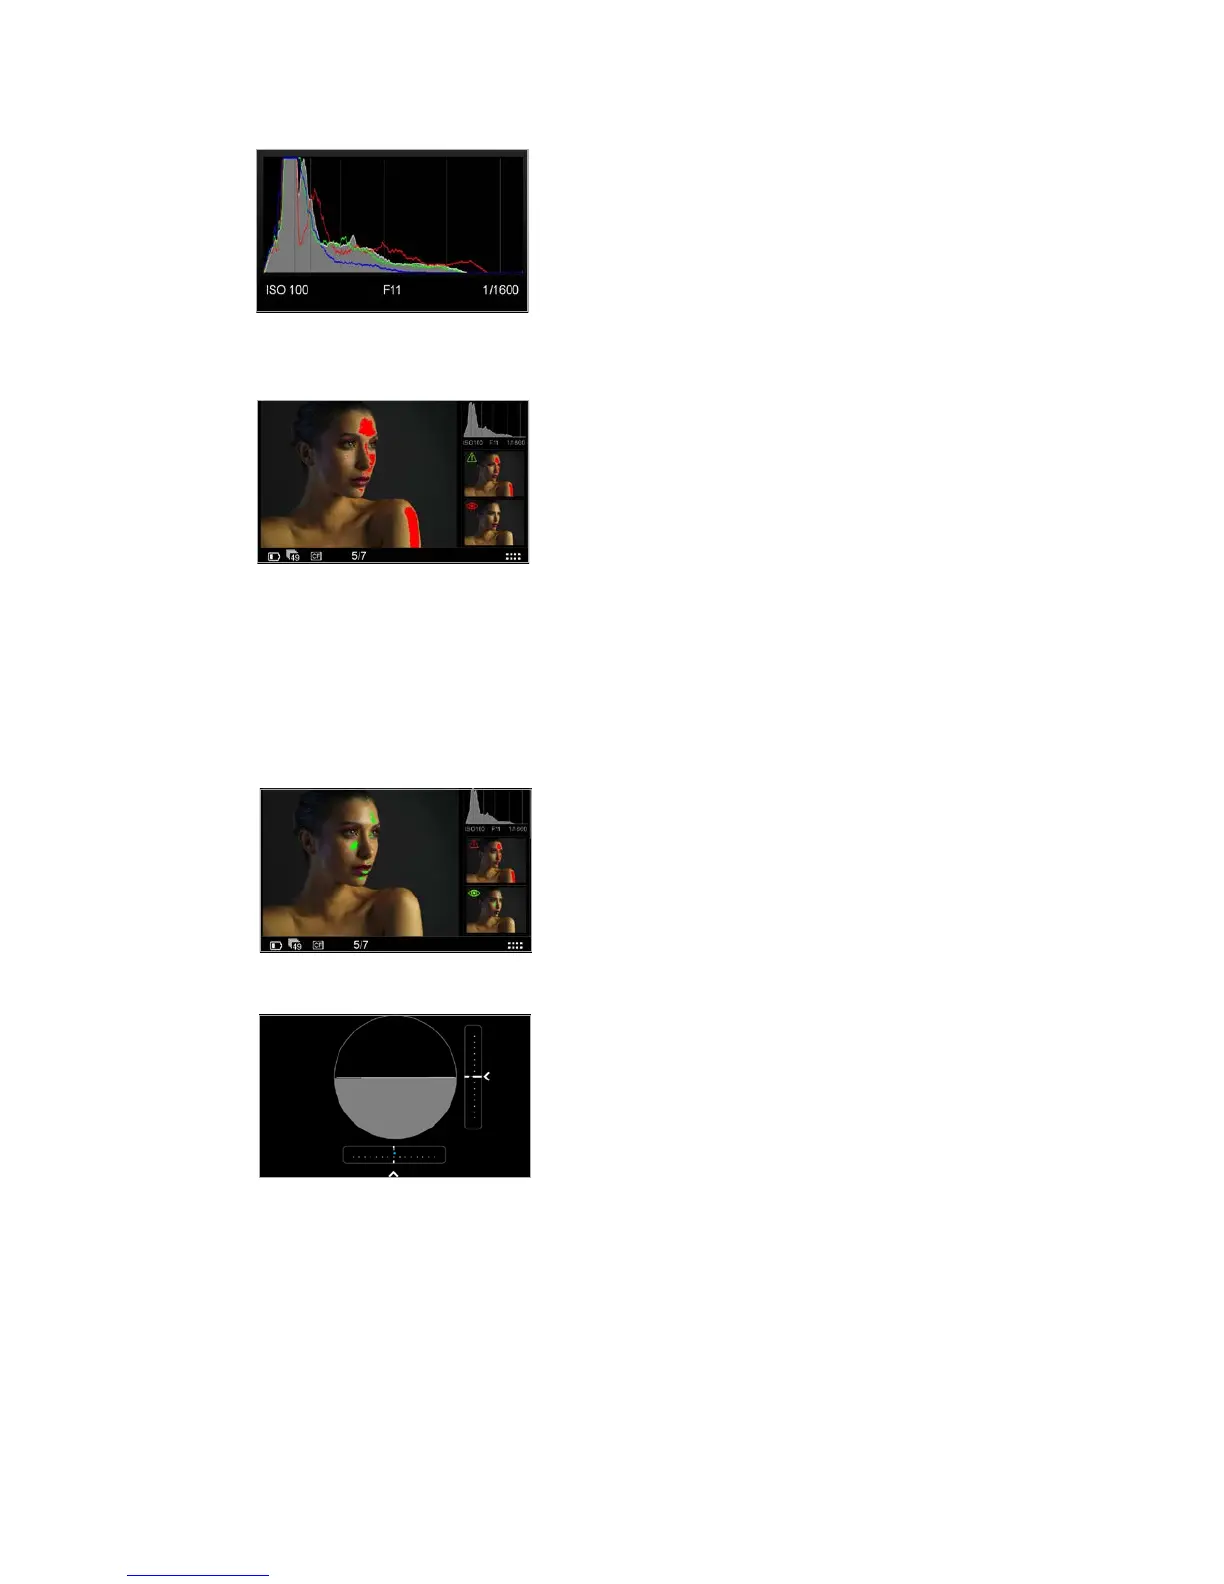
Histogram
The histogram displays the brightness data per channel and allows the user to
determine a level at which highlights start to clip. For improved accuracy, a
custom white balance measurement should be performed.
Press the Histogram thumbnail once to display full screen. The EXIF
information (ISO, f-stop and Shutter Speed) of the captured image is
displayed below the Histogram. Press the screen again to return to the Tool
view. Long press the Histogram thumbnail to access a dialog box to alter the
Tool’s settings. The user can choose between showing or hiding the RGB
readout and EXIF information. To exit, press the Home Key or the small
checkmark bottom right.
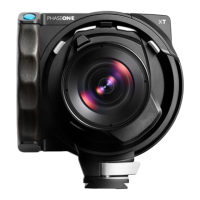
Exposure and Clip Warning
The Exposure Warning tool highlights areas of a captured image that are
overexposed. Press the Exposure Warning tool once to display any burned out
areas of an image with a (default red) color overlay. Press the Exposure
Warning tool again to remove this overlay from view.
This tool also features a new Clip warning option with a default pink colored
overlay based on the raw data for the most accurate visualization of the level
at which highlights will clip.
Long press the Exposure Warning to access a dialog box to alter the Tool’s
settings. Users can choose to set the Exposure and Clip Warning and to flash
on the overlay and on the tool. The Highlight level can be changed to make it
more or less sensitive. The color of the warnings can also be altered to one of
nine tones to help it stand out against a captured image.
The Exposure and Clip Warning overlay can be viewed full screen and zoomed
to check specific areas, in the same way as focus-checking. It will flash to alert
users to areas in that may be overexposed. To deactivate the overlay, return to
the Tool View screen and press the tool.
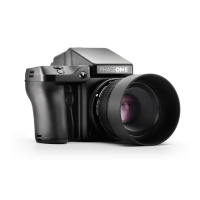
Focus Mask
The Focus Mask highlights areas that are in sharp focus. Tap the Focus Mask
tool once to display any areas of sharp focus in an image with a (default
green) color overlay. Tap the Exposure Focus Mask tool again to remove this
overlay from view.
Long press the Focus Mask to access a dialog box to alter the Tool’s settings.
Users can choose to set the Focus Mask to flash on the overlay and on the
tool. The Focus Mask can be adjusted to increase and decrease the threshold
setting for the preferred sharpness. The color of the Mask can also be altered
to one of nine tones to help it stand out against a captured image.
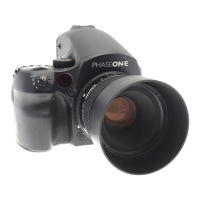
Alignment
The Alignment tool provides a quick and accurate visual aid when ensuring the
camera is level in both horizontal and vertical planes, and is particularly useful
when the camera is mounted on a tripod.
Press the Alignment tool once to view full screen. Tap the screen or press the
upper left (external) button to return to the Tool view.
To alter the settings, a long press on the tool’s thumbnail will access a dialog
box. Users can choose to view a virtual horizon or swap to see numeric Roll
and Pitch values instead. To hear an audio alert that signals when the camera
is level, enable the Beep On option box with a check mark.
Roll and Pitch oset: It is possible to realign the virtual horizon to a custom
setting. Press the Set arrow (see circled far left) and the virtual horizon will
appear. Adjust the camera/IQ back for the desired roll and pitch angles and
press the green check mark. This oset will be enabled automatically.
Ensure that the Roll and Pitch oset check mark box is not enabled to revert
to the default horizontal or vertical alignment setting. Please note that above
settings also is used by the BulsEye leveler on the XF Camera Body top
screen.
Histogram
Exposure and Clip Warning
Focus Mask
Alignment