XF Camera System Manual |
WiFi Connection
There are two wireless network mode options available to connect the IQ3
digital back to an iOS device. On location, use the ad-hoc mode for a range of
up to 8m / 25 ft. If the studio is equipped with a router, the infrastructure
mode can be used for an extended range of up to 30m / 100 ft (depending on
the equipment and signal strength).
Connect iOS device directly to IQ Digital Back using Ad-hoc mode
1. Power on the XF/ IQ3 and from the rear touch screen, select Menu > WiFi
> Mode (O) > Adhoc. This will start an image server with the network
name PhaseOne[serial number]. (Note this name can be changed, see
Network Security below).
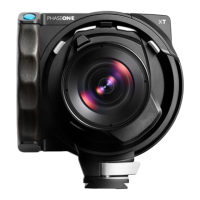
2. Using the iOS device, select the Settings app > WiFi > Choose a Network…
> PhaseOne[serial number].
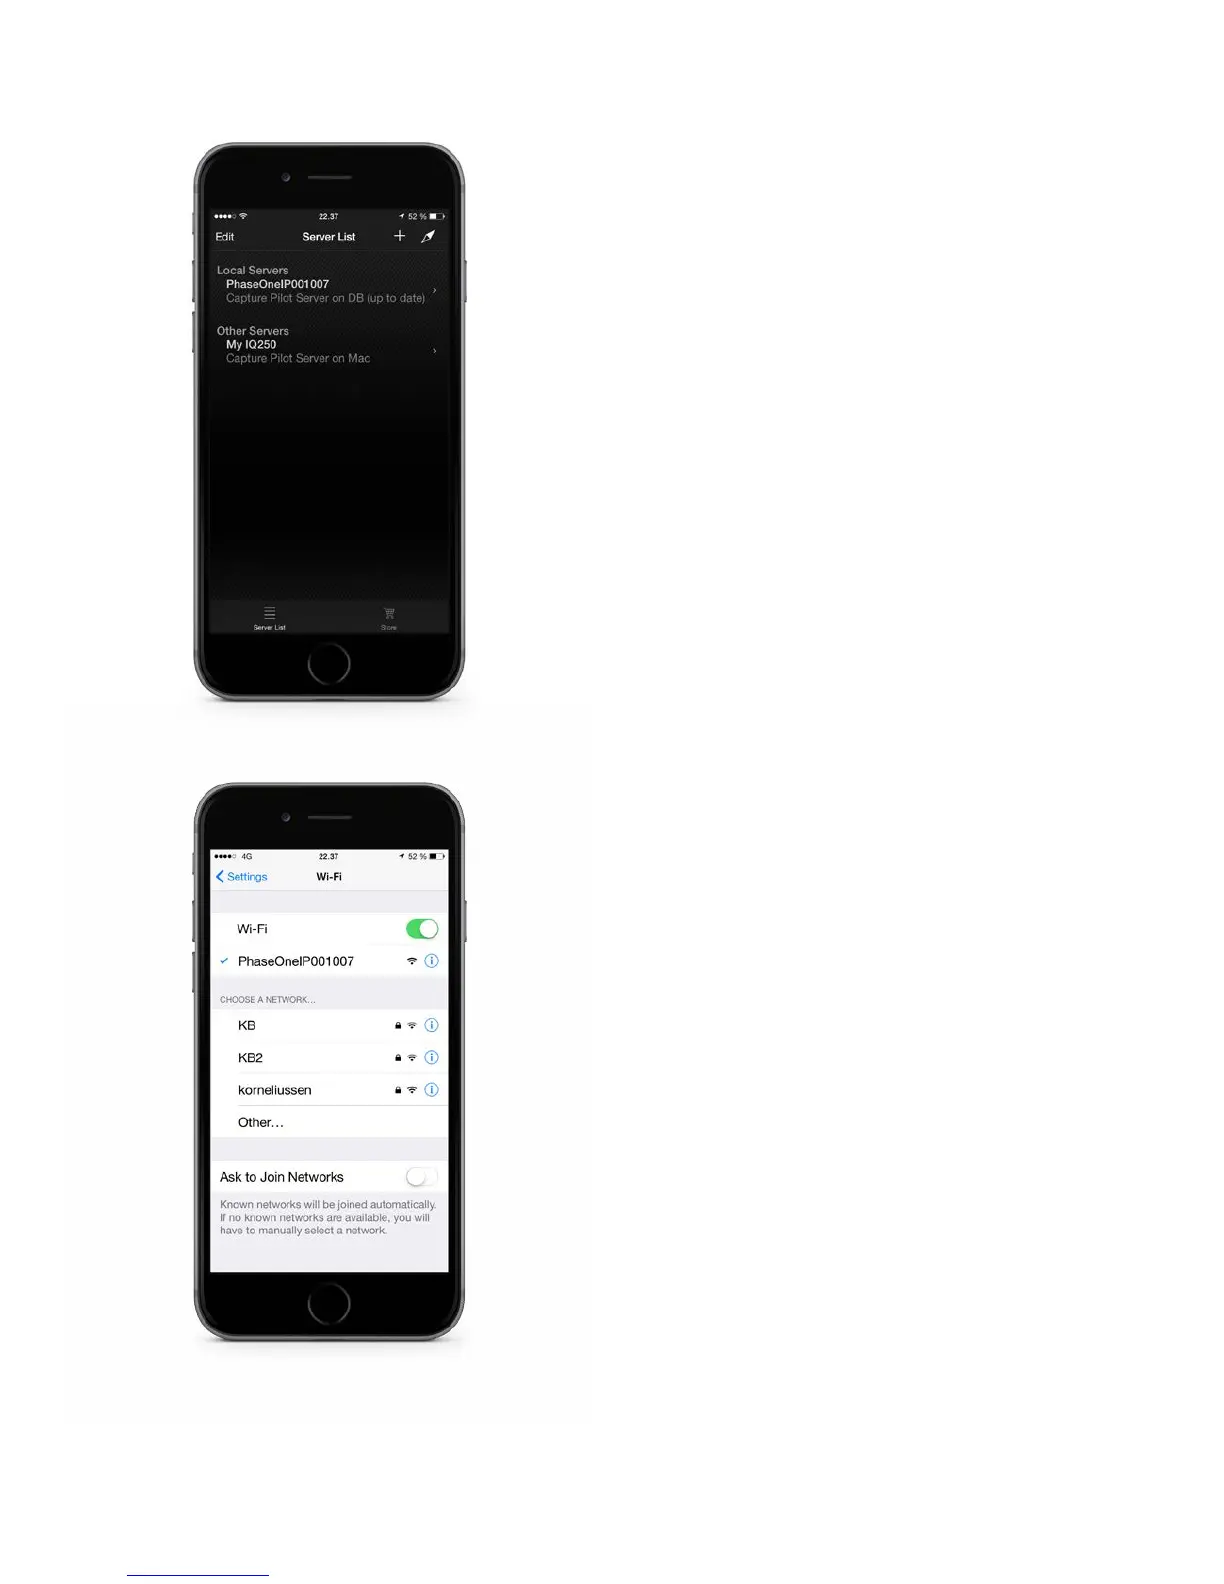
3. Start Capture Pilot and select the IQ Digital Back’s PhaseOne[serial
number] network name under the Local Servers list. Enter the back’s
authentication (pin) code, if applicable (see Network security, for more
details).
4. When connected to the IQ Digital Back, any images stored on the
camera’s CF card will be displayed as thumbnails.
5. To open Capture remote, the camera control tool of Capture Pilot, press
the Camera icon in the menu bar at the bottom of the screen.
6. To initiate remote live view, press the movie-camera icon (IQ3 50MP, IQ3
100MP, IQ3 100MP Achromatic and IQ250 only).
Troubleshooting Connection
In general, when working in the Ad-hoc mode the WiFi settings of the iOS
device should be set to Ask to Join Networks. This may prevent the IOS
device automatically switching networks when the signal is lost from the IQ3,
for example, when the camera is powered down. However, the iOS device will
automatically join a known connection (if available), and even though the IQ
Digital Back will re-enable WiFi on powering back up, Capture Pilot will be
prevented from re-connecting. To re-establish the connection, from the iOS
device Settings app, please reselect the IQ3 network name PhaseOne[serial
number] and then open Capture Pilot.
Connect IQ Digital Back to a Router (Infrastructure mode)
1. To turn on WiFi on the IQ3, select Menu > WiFi > Mode (O / Adhoc) >
On. Wait for the back to scan for the available WiFi networks.
2. Select the studio’s WiFi network name (SSID) from the IQ3 screen, Menu >
WiFi > Select Network.
3. Enter the studio WiFi network’s password (and user name, if applicable)
on the IQ3 touch screen, using the displayed keyboard. Confirm the
password with a long press on the keyboard’s green check-mark button.
(Note only basic ASCII (i.e. basic English) characters are supported when
working wirelessly with host names, user names and passwords.)
4. To join the network, press the green checkmark. The IQ back screen
displays progress, and confirms connection status.
Connecting Capture Pilot to your IQ3 via a Router
1. From the iOS device, select the studio’s network from Settings > WiFi >
WiFi network name (SSID).
2. Enter the studio WiFi network’s password (and user name, if applicable).
3. Open Capture Pilot and select PhaseOne [serial number] under Local
Servers in Capture Pilot. Enter the back’s authentication (pin) code, if
applicable (see Network security, for more details).
4. When connected to the IQ Digital Back, any images stored on the camera’s
CF card will be displayed as thumbnails.
5. To open Capture remote, the camera control tool of Capture Pilot, press
the Camera icon in the menu bar at the bottom of the screen.
6. To initiate remote live view, press the movie-camera icon (IQ3 50MP, IQ3
100MP, IQ3 100MP Achromatic and IQ250 only).
The IQ3 can be remotely operated using Capture Pilot when tethered. Either
wireless mode can be adopted, following the same procedure described above.
Select digital back in Capture Pilot
Choose digital back network name