5.10
Section 5
Maintenance
Pinnacle Operators Manual
Pickering Laboratories Inc.
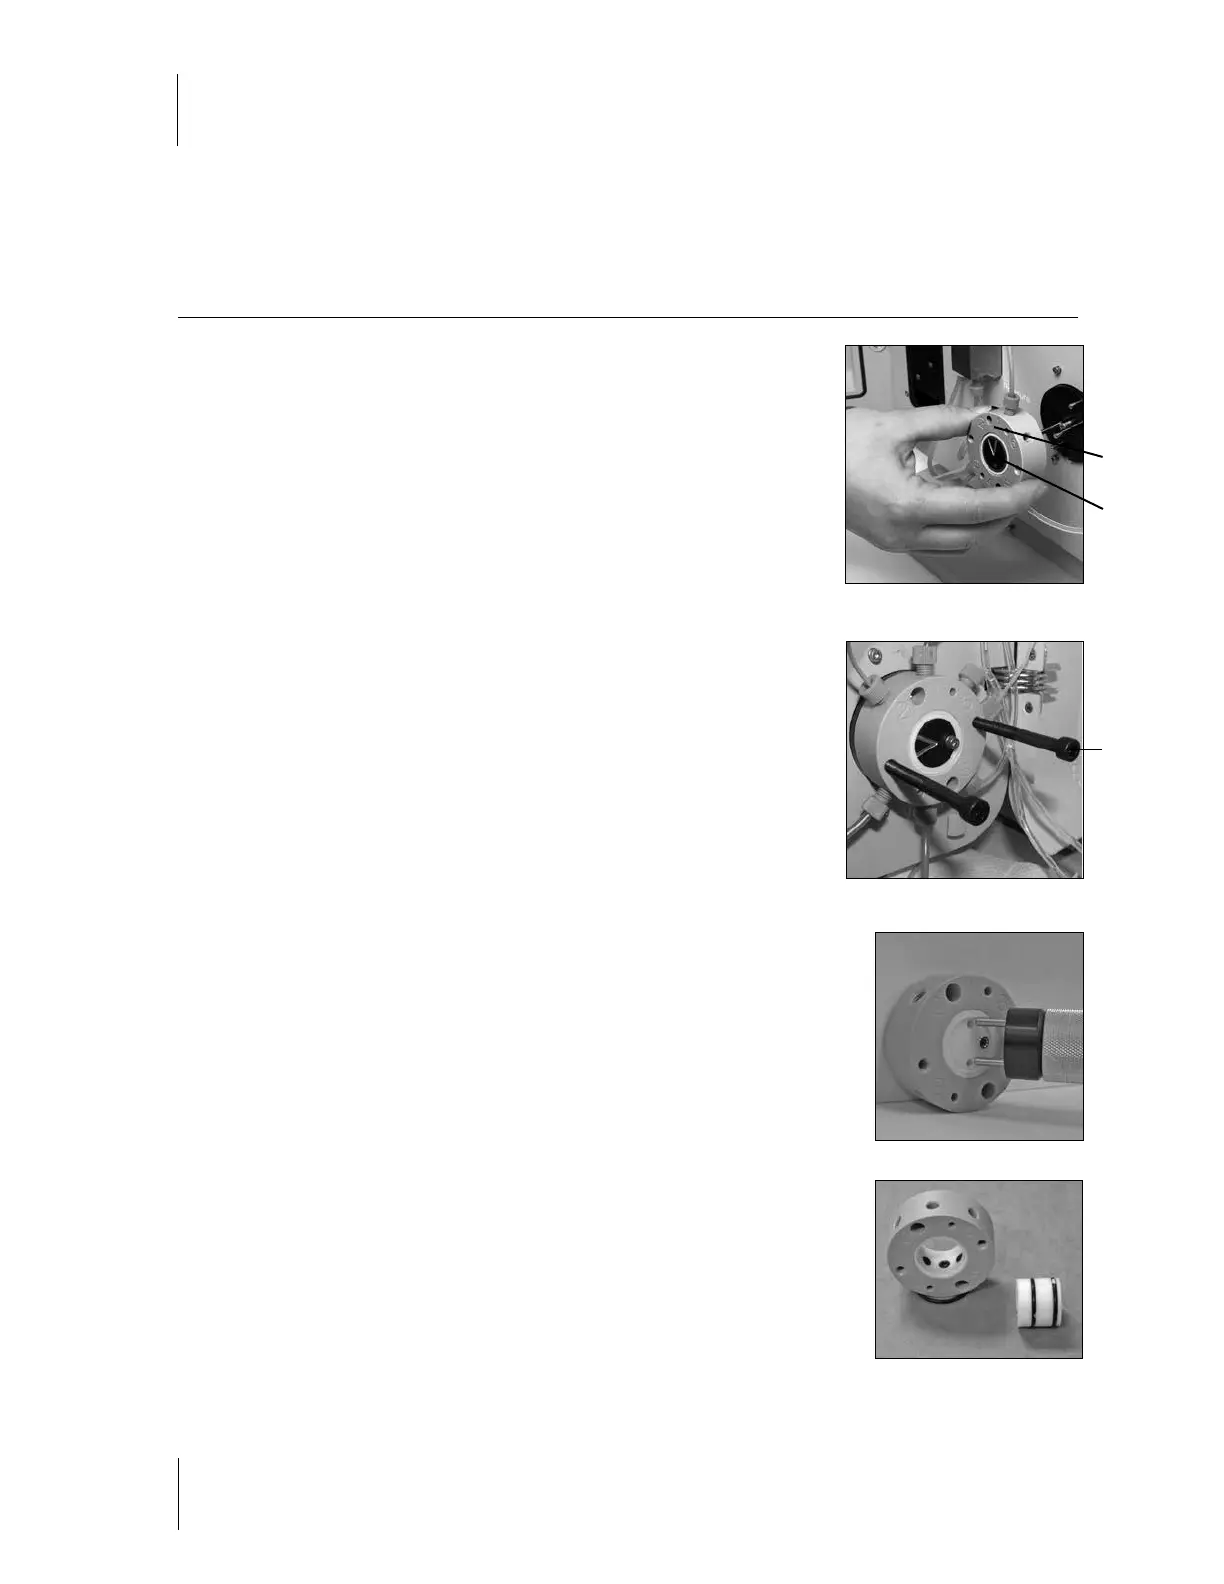
Pull the entire face horizontally forward. There will be some resistance.
If there has been any crystal build-up behind the valve, insert the jack screws
contained in the Valve Maintenance kit and tighten them until the face of the
valve comes forward and you are able to remove it (figure 5-7).
Warning: When removing the valve face with the jack screws, it is important
to remember to remove the valve using equal turns on each side.
It is important that it come off of the instrument as straight as possible to
prevent deforming the soft PEEK material.
Remove the jackscrews after the valve is removed.
Inspect the face of the motor mount. Ensure that there is no excess crystal
build up. Carefully clean any crystals with a paper towel and some DI Water.
Using the Pinnacle Valve Seal tool, turn insert clockwise and push to remove
spool (figure 5-8).
O-RING REMOVAL
DO NOT use any sharp tools as this will scratch the soft plastic of the
insert.
For the 5 smaller O-rings (Size 4) – use a length of 1/16 OD Peek tubing to
remove.
For the 2 large O-rings (Size 18) – pinch o-rings with fingers and roll to remove.
Once O-rings are removed, sonicate PEEK ring and PTFE insert to remove any
crystals from valve. O-rings will be replaced.
O-RING REPLACEMENT
Clean the new O-rings first by sonicating them in a soapy water bath for 20
minutes and then rinse thoroughly with DI Water. Wear gloves and use care
not to get dust or dirt on them after cleaning.
Push the 5 new Size 4 O-rings into the ports of the PEEK ring. Port 6 (Waste
port) does not have an O-ring.
Body
Spool
jack
scews
Figure 5-6
Figure 5-7
Figure 5-8
Figure 5-9