10828200.B Administration 13
Instructions for Autoclaveable Tips
DO NOT use a chemical sterilant on tips with the autoclave symbol.
DO NOT Autoclave tips without the autoclave symbol.
DO NOT place in Ultrasonic Cleaner.
Excessive cycle times may prematurely reduce the life and function of the tip.
Note: These instructions were validated using a Class B autoclave and the
sterilization pouch HSD # 112-4854 with a minimum cycle of 132° C (269°F) with a
sterilization time of 5 minutes. You may use an autoclave pouch with comparable
materials and the same dimensions.
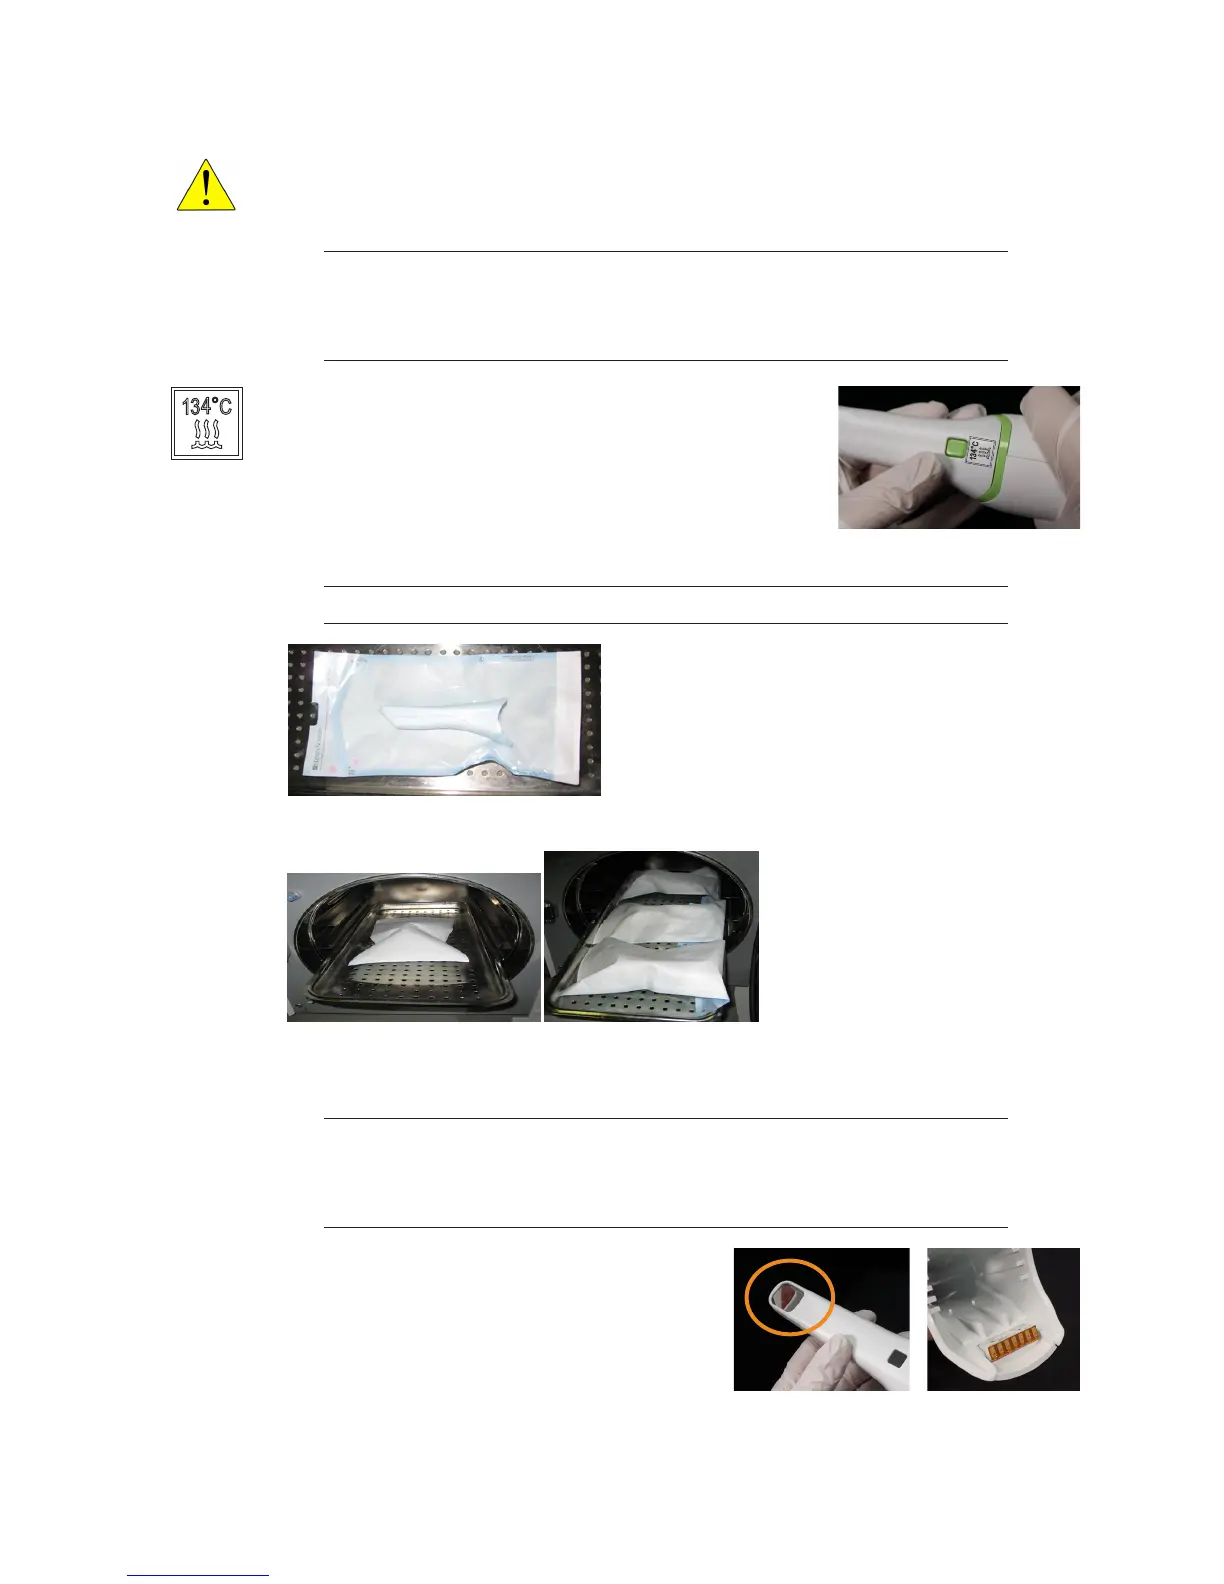
Look for the temperature symbol engraved on autoclaveable
tips. If the tip does not have this symbol, see “Instructions for
High Level Disinfection Tips” on page 14.
1 Clean the tip for 2 minutes under running tap water to remove
debris.
2 Individually pouch each scanner tip using an autoclave pouch
(ex. HSD # 112-4854 or a comparable product).
Note: Autoclave baskets are not indicated for this cleaningprocedure.
3 Place one to three pouches per tray or cassette.
4 Select the Wrapped, Wrapped Instruments, or Pouch cycle on the autoclave with a minimum
cycle of 132° C (269° F) with a sterilization time of 5 minutes. After cycle completion, store for
later use.
Note: Autoclave cycle names dier among manufacturers. Autoclave cycle times
exceeding 10 minutes could be considered excessive and may damage the
internal components and pin connector points. Referenceyour manufacturer’s
manual to select the cycle for sterilizing wrappedinstruments.
5 Prior to scanning, visually conrm the scanning
mirror and scanner connection points of the
scanning tip are clean and dry. To clean either
surface, use an optical cloth or 2x2 gauze with a
small amount of alcohol to gently remove residue.
Ensure each surface is dry before connecting it to
the scanner.